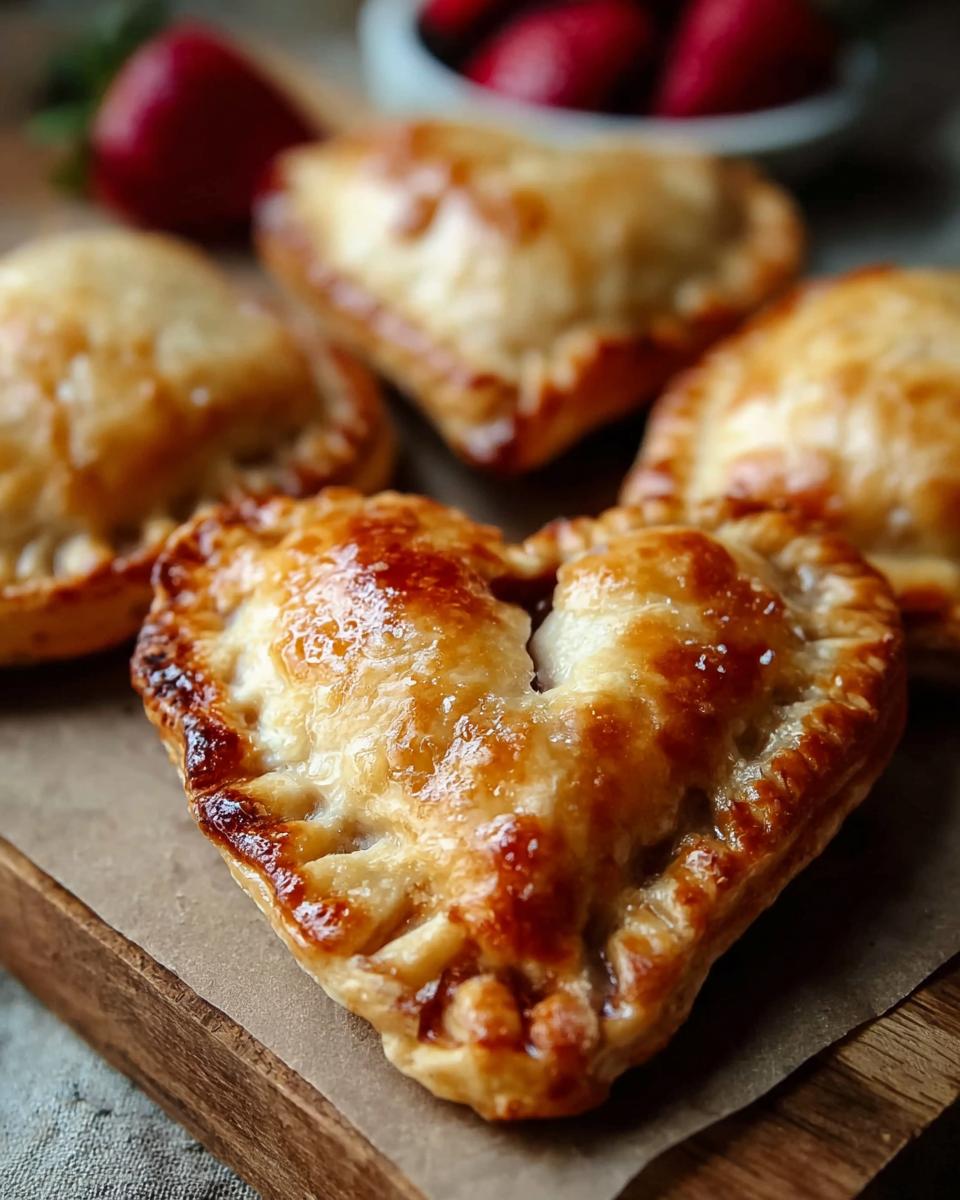
Okay, so these Heart Shaped Hand Pies? Total game-changer! I mean, who doesn’t love a mini pie, right? Especially when it’s shaped like a heart! They’re seriously the easiest thing to whip up, and you can totally customize them with whatever filling you’re craving. Versatile *and* adorable? Yes, please!
I made these last Valentine’s Day for a little Galentine’s brunch with my friends, and they were a HUGE hit. Like, gone-in-five-minutes kinda hit. Everyone was raving about how cute and delicious they were. Plus, the fact that you can use store-bought pie crust makes them ridiculously simple. Trust me, even if you’re not a baker, you can totally nail these. The best part? Seeing everyone’s faces light up when they see these sweet little Heart Shaped Hand Pies. It’s pure joy, I tell ya!
Why You’ll Love These Heart Shaped Hand Pies
Quick and Easy Dessert
Seriously, these are SO easy! Store-bought crust is the MVP here. No need to stress about making your own – just unroll, fill, and bake! Couldn’t be simpler, right?
Customizable Heart Shaped Hand Pies
My favorite part? You can use ANY pie filling you want! Apple, cherry, chocolate… the possibilities are endless. Get creative and make ’em your own!
Perfect for Special Occasions
Valentine’s Day is a no-brainer, but these are also adorable for anniversaries or even just a fun little “I love you” treat. They’re guaranteed to make someone smile!
Ingredients for Heart Shaped Hand Pies
Alright, gather ’round! Here’s what you’ll need for these cuties. You’ll want 2 sheets of store-bought pie crusts (the refrigerated kind!), one 21-oz can of your fave pie filling (I’m partial to cherry, but you do you!), 1 large egg white, a tablespoon of water, and some sparkling sugar if you’re feeling fancy. Trust me, it adds a little something special!
How to Make Heart Shaped Hand Pies: Step-by-Step Instructions
Okay, let’s get down to business! Here’s how you’re gonna make these adorable Heart Shaped Hand Pies. Don’t worry, it’s easier than it looks! I promise!
Preparing the Pie Crust for Heart Shaped Hand Pies
First things first, preheat your oven to 350°F. You’ll also want to line a baking sheet with parchment paper – this keeps things from getting sticky! Now, if your pie crust is refrigerated, you’ll need to soften it a bit. I usually pop it in the microwave at 50% power for like, 20-30 seconds. Just keep an eye on it! You don’t want it to melt. Or, you can just let it sit out at room temp for about 30 minutes. Easy peasy!
Cutting and Filling the Heart Shaped Hand Pies
Unroll those softened pie crusts and lay ’em flat. Grab your heart-shaped cookie cutter (the bigger, the better, in my opinion!) and cut out as many hearts as you can from both crusts. Now, place half of the heart cutouts on a clean surface. Take your pie filling and spoon about a tablespoon into the center of each heart. Don’t overfill, or you’ll have a sticky mess! Trust me, I’ve been there. Oops!
Sealing and Baking the Heart Shaped Hand Pies
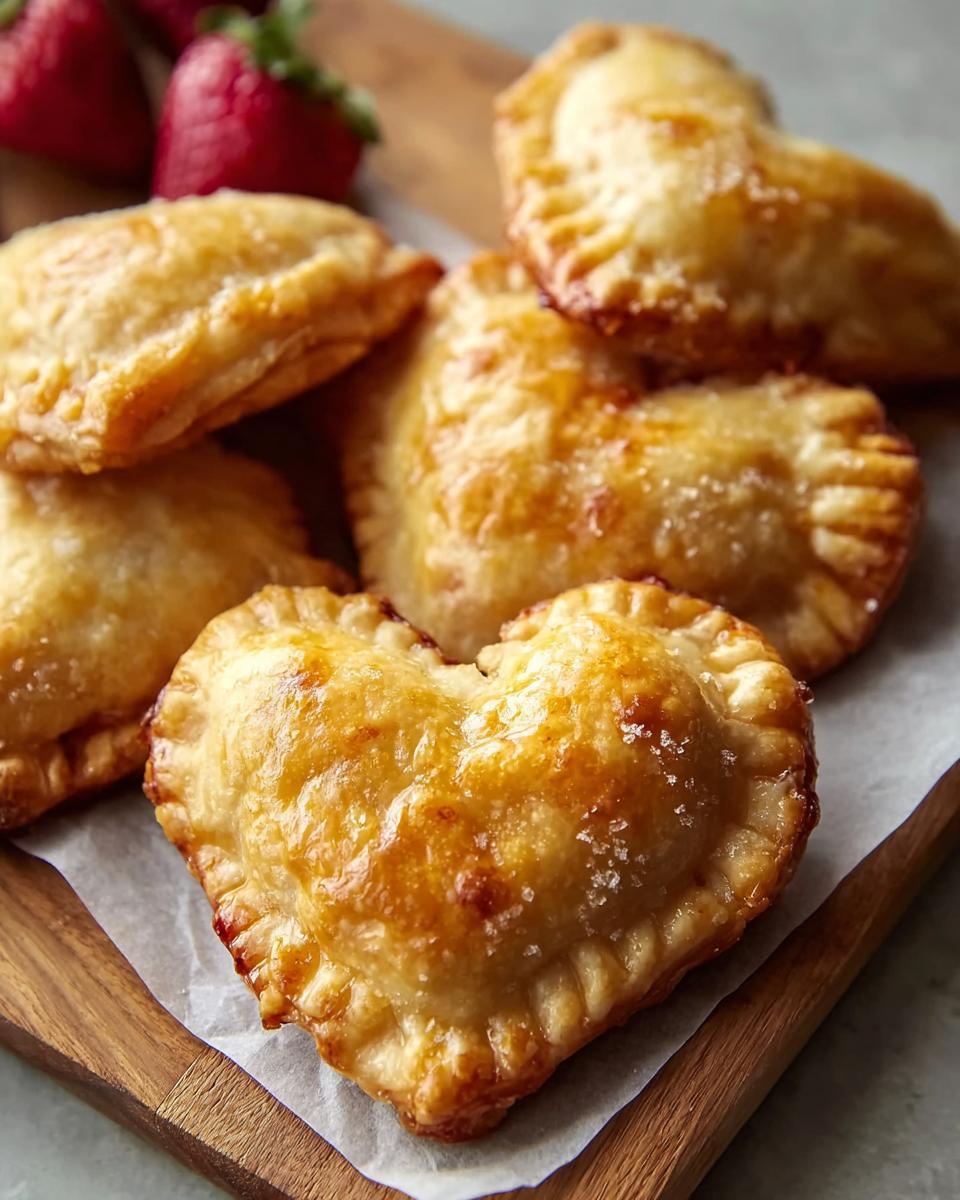
In a small bowl, whisk together your egg white and a tablespoon of water. This is your egg wash, and it’s what’s gonna give your pies that gorgeous golden-brown color. Brush the edges of the filled hearts with the egg wash. Then, carefully place a second heart cutout on top of each filled one. Press the edges together firmly. Now, grab a fork and crimp those edges to seal ’em up tight! This also makes them look super cute! Don’t forget to cut two small slits in the top of each pie – this lets the steam escape. Transfer the pies to your prepared baking sheet, brush the tops with the remaining egg wash, and sprinkle with sparkling sugar, if you’re using it. Bake for 10-15 minutes, or until they’re golden brown. Keep an eye on ’em!
Cooling and Serving Heart Shaped Hand Pies
Let the hand pies cool slightly before serving. I know it’s tempting to dig right in, but trust me, you don’t want to burn your tongue! Enjoy! They’re best served warm, in my humble opinion.
Tips for Perfect Heart Shaped Hand Pies
Want to take these Heart Shaped Hand Pies from “cute” to “OMG amazing?” Here are a few little tricks I’ve learned along the way to make sure they’re absolutely perfect every single time!
Preventing Soggy Bottoms in Heart Shaped Hand Pies
Nobody wants a soggy bottom! That’s why I always use parchment paper. A baking stone works wonders too, if you’ve got one!
Ensuring Even Baking for Heart Shaped Hand Pies
To make sure your Heart Shaped Hand Pies bake evenly, rotate the baking sheet halfway through. It’s a simple little thing that makes a HUGE difference! Trust me!
Alternative Sealing Methods for Heart Shaped Hand Pies
Besides a fork, you can also use a pastry crimper to seal those edges. Super fancy, right? Or, just get creative with your fork crimping! The goal is to seal them well!
Heart Shaped Hand Pies Variations
Okay, so you’ve mastered the basic Heart Shaped Hand Pies? Awesome! Now, let’s get a little crazy and mix things up! The possibilities are endless, seriously! Don’t be afraid to experiment and find your new fave combo. Baking should be fun, right?
Filling Variations for Heart Shaped Hand Pies
Fruit fillings are always a winner! Think classic apple or cherry. Blueberry is amazing too! But don’t stop there! Chocolate filling? Yes, please! Or how about a cream cheese filling? Ooh la la! For something totally different, try a savory filling like spinach and feta. Trust me, it’s surprisingly delicious!
Crust Variations for Heart Shaped Hand Pies
Want to add a little somethin’ somethin’ to the crust? A dash of cinnamon is always a good idea! Or, if you’re feeling zesty (get it?), try adding some lemon zest. Wowza! It’ll give your Heart Shaped Hand Pies a bright, fresh flavor that’s totally irresistible. So good!
Serving Suggestions for Heart Shaped Hand Pies
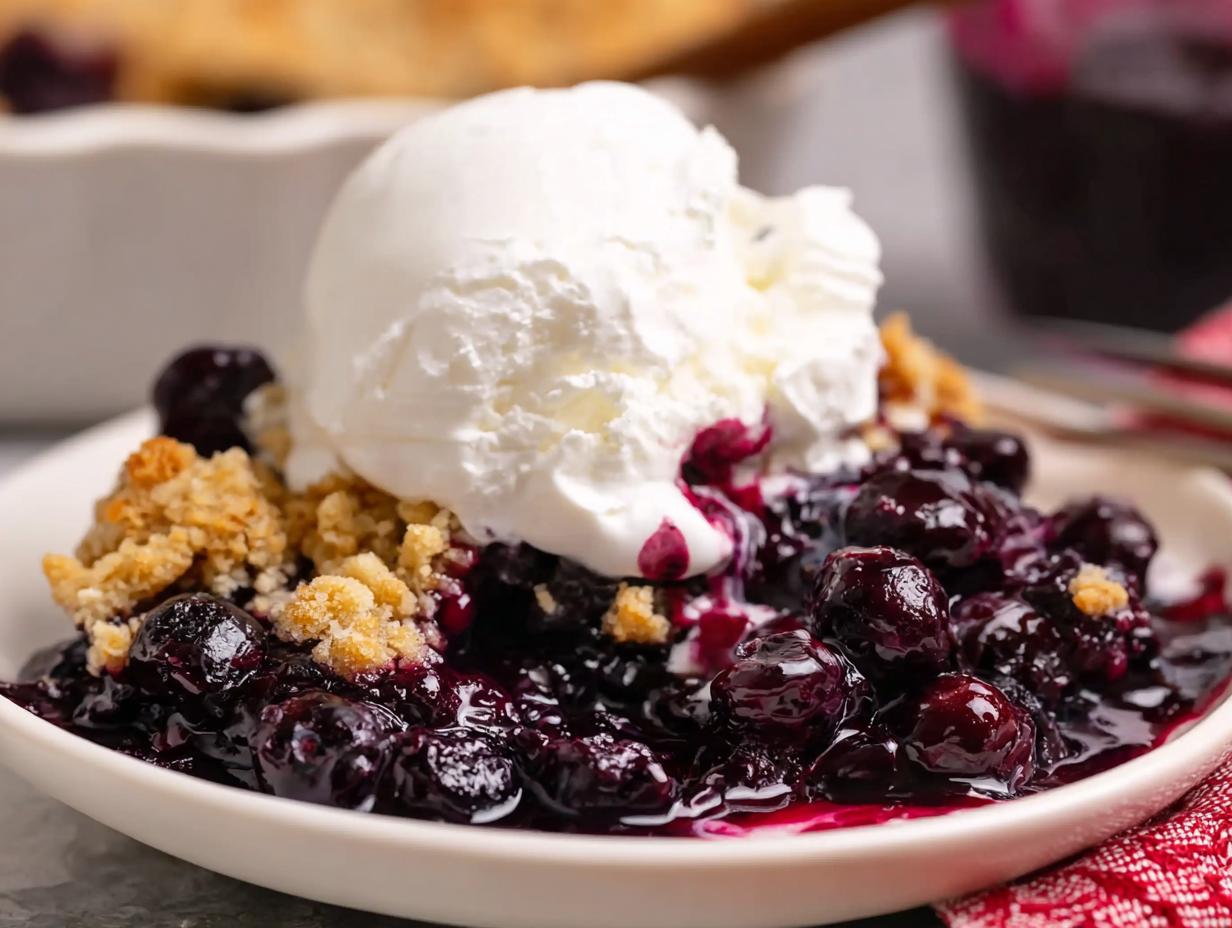
Okay, so you’ve got these adorable Heart Shaped Hand Pies… what now? Well, they’re pretty amazing on their own, but if you wanna take ’em to the next level, try serving them with a scoop of vanilla ice cream. Yum! Or, a dollop of whipped cream? Even better! And if you’re feeling simple, a dusting of powdered sugar is always a classic. So easy, so good!
FAQ About Heart Shaped Hand Pies
Got questions about these adorable Heart Shaped Hand Pies? I’ve got answers! Here are a few of the most common questions I get asked, plus a few extra tips and tricks!
Can I use homemade pie crust for Heart Shaped Hand Pies?
Absolutely! Homemade pie crust is amazing, if you’ve got the time! Just make sure it’s chilled before you start cutting out those hearts. You might need to adjust the baking time slightly, so keep an eye on ’em!
What other fillings can I use in Heart Shaped Hand Pies?
Oh, the possibilities! Besides the usual fruit fillings, how about Nutella? Or peanut butter and jelly? You could even do a mini cheesecake filling! Get creative and have fun with it! Savory fillings are also great. Think pizza fillings!
How do I store leftover Heart Shaped Hand Pies?
If you somehow have leftovers (seriously, how?!), store them in an airtight container at room temperature for up to two days. Or, pop them in the fridge for up to a week. Reheat them in a low oven or toaster oven to get them nice and crispy again. So good!
Storage & Reheating Instructions for Heart Shaped Hand Pies
Okay, if you have any of these little cuties left (which, let’s be honest, is a big “if”), just pop ’em in an airtight container. They’re good at room temperature for a day or two, or in the fridge for up to a week! To reheat, a quick zap in the microwave works, but for crispy crust? Oven or toaster oven is the way to go!
Nutritional Information Disclaimer
Okay, so here’s the deal: I’ve included some nutritional info, but keep in mind it’s just an estimate! It can totally vary depending on the brands you use and how big you make your Heart Shaped Hand Pies. So, ya know, don’t take it as gospel! Just a general idea!
Enjoying Your Heart Shaped Hand Pies? Leave a Review!
Made these cuties? I wanna know what you think! Leave a comment and rate the recipe below! I love hearing from you guys! Happy baking!
Print
Irresistible Heart Shaped Hand Pies: A Foolproof Recipe
- Prep Time: 20 minutes
- Cook Time: 15 minutes
- Total Time: 35 minutes
- Yield: Varies on cookie cutter size
- Category: Dessert
- Method: Baking
- Cuisine: American
- Diet: Vegetarian
Description
These Heart Shaped Hand Pies are a simple and delightful treat. Use store-bought pie crust and your favorite pie filling to create these adorable mini pies.
Ingredients
- 2 sheets store bought pie crusts
- 1 can pie filling of choice
- 1 egg white
- 1 tbsp water
- sparkling sugar, if desired
Instructions
- Preheat the oven to 350°F. Line a baking sheet with parchment paper or a silicone baking mat and set aside.
- If using refrigerated pie crusts, soften before unrolling. Open one side of the package and microwave at 50% power for 20–30 seconds to soften. Alternatively, let the pie crust sit at room temperature for about 30 minutes.
- Unroll the softened pie crusts and lay them flat. Use a heart-shaped cookie cutter to cut out as many hearts as possible from both crusts.
- Place half of the pie crust heart cutouts on a clean surface. Spoon about 1 tablespoon of pie filling into the center of each.
- In a small bowl, whisk together the egg white and water.
- Brush the edges of the filled hearts with the egg wash. Place a second heart cutout on top of each filled piece. Press the edges together and use a fork to crimp and seal.
- Use a sharp knife to cut two small slits in the top of each pie for steam to escape. Transfer the pies to the prepared baking sheet. Brush the tops with the remaining egg wash and sprinkle with sparkling sugar, if desired.
- Bake for 10–15 minutes, or until the pies are golden brown.
- Let the hand pies cool slightly before serving. Enjoy!
Notes
- Use different pie fillings for variety.
- Adjust baking time based on your oven.
Nutrition
- Serving Size: 1 Pie
- Calories: 2kcal
- Sugar: 0.03g
- Sodium: 6mg
- Fat: 0.01g
- Saturated Fat: 0g
- Unsaturated Fat: 0g
- Trans Fat: 0g
- Carbohydrates: 0.03g
- Fiber: 0g
- Protein: 0.4g
- Cholesterol: 0mg