Okay, so, gluten-free baking, right? It’s a whole different world! I kinda stumbled into it when my cousin got diagnosed with celiac. Finding decent gluten-free stuff? Seriously, it’s like searching for a unicorn riding a bicycle. Everything was either cardboard-y or tasted like…well, nothing. That’s when I decided, “Enough is enough! I’m gonna conquer this gluten-free thing!” And that’s how these amazing Gluten-Free Popovers were born.
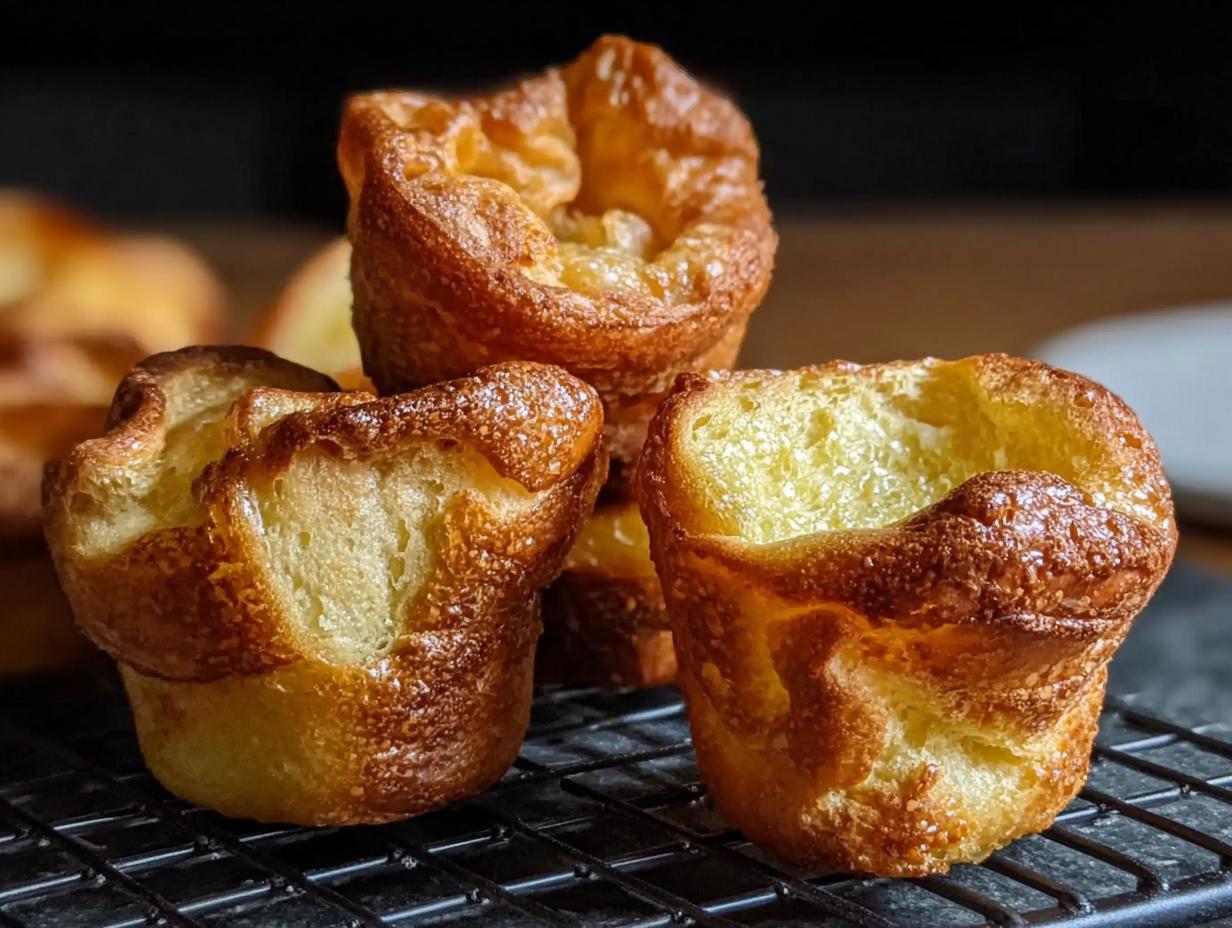
Trust me, these aren’t your average, dense, sad little gluten-free attempts. We’re talking light, airy, puffy clouds of deliciousness! And the best part? They’re surprisingly easy to whip up. Seriously, if *I* can do it (and I’ve had my fair share of kitchen mishaps, oops!), you can too. Get ready for some serious popover magic!
Why You’ll Love These Gluten-Free Popovers
Simple Ingredients for Gluten-Free Popovers
Seriously, you probably have most of this stuff in your pantry already! No weird, hard-to-find flours or anything. I hate recipes that require a trip to a specialty store, don’t you?
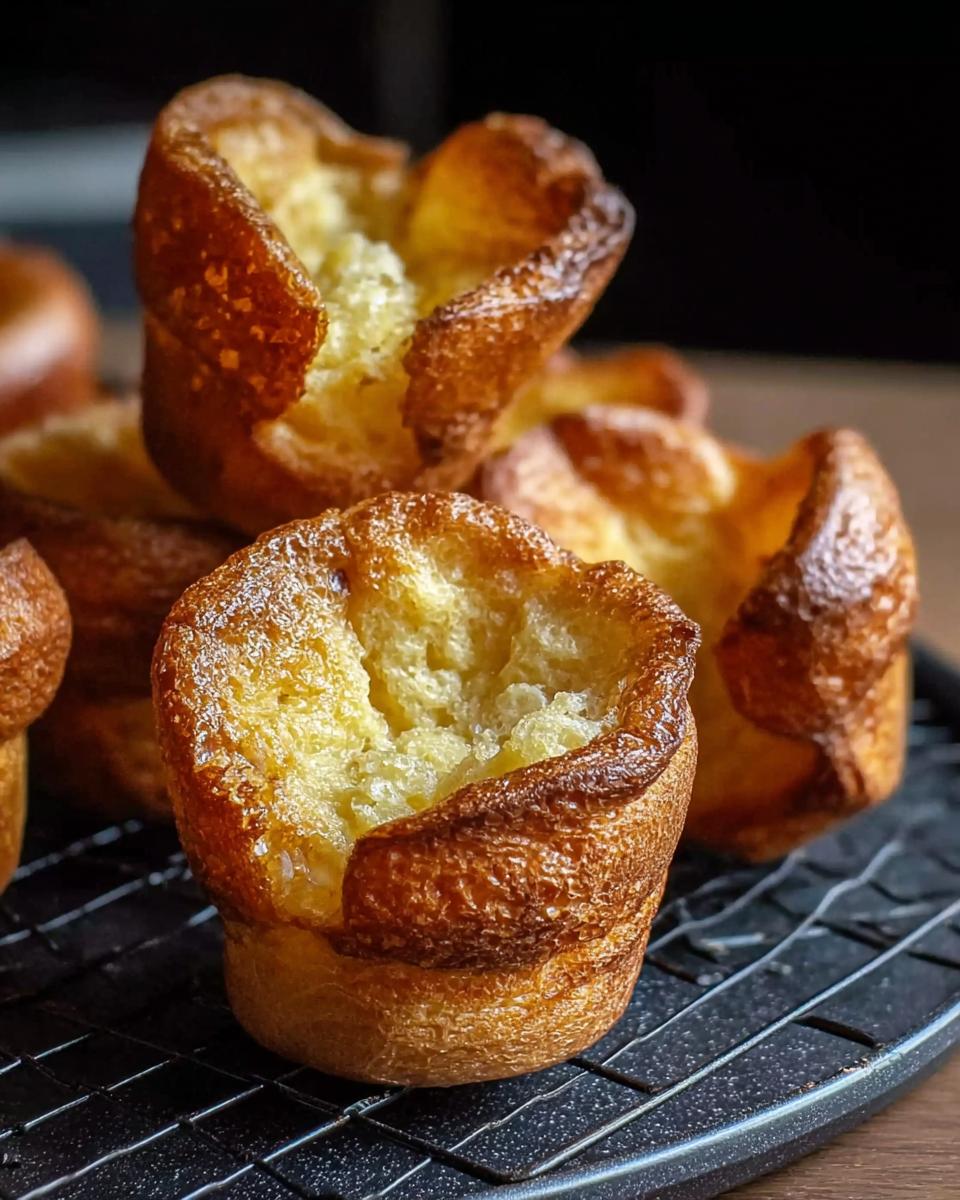
Light and Airy Texture in Gluten-Free Popovers
This is the *holy grail* of gluten-free baking, and these popovers totally deliver! They’re not dense or gummy at all. They’re puffy and light as a feather. It’s kinda magical, actually.
Quick and Easy Gluten-Free Popovers Recipe
From start to finish, you’re looking at maybe an hour. Most of that is just baking time, so you can kick back and relax while the oven does its thing!
Versatile Gluten-Free Popovers
Okay, these aren’t just for breakfast, even though they’re amazing with eggs! You can serve them as a side with dinner, or even as a snack. Get creative! I’ve even stuffed them with chili. Yum!
Ingredients for Perfect Gluten-Free Popovers
Alright, let’s talk ingredients! This is where the magic *really* starts. Don’t skimp, and don’t substitute unless you *really* know what you’re doing. Trust me on this one!
Eggs (4 large, room temperature)
Seriously, room temperature is key! They mix better, and it helps with the rise. I usually take mine out about an hour before I start. Don’t skip this step!
Milk (2 cups low-fat (1%))
I usually use 1% ’cause that’s what I have on hand. Whole milk works too, if that’s your thing. I wouldn’t go lower than 1%, though; you need a little fat for flavor!
Gluten-Free Sourdough Discard (1 cup)
Okay, this is the secret weapon! It adds a *ton* of flavor and helps with the texture. If you don’t have sourdough discard, you can try using a gluten-free starter, but the discard is best!
Cornstarch (1 cup)
This helps give the popovers their structure. Don’t skip it!
Tapioca Starch (1 cup)
Tapioca starch adds a little chewiness and helps keep them light. It’s a must-have!
Kosher Salt (1 teaspoon)
Salt is a flavor enhancer! Don’t leave it out, or your popovers will taste kinda flat.
Seasoning of Choice (1 teaspoon, specify e.g., Italian herbs or garlic powder)
Okay, here’s where you can get creative! I usually use Italian herbs for a savory vibe, but garlic powder is also amazing. Get wild!
Vegetable Oil (1 tablespoon, plus extra for greasing the pan)
Any neutral oil will do. Canola, vegetable, even melted coconut oil works. Just make sure it’s neutral so it doesn’t mess with the flavor!
How to Make Gluten-Free Popovers: Step-by-Step Instructions
Preparing the Gluten-Free Popovers Batter
Okay, first things first, let’s get that batter going! Grab a big bowl and whisk together your cornstarch, tapioca starch, salt, and whatever seasonings you’re feeling. Get it nice and mixed, no clumps allowed!
In a separate bowl, whisk those room-temperature eggs until they’re all frothy and happy. Then, gently warm up your milk – not boiling, just warm to the touch. Add that to the eggs and whisk it all together. Now, fold in that sourdough discard. It might look a little weird, but trust me, it’s gonna be amazing!
Now, the grand finale: slowly add the dry ingredients to the wet ingredients, mixing until *just* combined. Don’t overmix! A few lumps are okay. Once it’s smooth-ish, cover the bowl and let it rest for 25-30 minutes. This gives the starches time to absorb the liquid, and it really helps with the rise. Don’t skip this!
Baking Your Gluten-Free Popovers
This is where the magic happens! Preheat your popover pan (or a muffin tin, if you don’t have a popover pan) in the oven with a tablespoon of vegetable oil in each cavity. Make sure it’s *screaming* hot! Careful, it splatters!
Now, *carefully* (seriously, the pan is HOT!) fill each cavity about halfway with the batter. Pop it back in the oven and bake at 450°F for 15 minutes. Then, *without opening the oven door!*, reduce the heat to 400°F and bake for another 12 minutes. Finally, reduce the heat again to 350°F and bake for 10 more minutes. I know, it’s a whole process, but it’s worth it!
The secret? Don’t. Open. The. Oven! Seriously, I can’t stress this enough. Opening the door will let out the heat and your popovers will collapse. Sad!
Cooling and Serving the Gluten-Free Popovers
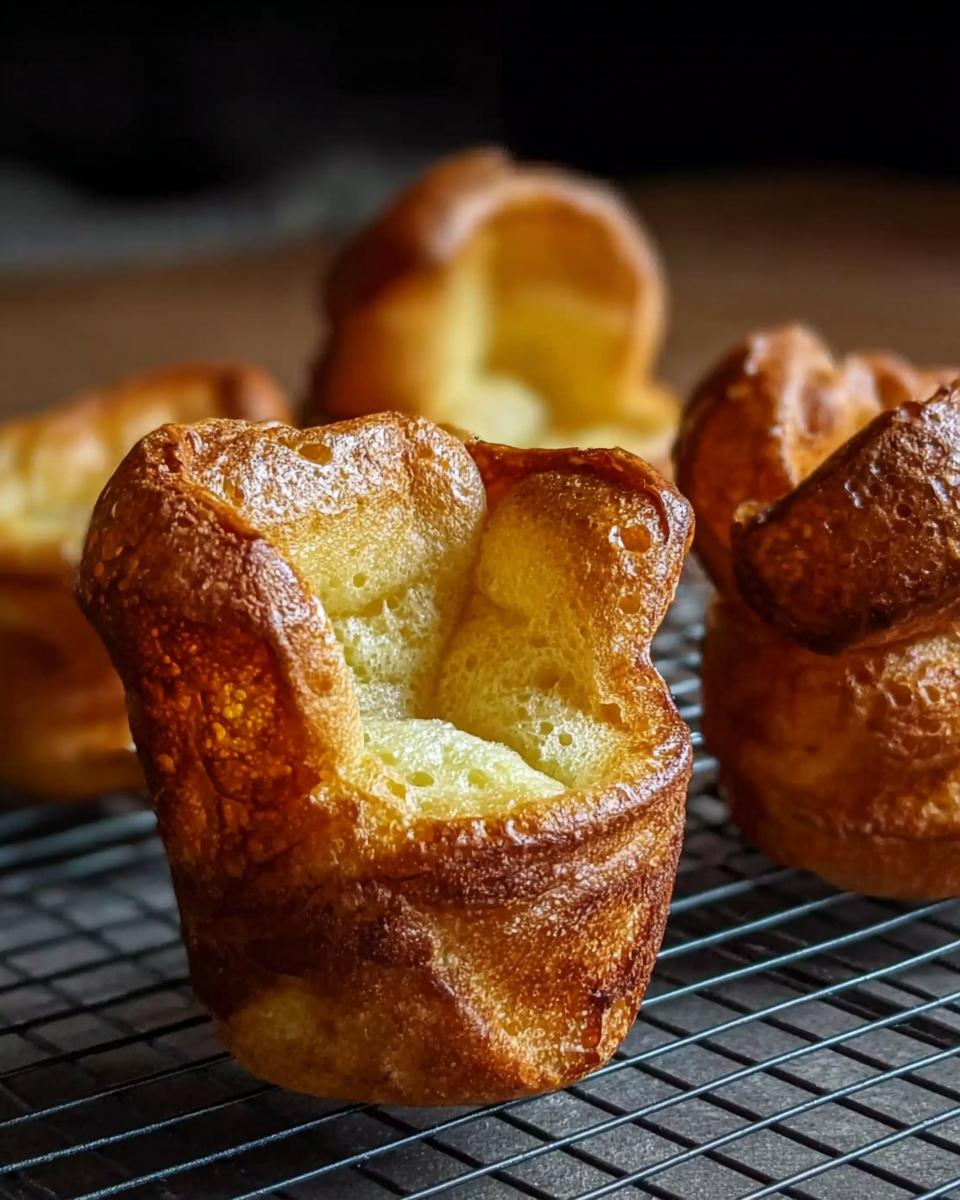
Once they’re golden brown and beautiful, take them out of the oven. Now, poke a small hole in the top of each popover to let the steam escape. This helps them stay crisp. Let them cool *briefly* in the pan before serving. They’re best served warm, straight from the oven. I mean, who can resist a warm popover?
Tips for the Best Gluten-Free Popovers
Room Temperature Matters for Gluten-Free Popovers
Okay, so, room temperature eggs? They’re not just a fancy thing chefs say! They actually emulsify *way* better, which means they blend with the other ingredients more smoothly. This gives you a lighter, airier popover. Trust me, it makes a difference!
Warm Milk for a Better Rise in Gluten-Free Popovers
Warming the milk? It’s like giving the yeast a little hug! It helps activate it (even though there’s no *actual* yeast in this recipe, the sourdough discard acts kinda like it). Plus, warm milk helps the starches in the batter absorb the liquid better, which means a better rise. Science!
Resist Opening the Oven When Making Gluten-Free Popovers
I know, I know, it’s tempting to peek! But seriously, *don’t do it!* Opening the oven door lets out all that precious heat, and your popovers will collapse faster than a house of cards. Be strong! You can do it!
Serve Gluten-Free Popovers Immediately
These are best enjoyed hot, right out of the oven. As they cool, they tend to deflate a little (sad face). So, gather ’round the table and dig in while they’re still puffy and perfect! My favorite part is tearing them open and seeing all that steamy goodness inside!
Gluten-Free Popovers Variations
Savory Gluten-Free Popovers
Okay, so you’re feeling savory? Awesome! Try adding a teaspoon of Italian herbs, garlic powder, or even some dried rosemary to the batter. A little grated Parmesan cheese is also AMAZING! Seriously, get creative!
Sweet Gluten-Free Popovers
Sweet tooth calling? No problem! Add a tablespoon of sugar and a teaspoon of vanilla extract to the batter. You can even drizzle them with honey or maple syrup after they’re baked. Yum!
Cheesy Gluten-Free Popovers
Cheese makes everything better, right? Right! Stir in about a half cup of shredded cheddar, Gruyere, or even some crumbled goat cheese to the batter before baking. Ooh la la!
Serving Suggestions for Gluten-Free Popovers
Breakfast Pairings for Gluten-Free Popovers
Seriously, these are amazing with breakfast! Scrambled eggs? Yes! Crispy bacon? Absolutely! Fresh fruit salad? You betcha! They’re like the perfect blank canvas for all your breakfast faves.
Side Dish Options for Gluten-Free Popovers
But don’t think these are just for breakfast! They’re also a fantastic side dish. Imagine them alongside a hearty soup, a fresh salad, or even some roasted veggies. So good!
Frequently Asked Questions About Gluten-Free Popovers
Why Didn’t My Gluten-Free Popovers Rise?
Okay, so, popover fails? We’ve all been there! The most common culprit is not having the pan and oil hot enough. Seriously, they need to be *screaming* hot! Also, resist the urge to open the oven door! That’s a popover killer, I’m telling ya! Make sure your oven temp is accurate, too. An oven thermometer is your best friend!
Can I Make Gluten-Free Popovers Ahead of Time?
Well, you *can*, but they’re definitely best fresh. If you *have* to make them ahead, store them in an airtight container at room temperature. To reheat, pop them in a 350°F oven for a few minutes to crisp them up. Just know they won’t be *quite* as amazing as the day they were baked.
What is the Best Gluten-Free Flour to Use for Gluten-Free Popovers?
I’ve found that a mix of cornstarch and tapioca starch works best. It gives them the perfect light and airy texture! Don’t try to substitute with other gluten-free flours unless you’re a seasoned gluten-free baking pro. This combo is pretty foolproof, trust me!
Can I Freeze Gluten-Free Popovers?
Yep! Freeze them in a single layer on a baking sheet, then transfer them to a freezer bag. To reheat, bake them straight from frozen in a 350°F oven until warmed through and crispy. Again, fresh is best, but freezing is a good option if you want to make a big batch ahead of time.

Estimated Nutritional Information for Gluten-Free Popovers
Okay, so, here’s the skinny on the nutrition. Each popover clocks in around 150 calories, 5g of fat, 5g of protein and 20g of carbs…but remember, that’s just an estimate! It can totally vary!
Enjoy Your Homemade Gluten-Free Popovers!
Okay, that’s it! You did it! Now go enjoy those amazing Gluten-Free Popovers! Seriously, I’d love to hear how they turned out, so leave a comment or rate the recipe! Happy baking!
Print
Gluten-Free Popovers: Banish Sadness with 4 Eggs
- Prep Time: 15 minutes
- Cook Time: 39 minutes
- Total Time: 64 minutes
- Yield: 12 popovers 1x
- Category: Breakfast/Side Dish
- Method: Baking
- Cuisine: American
- Diet: Gluten Free
Description
Enjoy light and airy Gluten-Free Popovers. This recipe uses simple ingredients for a delightful treat.
Ingredients
- 4 large Eggs (Room temperature)
- 2 cups Low-Fat Milk (1%)
- 1 cup Gluten Free Sourdough Discard
- 1 cup Cornstarch
- 1 cup Tapioca Starch
- 1 teaspoon Kosher Salt
- 1 teaspoon Seasoning of Choice
- 1 tablespoon Vegetable Oil
Instructions
- Whisk together cornstarch, tapioca starch, salt, and seasonings.
- Whisk eggs until frothy, add warm milk.
- Fold in sourdough discard.
- Combine dry and wet ingredients until smooth, set aside for 25-30 minutes.
- Preheat popover pan with oil.
- Fill cavities halfway with batter, bake at 450°F for 15 minutes.
- Reduce oven to 400°F, bake for 12 minutes, then reduce to 350°F for 10 minutes.
- Poke popovers, bake for 2-3 minutes until golden.
- Cool briefly before serving.
Notes
- Use room-temperature eggs for better mixing.
- Warm the milk slightly to help the batter rise.
- Do not open the oven door during baking.
- Serve warm for best texture.
Nutrition
- Serving Size: 1 popover
- Calories: 150
- Sugar: 3g
- Sodium: 150mg
- Fat: 5g
- Saturated Fat: 1g
- Unsaturated Fat: 3g
- Trans Fat: 0g
- Carbohydrates: 20g
- Fiber: 1g
- Protein: 5g
- Cholesterol: 70mg