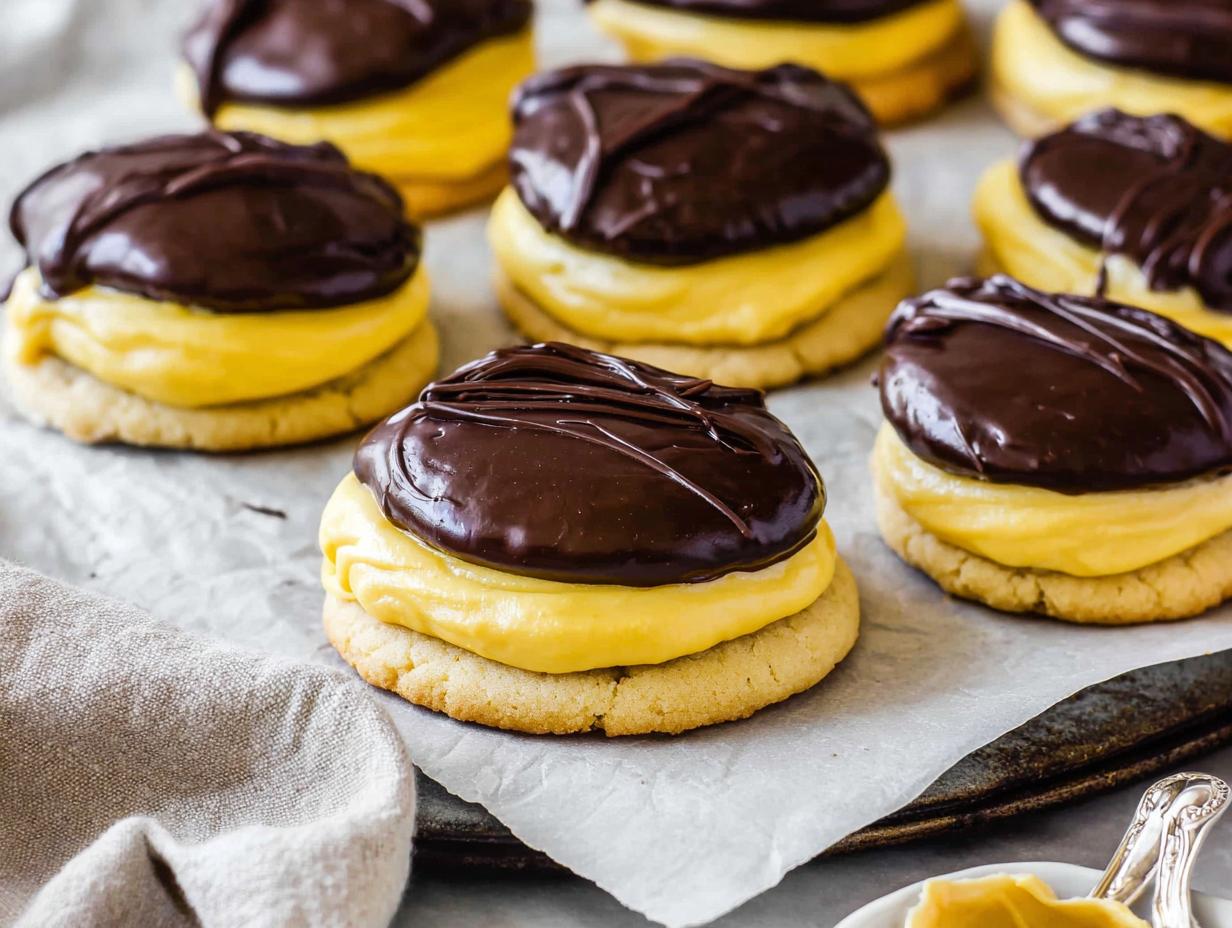
Okay, so, Boston Cream Pie Cookies! How fun is that? It’s like…all the best parts of Boston Cream Pie, but in adorable, bite-sized cookie form. You know, the creamy vanilla filling, that rich chocolate glaze…I mean, come ON.
I remember the first time I ever had Boston Cream Pie. I was maybe, like, eight? And it was at this super old-school bakery downtown. That first bite? Seriously mind-blowing. So, I’ve kinda been obsessed ever since. But sometimes, you just want something a little easier, you know? That’s where these Boston Cream Pie Cookies come in!
Trust me, these are *way* simpler than making a whole pie, but you still get that incredible, classic flavor combo. Plus, they’re just so darn cute! And honestly, who can resist a cookie? Exactly. So, let’s get baking!
Ingredients for Boston Cream Pie Cookies
Alright, let’s gather our goodies! Here’s what you’ll need to whip up these amazing Boston Cream Pie Cookies. Don’t worry, it’s mostly stuff you probably already have!
- 1 cup unsalted butter, softened (this is key – seriously, softened!)
- 1 cup granulated sugar
- 2 large eggs
- 1 teaspoon vanilla extract (the good stuff, if you have it!)
- 2 cups all-purpose flour
- 1 teaspoon baking powder
- 1/2 teaspoon baking soda
- 1/4 teaspoon salt
- 1 cup heavy cream
- 1/2 cup powdered sugar
- 1 teaspoon vanilla extract (yes, more vanilla! This is for the cream filling!)
- 1 cup semi-sweet chocolate chips
- 1 tablespoon vegetable oil (this helps make the chocolate nice and smooth!)
And that’s it! Make sure your butter is *actually* softened – I’ve tried it with cold butter before, and oops! Big mess. Now, let’s get baking!
How to Make Boston Cream Pie Cookies
Okay, here we go! Time to turn those ingredients into delicious Boston Cream Pie Cookies. Don’t worry, I’ll walk you through it. Just follow along, and you’ll be golden!
- Cream butter and sugar: Grab your softened butter and sugar, and throw them in a bowl. Now, cream them together until they’re light and fluffy. I usually use my stand mixer for this, but a hand mixer works great too! You’re looking for a pale, almost whipped texture.
- Add eggs and vanilla: Crack in those eggs one at a time, mixing well after each addition. Then, stir in that vanilla extract. Mmm, smells good already, right?
- Mix dry ingredients: In a separate bowl, whisk together the flour, baking powder, baking soda, and salt. This makes sure everything’s evenly distributed, so you don’t get any weird salty bites!
- Combine wet and dry ingredients: Gradually add the dry ingredients to the wet ingredients, mixing until just combined. Don’t overmix! Overmixing makes tough cookies, and nobody wants that.
- Refrigerate dough for 30 minutes: This is important! Chilling the dough helps prevent the cookies from spreading too much in the oven. Plus, it makes them easier to handle. Just pop the dough in the fridge for about half an hour.
- Whip heavy cream, powdered sugar, and vanilla: While the dough is chilling, let’s make the filling! In a clean bowl, whip the heavy cream, powdered sugar, and vanilla extract until stiff peaks form. Be careful not to overwhip, or you’ll end up with butter!
- Refrigerate cream filling: Once the filling is whipped, pop it in the fridge to keep it nice and cold until we’re ready to assemble the cookies.
- Preheat oven to 350°F (175°C): Now’s the time to get that oven going! Make sure it’s nice and hot before you start baking.
- Drop dough onto baking sheets: Take the chilled dough out of the fridge and drop rounded tablespoons onto ungreased baking sheets. Leave a little space between each cookie, so they have room to spread.
- Bake for 10-12 minutes: Pop those cookies in the oven and bake for 10-12 minutes, or until the edges are lightly golden brown. Keep an eye on them, because ovens can be tricky!
- Cool cookies: Once the cookies are baked, let them cool on the baking sheets for a few minutes before transferring them to a wire rack to cool completely. This is super important – you don’t want to fill them while they’re still warm!
- Melt chocolate chips and oil: While the cookies are cooling, melt the chocolate chips and vegetable oil in a double boiler or microwave in 30-second intervals, stirring until smooth. The oil helps create a nice, shiny glaze.
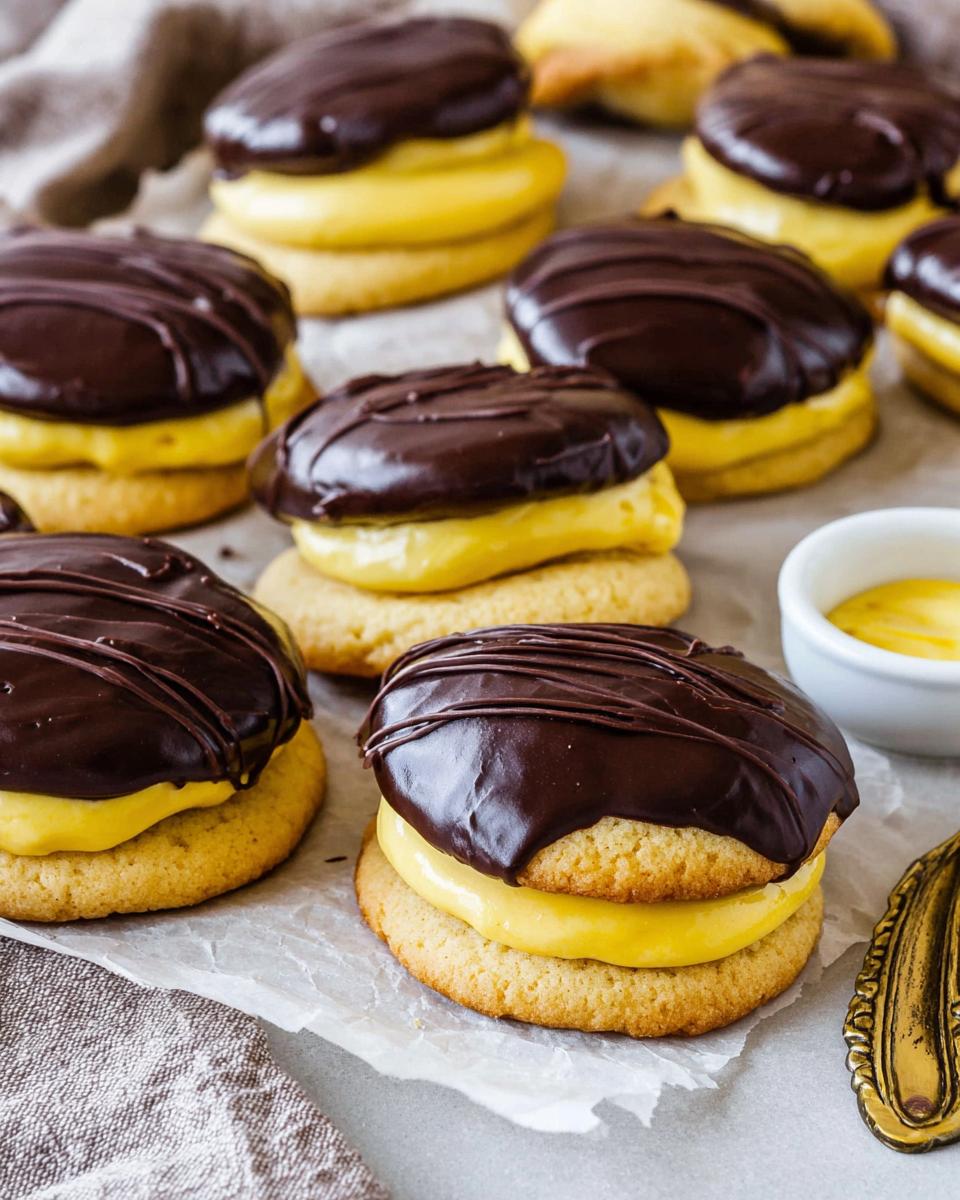
- Fill cookies with cream: Once the cookies are completely cool, grab that cream filling from the fridge. Use a spoon or piping bag to spread or pipe the cream onto the flat side of half of the cookies. Then, top with the other half to create little cookie sandwiches!
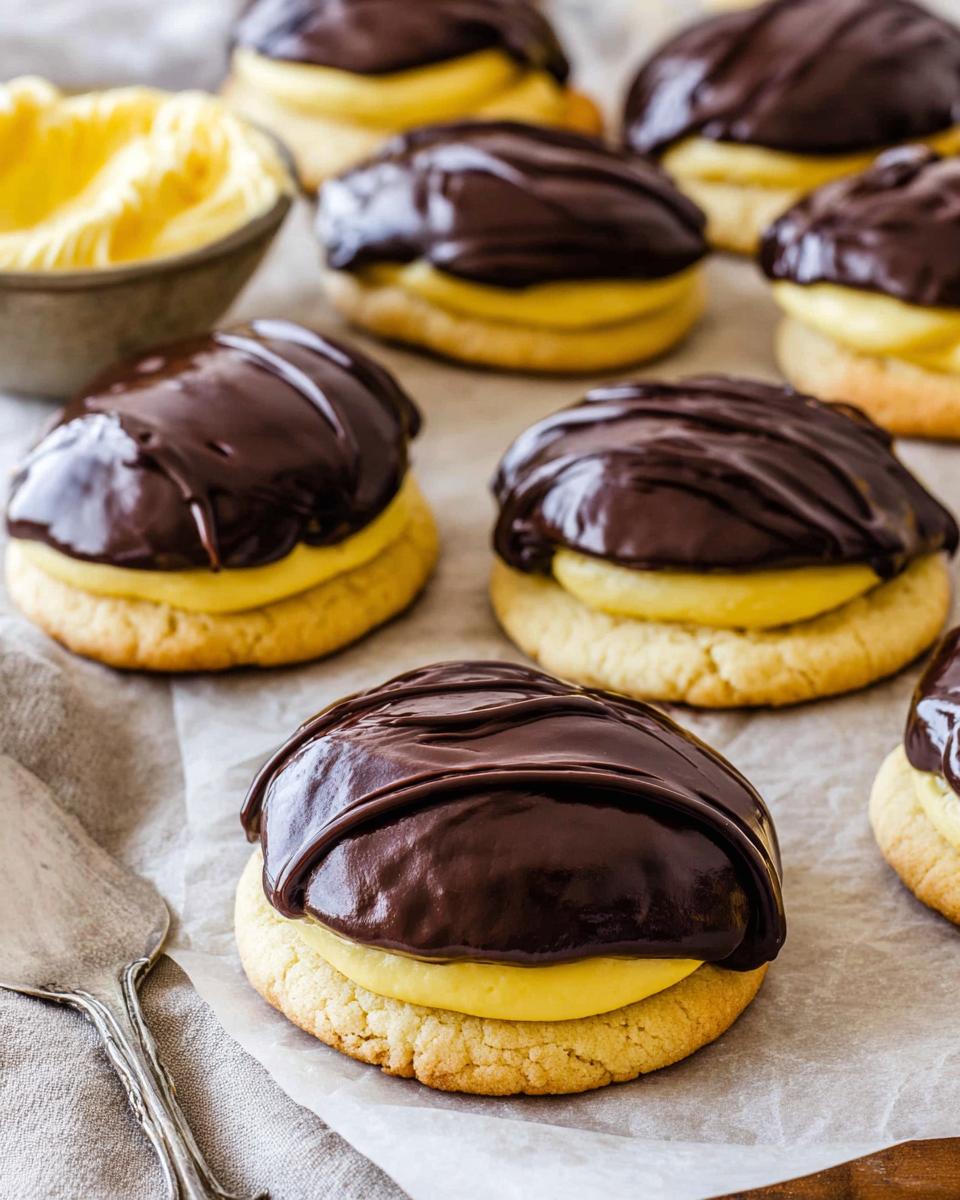
- Glaze with chocolate: Dip the tops of the filled cookies into the melted chocolate, letting the excess drip off. You can also use a spoon to drizzle the chocolate over the cookies if you prefer.
- Let glaze set: Finally, place the glazed cookies on a wire rack to allow the chocolate to set completely. This usually takes about 15-20 minutes. And then…ENJOY!
Whew! That was a lot, but trust me, it’s totally worth it. These Boston Cream Pie Cookies are seriously addictive!
Tips for Perfect Boston Cream Pie Cookies
Okay, so you wanna make these Boston Cream Pie Cookies *amazing*, right? Here are a few little tricks I’ve learned along the way. These will seriously up your cookie game!
- Chill that dough! I know, I know, it’s hard to wait. But trust me, chilling the dough is a MUST. It keeps the cookies from spreading too thin and gives them a better texture.
- Don’t overwhip the cream! Seriously, watch it like a hawk. Once you see those stiff peaks forming, STOP. Overwhipped cream turns into butter, and nobody wants that.
- Cool those cookies completely! Patience, my friend! If you try to fill warm cookies, the cream will melt. And that’s just sad.
- Adjust the sweetness to *your* taste! Feel like the filling’s too sweet? Cut back on the powdered sugar a bit. Want a richer chocolate flavor? Use dark chocolate chips! It’s your cookie, make it your own!
Follow these tips, and you’ll be baking up Boston Cream Pie Cookie perfection in no time!
Storing Your Boston Cream Pie Cookies
Alright, so you’ve made these amazing Boston Cream Pie Cookies…now what? Well, if you’re not planning on eating them all right away (good luck with that!), here’s how to store them to keep them fresh.
The best way is to pop them in an airtight container and keep them in the fridge. Because of that cream filling, they’re best kept cold. They’ll stay good for about 3-4 days…if they last that long! I definitely wouldn’t reheat them; they’re perfect straight from the fridge!
Variations on Boston Cream Pie Cookies
Okay, so you’ve mastered the classic Boston Cream Pie Cookie? Awesome! Now, let’s get a little wild, shall we? Here are some fun variations you can try to mix things up. My favorite part is experimenting!
- Extract Extravaganza! Try using almond extract instead of vanilla in the cookie dough for a nutty twist. Or, a little bit of lemon extract in the cream filling? Wow!
- Spice It Up! Add a pinch of cinnamon or nutmeg to the cookie dough for a warm, cozy vibe. Perfect for fall!
- Chocolate, Chocolate, CHOCOLATE! Swap out the semi-sweet chocolate chips for dark chocolate, milk chocolate, or even white chocolate! Or, swirl some peanut butter into the melted chocolate…YUM!
- Coffee Kick! Add a tablespoon of instant coffee to the cream filling for a mocha-flavored cookie. Trust me, it’s amazing!
Seriously, the possibilities are endless! Don’t be afraid to get creative and make these Boston Cream Pie Cookies your own!
Frequently Asked Questions About Boston Cream Pie Cookies
Got questions about making these Boston Cream Pie Cookies? Don’t worry, I’ve got answers! Here are a few common questions I get asked all the time.
Can I make Boston Cream Pie Cookies ahead of time?
Totally! You can bake the cookies a day or two in advance and store them in an airtight container. You can also make the cream filling ahead of time and keep it in the fridge. But, I’d recommend assembling the cookies (filling and glazing) right before serving for the best texture. That way, the cookies don’t get soggy!
How do I prevent the chocolate glaze from cracking?
Ah, the dreaded cracking glaze! The secret is the oil! Make sure you’re using that tablespoon of vegetable oil when you melt the chocolate. It helps keep the chocolate smooth and prevents it from becoming brittle and cracking. Also, let the glaze set at room temperature – don’t try to speed things up by sticking them in the fridge!
Can I freeze Boston Cream Pie Cookies?
Okay, so freezing filled and glazed cookies isn’t the *best* idea. The cream filling can get a little weird after thawing. But! You *can* freeze the baked cookies before filling them! Just let them cool completely, then wrap them tightly in plastic wrap and pop them in a freezer bag. They’ll keep for a month or two. When you’re ready to eat them, just thaw them out, whip up some fresh cream filling, and glaze ’em!
Why You’ll Love These Boston Cream Pie Cookies
Okay, seriously, why *won’t* you love these? They’re just the best! But, if you need convincing, here’s the lowdown:
- Easy peasy! Way easier than making a whole Boston Cream Pie, trust me!
- Classic flavors that can’t be beat! That vanilla cream, that rich chocolate…it’s a match made in heaven!
- Crowd-pleasing dessert! Everyone loves cookies, right? These are always a hit!
- Perfect for parties! They’re cute, portable, and totally shareable! (Or not…I won’t judge if you keep them all for yourself!)
So, what are you waiting for? Get baking!
Estimated Nutritional Information for Boston Cream Pie Cookies
Okay, so, just a quick note about the nutrition info. I’m giving you an estimate, but honestly, it can vary *a lot* depending on the exact brands and ingredients you use. So, don’t take this as gospel, okay? Just a general idea!
Rate and Share Your Boston Cream Pie Cookies
Made these Boston Cream Pie Cookies? Woohoo! Leave a comment and rating below – I wanna hear all about it! And don’t forget to share your creations on social media! Happy baking!
Print
Devastating Boston Cream Pie Cookies in Just 1 Hour
- Prep Time: 30 minutes
- Cook Time: 12 minutes
- Total Time: 1 hour
- Yield: About 24 cookies 1x
- Category: Dessert
- Method: Baking
- Cuisine: American
- Diet: Vegetarian
Description
Make Boston Cream Pie Cookies. These treats combine the flavors of Boston Cream Pie in cookie form.
Ingredients
- 1 cup unsalted butter, softened
- 1 cup granulated sugar
- 2 large eggs
- 1 teaspoon vanilla extract
- 2 cups all-purpose flour
- 1 teaspoon baking powder
- 1/2 teaspoon baking soda
- 1/4 teaspoon salt
- 1 cup heavy cream
- 1/2 cup powdered sugar
- 1 teaspoon vanilla extract (for the cream filling)
- 1 cup semi-sweet chocolate chips
- 1 tablespoon vegetable oil
Instructions
- Cream butter and sugar.
- Add eggs and vanilla.
- Mix dry ingredients.
- Combine wet and dry ingredients.
- Refrigerate dough for 30 minutes.
- Whip heavy cream, powdered sugar, and vanilla.
- Refrigerate cream filling.
- Preheat oven to 350°F (175°C).
- Drop dough onto baking sheets.
- Bake for 10-12 minutes.
- Cool cookies.
- Melt chocolate chips and oil.
- Fill cookies with cream.
- Glaze with chocolate.
- Let glaze set.
Notes
- Chill dough for best results.
- Do not overwhip cream.
- Cool cookies completely before filling.
- Adjust sweetness to your preference.
Nutrition
- Serving Size: 1 cookie
- Calories: 250
- Sugar: 20g
- Sodium: 50mg
- Fat: 15g
- Saturated Fat: 9g
- Unsaturated Fat: 5g
- Trans Fat: 0g
- Carbohydrates: 30g
- Fiber: 1g
- Protein: 2g
- Cholesterol: 50mg