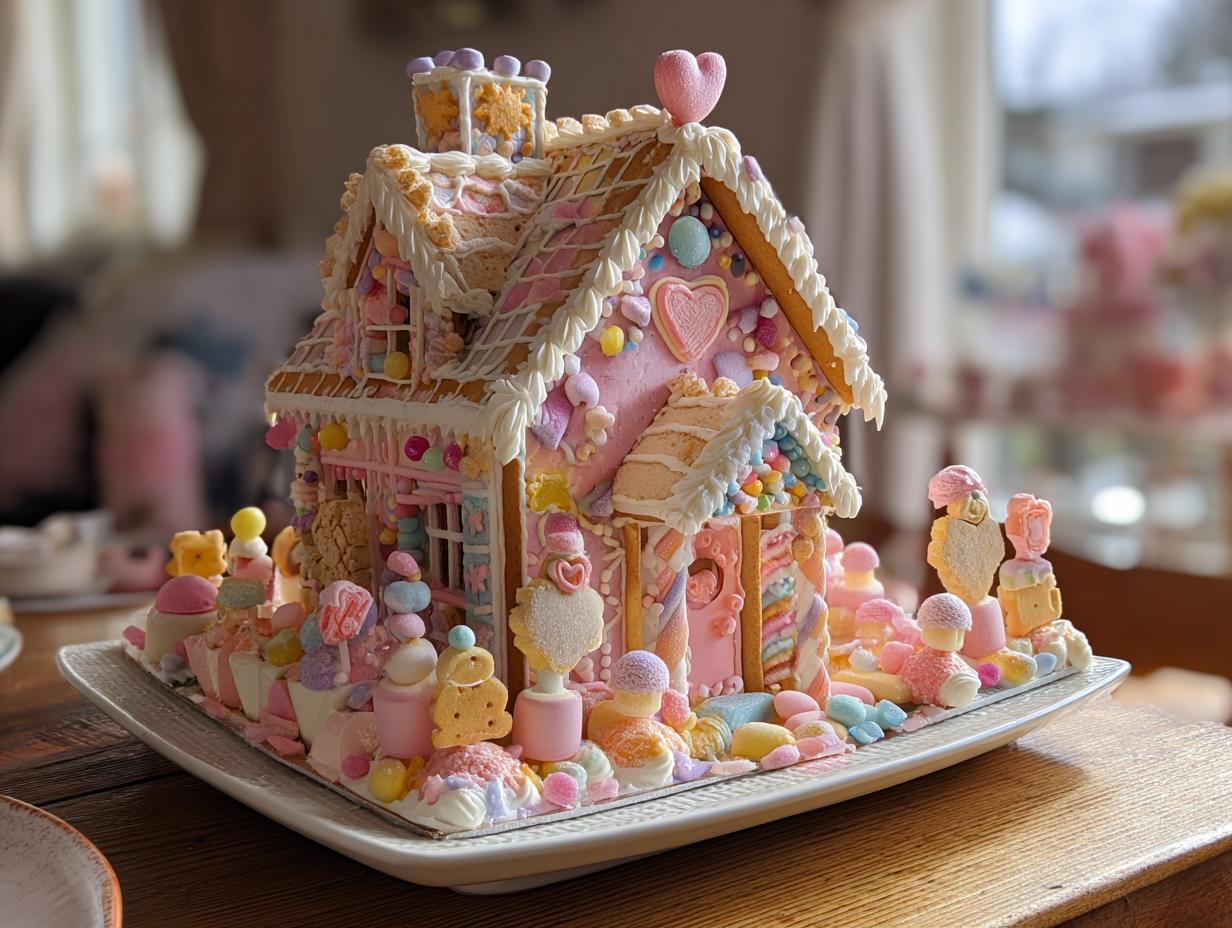
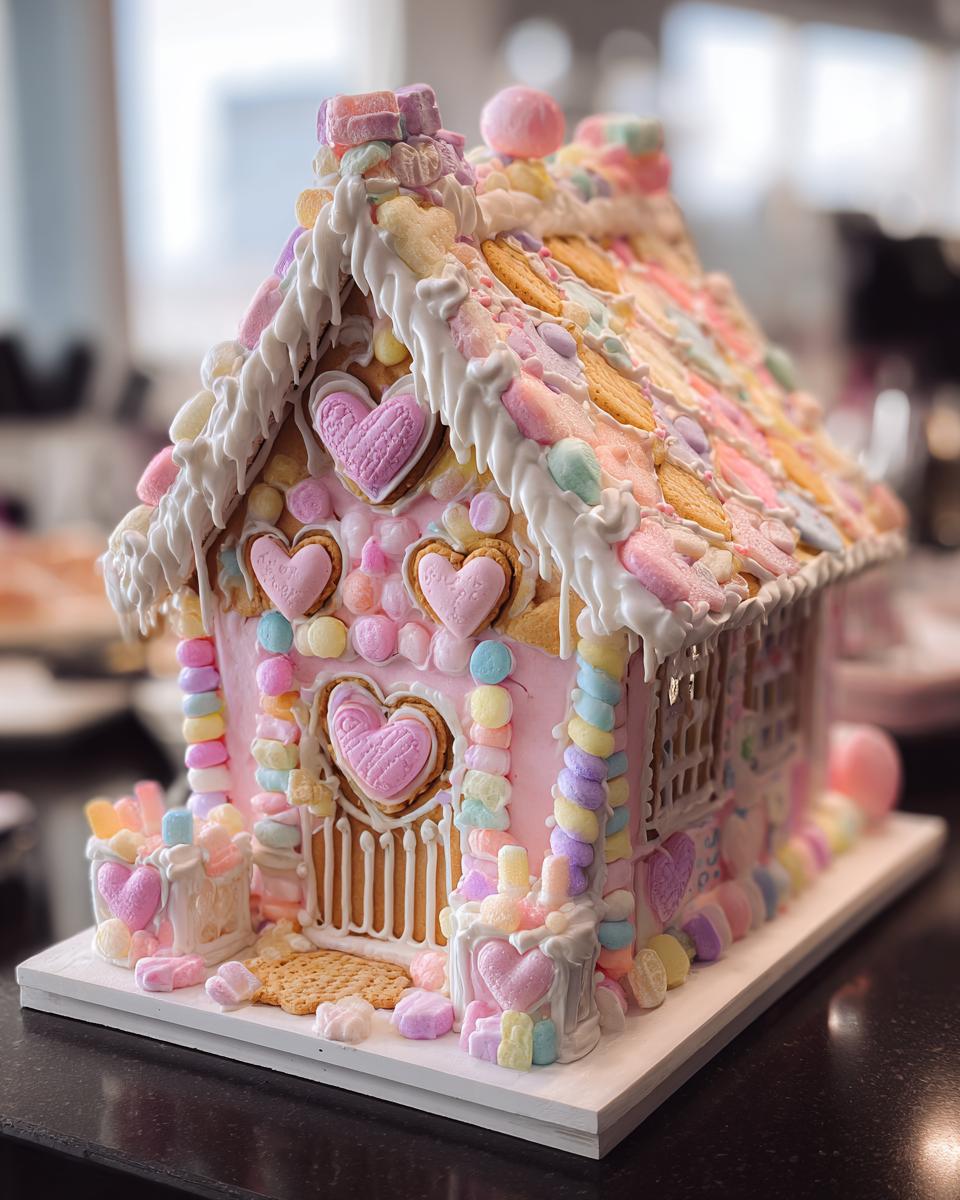
Okay, so, gingerbread houses! They’re like, the ultimate holiday baking project, right? I remember making them as a kid with my grandma – total chaos, icing everywhere, but SO much fun. We’d always go classic brown gingerbread, but this year, I’m totally obsessed with this *Pink Gingerbread House with Soft Pastel Icing and Candy Accents*. Seriously, how cute is that?!
It’s basically taking that cozy, nostalgic gingerbread vibe and giving it a majorly modern, whimsical twist. Think Barbie Dreamhouse meets Christmas – LOL! I’ve been baking gingerbread for, like, ever, and I’ve gotta say, this pink pastel version is my absolute fave. It’s such a fun way to get creative, and honestly, who can resist a pink house covered in candy?
This isn’t just a recipe; it’s a chance to ditch the usual and create something totally unique and Instagram-worthy. So, ditch the drab and let’s get baking a Pink Gingerbread House with Soft Pastel Icing and Candy Accents that’s as fun to make as it is to look at!
Why You’ll Love This Pink Gingerbread House with Soft Pastel Icing and Candy Accents
Okay, seriously, why wouldn’t you love this?! But just in case you need convincing, here are a few reasons why this Pink Gingerbread House is gonna be your new holiday baking obsession:
Reasons to Bake This Pink Gingerbread House with Soft Pastel Icing and Candy Accents
Creative Expression
Forget cookie-cutter! This is your chance to go wild with colors, candies, and icing designs. Seriously, let your inner artist loose! My favorite part is experimenting with different pastel shades – it’s so therapeutic!
Festive Fun
Baking this isn’t just about the finished product; it’s about the whole experience! Gather your friends, family, or even just crank up the Christmas tunes and make it a party. It’s the perfect way to get in the holiday spirit!
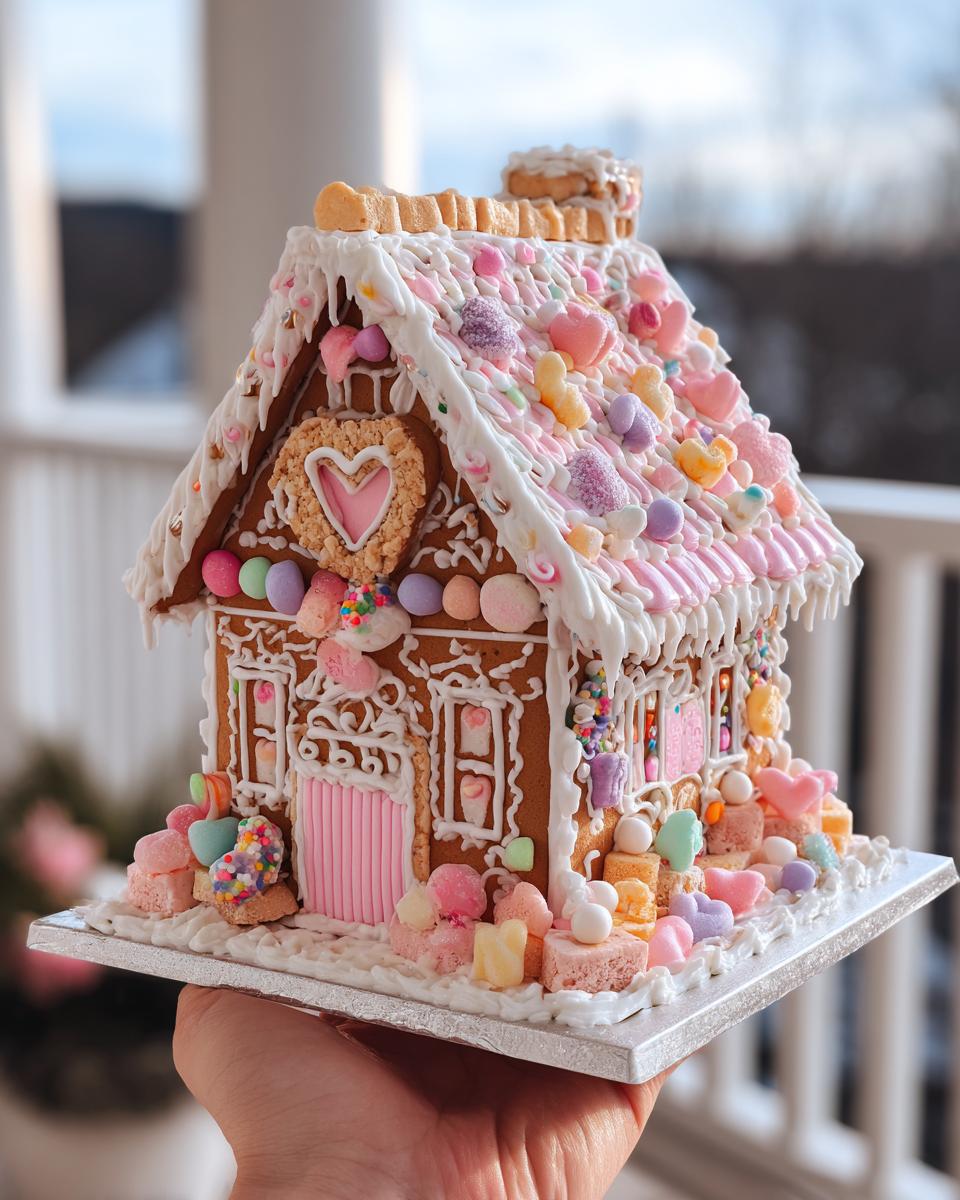
Delicious and Beautiful
Okay, let’s be real, it’s gotta taste good, right? The gingerbread is perfectly spiced, and the royal icing? Yum! Plus, it’s SO pretty! You’ll have a stunning centerpiece that everyone will be talking about – and wanting a bite of!
Ingredients for Your Pink Gingerbread House with Soft Pastel Icing and Candy Accents
Alright, let’s gather our supplies! Don’t worry, it’s mostly stuff you probably already have in your pantry. We’re gonna break it down into sections, so it’s super easy to follow. Trust me, even if you’re not a master baker, you can totally nail this!
Gingerbread Dough Ingredients
Okay, for the gingerbread itself, you’ll need:
- 3 cups all-purpose flour – plus a little extra for dusting, you know, ’cause things get messy!
- 1 cup packed brown sugar – the dark stuff gives it that yummy molasses flavor.
- ¾ cup (1 ½ sticks) unsalted butter, softened – gotta be soft, or you’ll be wrestling with it forever!
- ½ cup molasses – adds that classic gingerbread taste.
- ½ cup water
- 1 tsp ground ginger – can’t have gingerbread without ginger!
- 1 tsp ground cinnamon – adds a little warmth, so cozy!
- ½ tsp ground cloves – just a pinch, it’s strong stuff!
- ½ tsp baking soda
- ½ tsp salt
Royal Icing Ingredients
Now, for the glue and decorations (aka the royal icing):
- 4 cups powdered sugar – sifted, if you’re feeling fancy!
- 3 large egg whites – or meringue powder if you’re worried about raw eggs. Your call!
- 1 tsp vanilla extract – because everything’s better with vanilla!
- 2-4 tablespoons water – add it slowly until you get the right consistency.
Pink Gingerbread House with Soft Pastel Icing and Candy Accents Decorations
The fun part! Grab:
- Assorted gumdrops – the pastel ones are perfect!
- Pastel sprinkles – the more, the merrier!
- Candy canes – mini ones are super cute for the roof.
Other Ingredients
And don’t forget these:
- Pink food coloring – I love the gel kind; it gives the best color! I use Americolor brand.
- Pastel food coloring – grab a variety pack for the full pastel effect! Wilton is easy to find.
- Graham Crackers – For the base.
How to Make a Pink Gingerbread House with Soft Pastel Icing and Candy Accents: Step-by-Step Instructions
Okay, buckle up, buttercups! It’s time to turn those ingredients into a sugary masterpiece! Don’t worry; I’ll walk you through every step. Just breathe, and remember, even if it’s a little wonky, it’ll still be delicious!
Preparing the Gingerbread Dough
First things first, let’s make that dough! In a big bowl, cream together the softened butter and brown sugar until it’s light and fluffy – like a cloud! Then, mix in the molasses and water. In a separate bowl, whisk together the flour, ginger, cinnamon, cloves, baking soda, and salt. Gradually add the dry ingredients to the wet ingredients, mixing until just combined. Don’t overmix! Wrap the dough in plastic wrap and chill it in the fridge for at least 2 hours – or even better, overnight. This is important; otherwise, it’ll be too sticky to work with!
Cutting and Baking the Gingerbread Pieces
Now for the architecture! Print out a gingerbread house template (you can find tons online!). Roll out the chilled dough on a lightly floured surface to about ¼ inch thickness. Place the templates on the dough and cut out the pieces with a sharp knife or pizza cutter. Place the gingerbread pieces on a baking sheet lined with parchment paper. Bake in a preheated oven at 350°F (175°C) for 12-15 minutes, or until the edges are golden brown. Let them cool completely on a wire rack. Careful, they’re delicate when they’re warm!
Making the Royal Icing
Icing time! In a large bowl, beat the egg whites (or meringue powder mixture) until stiff peaks form. Gradually add the powdered sugar, beating until smooth and glossy. Mix in the vanilla extract. Now, divide the icing into several bowls and tint each one with your desired pastel food coloring. I usually start with a tiny drop of color and add more until I get the perfect shade. You can always add more, but you can’t take it away! If the icing is too thick, add a tiny bit of water, one teaspoon at a time, until it reaches a good piping consistency. You want it thick enough to hold its shape but thin enough to squeeze out of a piping bag.
Assembling Your Pink Gingerbread House with Soft Pastel Icing and Candy Accents
Okay, time to build! This can be a little tricky but be patient. Fill a piping bag with royal icing and pipe thick lines along the edges of the gingerbread pieces. Start by attaching the walls to the base (graham crackers) , then add the roof pieces. Use cans or small boxes to support the walls while the icing dries – this is super important! Let the icing dry completely, preferably overnight, before decorating. This is KEY! Otherwise, your house will collapse. Oops, I’ve been there!
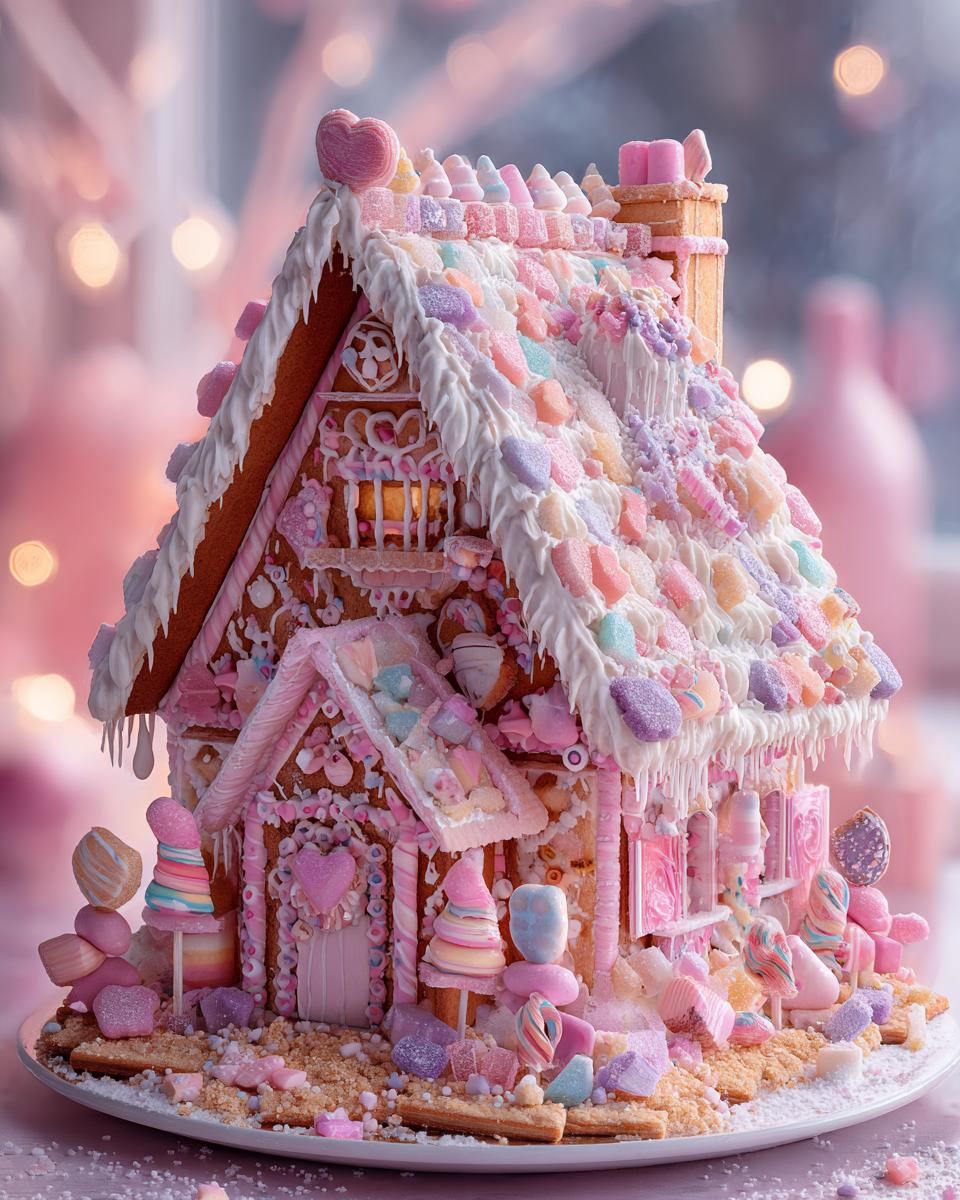
Decorating Your Pink Gingerbread House with Soft Pastel Icing and Candy Accents
The best part! Let your imagination run wild! Use piping bags fitted with different tips to create swirls, dots, and other designs. Attach gumdrops, sprinkles, and candy canes with royal icing. Get creative! There are no rules here. I love using pastel sprinkles to create a snowy effect on the roof. You can even add little gingerbread people or other edible decorations. The possibilities are endless!
Tips for the Perfect Pink Gingerbread House with Soft Pastel Icing and Candy Accents
Want to make sure your Pink Gingerbread House is a total showstopper? Here are a few little secrets I’ve learned over the years. These will seriously up your gingerbread game!
Dough Consistency is Key
Your gingerbread dough should be firm but pliable – kind of like Play-Doh, but tastier! If it’s too sticky, add a little more flour. If it’s too dry and crumbly, add a tiny bit of water. Trust me, getting this right makes all the difference!
Icing Consistency Matters
Royal icing is like the glue and the glitter of this whole operation! For sticking the house together, you want it THICK. Like, toothpaste thick. For decorating, a slightly thinner consistency works best for piping details. Play around with it – you’ll get the hang of it!
Support While Drying
Seriously, don’t skip this! Those walls need some love while the icing sets. Cans, small boxes, even mugs work great. Just prop ’em up against the walls to keep everything stable. Otherwise, you might wake up to a gingerbread avalanche!
Pink Gingerbread House with Soft Pastel Icing and Candy Accents Variations
Okay, so you’ve got the basics down, but wanna kick things up a notch? Here are a few fun ideas for switching up your Pink Gingerbread House! Let’s get remixing!
Different Icing Colors
Pastels are adorable, but who says you have to stick with them? Go bold with bright, jewel-toned icing, or try a monochrome look with different shades of pink! Ooh, or even a rainbow effect?! So fun!
Alternative Candy Decorations
Gumdrops and sprinkles are classic, but think outside the box! Use mini marshmallows for a fluffy snow effect, or pretzel sticks for a rustic, log cabin vibe. Chocolate chips? Always a good idea! Get creative with it!
Add Extracts to the Dough for Flavor
Want to add a little extra somethin’ somethin’ to your gingerbread? Try adding a teaspoon of lemon or almond extract to the dough. It’ll give it a subtle but delicious flavor boost! Wow!
Storing Your Pink Gingerbread House with Soft Pastel Icing and Candy Accents
How to Keep Your Pink Gingerbread House with Soft Pastel Icing and Candy Accents Fresh
Okay, so you’ve built this amazing Pink Gingerbread House – now how do you keep it from getting stale? Honestly, it’s mostly for decoration, but if you *do* wanna nibble, store it in a cool, dry place, away from direct sunlight. A big cardboard box works great! Just try not to touch it too much, or those candies might start falling off.
Pink Gingerbread House with Soft Pastel Icing and Candy Accents FAQs
Got questions? I’ve got answers! Here are some of the most common things people ask me about making this adorable Pink Gingerbread House. Don’t worry; I’ve got you covered!
Can I make the gingerbread dough ahead of time?
Absolutely! In fact, I highly recommend it. Just wrap it tightly in plastic wrap and store it in the fridge for up to 3 days. Or, you can even freeze it for up to a month! Just let it thaw in the fridge overnight before rolling it out. So easy!
What if my royal icing is too thin?
Oops! No biggie. Just gradually add more powdered sugar, a tablespoon at a time, until it reaches the right consistency. Remember, you want it thick enough to hold its shape but still be pipable. You got this!
How long will the Pink Gingerbread House with Soft Pastel Icing and Candy Accents last?
Okay, so technically, it’ll last for weeks, even months, if stored properly. But honestly? It’s more for decoration than eating. The gingerbread will get pretty hard after a while. But hey, it’ll look super cute on your holiday display!
Can I use store-bought gingerbread dough?
Sure, you *can*, but the results may vary. Store-bought dough is often thinner and doesn’t have quite the same flavor as homemade. Plus, it might not hold its shape as well. But if you’re short on time, go for it! Just keep an eye on it while it’s baking.
What is the best way to get the gingerbread house pieces to stick together?
Thick royal icing is your best friend! Make sure it’s nice and thick, like toothpaste, and use plenty of it. And most importantly, be patient! Let the icing dry completely, preferably overnight, before decorating. Those support cans are super important, too!
Nutritional Information for Pink Gingerbread House with Soft Pastel Icing and Candy Accents
Okay, let’s talk numbers! Now, keep in mind that this is just an estimate, because, well, who measures every single sprinkle?! But roughly, one slice of this Pink Gingerbread House will give you about:
- Calories: 350 (Hey, it’s a holiday treat!)
- Fat: 15g (Mostly from that yummy butter)
- Protein: 3g (Every little bit helps, right?)
- Carbs: 50g (Yup, it’s a sugary delight!)
So, yeah, it’s not exactly health food, LOL! But hey, it’s all about balance, right? Enjoy a slice of this adorable Pink Gingerbread House, and then maybe go for a walk around the block to admire your neighbor’s lights! It’s all about moderation, my friends!
Ready to Build Your Dream Pink Gingerbread House with Soft Pastel Icing and Candy Accents?
So, what are you waiting for?! Grab your sprinkles and get baking! And don’t forget to share your creations – I wanna see all those pink masterpieces!
Print
Defeat Ugly: Pink Gingerbread House Recipe with 4 Steps
- Prep Time: 2 hours
- Cook Time: 20 minutes
- Total Time: 4 hours 20 minutes
- Yield: 1 gingerbread house
- Category: Dessert
- Method: Baking
- Cuisine: American
- Diet: Vegetarian
Description
Create a whimsical pink gingerbread house adorned with soft pastel icing and delightful candy accents.
Ingredients
- Gingerbread dough (recipe follows)
- Royal icing (recipe follows)
- Pink food coloring
- Pastel food coloring (various shades)
- Assorted candies (gumdrops, sprinkles, candy canes, etc.)
- Graham Crackers
Instructions
- Prepare gingerbread dough according to recipe.
- Cut out gingerbread house pieces (walls, roof, etc.).
- Bake gingerbread pieces until golden brown.
- Let cool completely.
- Prepare royal icing and divide into portions.
- Tint each portion with desired pastel food coloring.
- Assemble gingerbread house using royal icing as glue.
- Decorate with pastel icing and assorted candies.
- Let icing dry completely before displaying.
Notes
- Use gel food coloring for best results when tinting icing.
- Get creative with candy placement and icing designs.
- Consider using parchment paper to protect your work surface.
Nutrition
- Serving Size: 1 slice
- Calories: 350
- Sugar: 40g
- Sodium: 100mg
- Fat: 15g
- Saturated Fat: 8g
- Unsaturated Fat: 5g
- Trans Fat: 0g
- Carbohydrates: 50g
- Fiber: 1g
- Protein: 3g
- Cholesterol: 20mg