

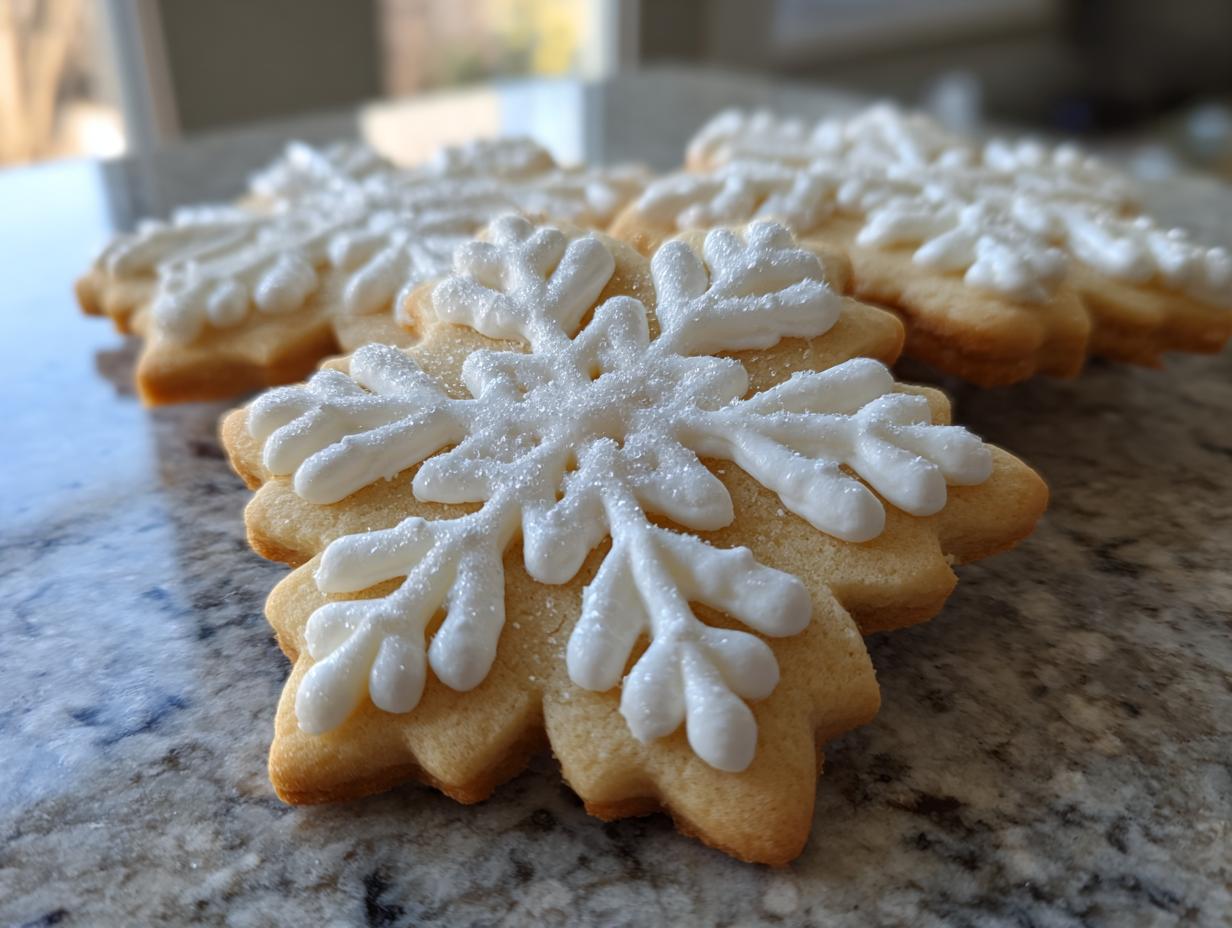
Oh, winter baking! Is there anything better than the smell of sugar cookies wafting through the house when it’s chilly outside? I think not! And that’s why I’m SO excited to share this Snowflake sugar cookies recipe tutorial with you. Trust me, it’s seriously easy, and the results are just gorgeous. Even if you’re a total newbie baker, you can totally pull these off.
I have the best memories of making these with my grandma every year during the holidays. We’d crank up the Christmas tunes, get flour everywhere (oops!), and spend hours decorating. Those sparkly little snowflakes just made everything feel so magical. And now, you can make some magic of your own!
Why You’ll Love This Snowflake Sugar Cookies Recipe Tutorial
Easy to Follow Snowflake Sugar Cookies Recipe Tutorial
Seriously, this isn’t one of those recipes that makes you want to throw your mixer out the window! I’ve broken everything down into super simple steps, so even if you’ve never decorated a cookie before, you’ll be just fine. Promise!
Beautiful Snowflake Sugar Cookies Recipe Tutorial Results
Okay, let’s be real, these snowflake cookies? They’re STUNNING. They look like they came straight out of a fancy bakery window. The royal icing gives them such a professional finish, and they’re just perfect for showing off to your friends and family during the holidays.
Fun Snowflake Sugar Cookies Recipe Tutorial for all ages
This is a fantastic activity to do with kids (or just your inner child!). Get everyone involved in rolling, cutting, and decorating. Don’t worry about perfection – the wonkier the snowflakes, the more character they have! It’s all about having fun and making memories, right?
Snowflake Sugar Cookies Recipe Tutorial: The Ingredients You’ll Need
Easy Sugar Cookies Ingredients
Alright, let’s gather our goodies! Here’s what you’ll need for the cookies themselves. Don’t skimp on the good stuff, okay?
- 2 cups all-purpose flour – I always use unbleached!
- 1 cup (2 sticks) unsalted butter, softened – Make sure it’s actually soft, not melted!
- 1 cup granulated sugar – For that perfect sweetness.
- 1 large egg – Adds richness and helps bind everything together.
- 1 teaspoon vanilla extract – My secret weapon for amazing flavor!
Royal Icing Ingredients
Now, for the royal icing magic! This is what makes the snowflakes truly special. Get ready to whip up some sweetness!
- 4 cups powdered sugar – Sift it if you wanna be extra fancy (less lumps!).
- 3 tablespoons meringue powder – This is what gives the icing its strength and shine.
- 1/2 cup warm water – Not too hot, not too cold, Goldilocks!
- Gel food coloring (optional) – For adding a pop of color if you’re feeling adventurous!
Additional Supplies for Your Snowflake Sugar Cookies Recipe Tutorial
Almost there! Here are a few extras to make your snowflake dreams come true:
- Snowflake cookie cutter – Any size or shape you like!
- Tipless piping bags – These are seriously the BEST for decorating. Trust me!
- Sanding sugar or edible glitter (optional) – For that extra sparkle and shine! ✨
How to Prepare: Snowflake Sugar Cookies Recipe Tutorial
Baking the Snowflake Sugar Cookies
Okay, time to get baking! First things first, preheat your oven to 350°F (175°C). This is super important – a cold oven is a cookie disaster waiting to happen! While the oven’s heating, grease your baking sheets. Or, even better, line them with parchment paper. That way, nothing sticks, and cleanup is a breeze!
Now, in a large bowl, cream together the softened butter and granulated sugar until it’s light and fluffy. This might take a few minutes, so be patient! Beat in the egg and vanilla extract. Gradually add the flour, mixing until just combined. Don’t overmix – that’ll make your cookies tough.
Divide the dough in half, and roll it out on a lightly floured surface to about 1/4 inch thickness. Use your snowflake cookie cutter to cut out the cookies and place them on the prepared baking sheets. Bake for 8-10 minutes, or until the edges are lightly golden brown. Let them cool on the baking sheets for a couple of minutes before transferring them to a wire rack to cool completely. This is crucial – warm cookies break easily!

Making the Royal Icing for your Snowflake Sugar Cookies Recipe Tutorial
While the cookies are cooling, let’s whip up that royal icing! In a large bowl, combine the powdered sugar and meringue powder. Add the warm water and beat with an electric mixer until stiff peaks form. This usually takes about 5-7 minutes. If it’s too thick, add a tiny bit more water, a teaspoon at a time, until you reach the right consistency.
Now, here’s the trick: you’ll need two different consistencies of icing. For outlining, you want a thicker “piping” consistency – it should hold its shape when piped. For flooding (filling in the cookies), you need a thinner “flooding” consistency – it should spread easily. To get the flooding consistency, add a tiny bit more water to about half of the icing, mixing until it’s smooth and flows easily.
Decorating the Snowflake Sugar Cookies Recipe Tutorial
Alright, the fun part! Once the cookies are completely cool (seriously, completely!), transfer the piping-consistency icing to one tipless piping bag and the flooding-consistency icing to another. Snip a tiny bit off the tip of each bag – you can always cut more, but you can’t cut less!
First, outline each snowflake cookie with the piping icing. This creates a little “dam” to hold in the flooding icing. Let the outlines dry for just a minute or two. Then, flood the inside of the outlined cookies with the flooding icing. Use a toothpick or scribe tool to pop any air bubbles and spread the icing evenly.

Now, for the really fun part – adding the details! While the flooding icing is still wet, use the piping icing to pipe on your desired snowflake patterns. Get creative! If you want, sprinkle the cookies with sanding sugar or edible glitter while the icing is still wet. Let the decorated cookies dry completely – this can take several hours, or even overnight. Seriously, don’t rush this step, or you’ll end up with smudged snowflakes!
Tips for Success with This Snowflake Sugar Cookies Recipe Tutorial
Getting the Icing Consistency Right for Your Snowflake Sugar Cookies Recipe Tutorial
Okay, listen up, ’cause this is HUGE: icing consistency is KEY! Too thick, and your icing will be lumpy and hard to pipe. Too thin, and it’ll run right off the cookie. Aim for a consistency similar to school glue for piping, and a slightly thinner, spreadable consistency for flooding. Add water a TEASPOON at a time – seriously, it’s easy to go overboard!
Ensuring Proper Drying Time for Your Snowflake Sugar Cookies Recipe Tutorial
Patience, my friend, patience! I know it’s hard, but you must let those cookies dry completely. We’re talking several hours, or even overnight. If you try to stack them or move them before they’re dry, you’ll end up with a smudged, sticky mess. Trust me, I’ve been there! A wire rack is your best friend for this step.
Creative Snowflake Sugar Cookies Recipe Tutorial Designs
Don’t be afraid to get creative with your snowflake designs! Search online for inspiration, or just let your imagination run wild. Try different piping techniques, add edible glitter, or even use different colors of icing. The possibilities are endless! And hey, even if they don’t look perfect, they’ll still taste amazing!
Snowflake Sugar Cookies Recipe Tutorial: Ingredient Notes and Substitutions
Sugar Substitutions for Your Snowflake Sugar Cookies Recipe Tutorial
Okay, so maybe you’re watching your sugar intake? No worries! You can swap the granulated sugar in the cookies with a sugar alternative like erythritol or stevia. Just follow the package directions for equivalent measurements. I haven’t tried it myself, but I’ve heard good things! The texture might be slightly different, but they’ll still be yummy!
Dairy-Free Options for Your Snowflake Sugar Cookies Recipe Tutorial
Dairy-free bakers, I got you! For the cookies, just use a good-quality dairy-free butter alternative. There are tons of great ones out there now! Just make sure it’s the stick kind, not the spreadable tub stuff. As for the royal icing, meringue powder should be dairy-free, but always double-check the label just to be safe!
Frequently Asked Questions About This Snowflake Sugar Cookies Recipe Tutorial
How long do these Snowflake Sugar Cookies last?
Alright, so if you manage not to eat them all in one sitting (which, let’s be honest, is a challenge!), these snowflake sugar cookies will stay fresh for about a week. Just store them in an airtight container at room temperature. Oh, and keep them out of direct sunlight, or the colors might fade!
Can I freeze the Snowflake Sugar Cookies?
Yep, you totally can! If you wanna get a head start on your holiday baking, just pop the decorated cookies (make sure the icing is completely dry!) into a freezer-safe container. They’ll keep for up to 2-3 months. When you’re ready to eat them, just thaw them at room temperature for a few hours. Easy peasy!
What if my royal icing is too thick or too thin for this Snowflake Sugar Cookies Recipe Tutorial?
Don’t panic! If your icing’s too thick, add a tiny bit of water, like a teaspoon at a time, until it reaches the right consistency. If it’s too thin, add a tablespoon of powdered sugar. Remember, patience is key! And hey, even if it’s not perfect, they’ll still taste delish!
Storing Your Decorated Snowflake Sugar Cookies
Okay, so you’ve made these gorgeous snowflake cookies…now what? The key is to keep ’em airtight! I usually layer mine in a container with parchment paper between the layers. That way, the icing doesn’t stick. They’ll stay pretty and delicious for about a week – if they last that long!
Estimated Nutritional Information for This Snowflake Sugar Cookies Recipe Tutorial
Okay, so I’m not gonna lie, these snowflake sugar cookies aren’t exactly a health food! But hey, it’s the holidays, right? According to my calculations (and remember, this is just an estimate!), one cookie clocks in at around:
- Calories: 200
- Fat: 8g
- Protein: 2g
- Carbs: 30g
So, yeah, maybe don’t eat the whole batch in one sitting (though I totally wouldn’t judge you if you did!). Everything in moderation, right? Enjoy these little snowflakes as a special treat, and savor every sweet bite!
Rate this Snowflake Sugar Cookies Recipe Tutorial Below!
Hey, if you tried this recipe, let me know what you think! Rate it below and leave a comment – I’d love to hear how your snowflake cookies turned out! Happy baking!


Flawless Snowflake Sugar Cookies Recipe Tutorial in 1 Hour
- Prep Time: 30 minutes
- Cook Time: 2 hours
- Total Time: 2 hours 30 minutes
- Yield: Varies
- Category: Dessert
- Method: Baking
- Cuisine: American
- Diet: Vegetarian
Description
Create beautiful snowflake sugar cookies with this easy recipe and tutorial. Learn how to bake, ice, and decorate your cookies for a festive treat.
Ingredients
- Easy Sugar Cookies (recipe included)
- Royal Icing (recipe included)
- Snowflake cookie cutter
- 2 tipless piping bags
- White sanding sugar or edible glitter (optional)
Instructions
- Bake Easy Sugar Cookies, cut with snowflake cutter. Make Royal Icing.
- Snip a very small opening (approx. 1/2 cm) in tip of 1 piping bag (for piping-consistency icing). Snip a slightly larger opening (approx. 1 cm) in tip of 1 piping bag (for flooding-consistency icing).
- Fill piping-consistency piping bag with 1/2 of the white Royal Icing. Mix an additional tablespoon of water (or amount needed to achieve flooding-consistency icing) into remaining Royal Icing. Fill flooding-consistency tipless piping bag with white flooding icing.
- Outline snowflake cookies with white piping-consistency icing. Let dry for 1-2 minutes. Flood with white flooding-consistency icing. Let dry for 1-2 hours.
- Using white piping-consistency icing, pipe desired pattern or design on snowflake cookies. If you’d like, dip the iced cookies in sanding sugar or brush with edible glitter for shine.
Notes
- Adjust icing consistency as needed for your desired designs.
- Allow ample drying time for the icing to set properly.
- Experiment with different snowflake designs and colors for variety.
Nutrition
- Serving Size: 1 cookie
- Calories: 200
- Sugar: 25g
- Sodium: 50mg
- Fat: 8g
- Saturated Fat: 5g
- Unsaturated Fat: 3g
- Trans Fat: 0g
- Carbohydrates: 30g
- Fiber: 0g
- Protein: 2g
- Cholesterol: 20mg






