

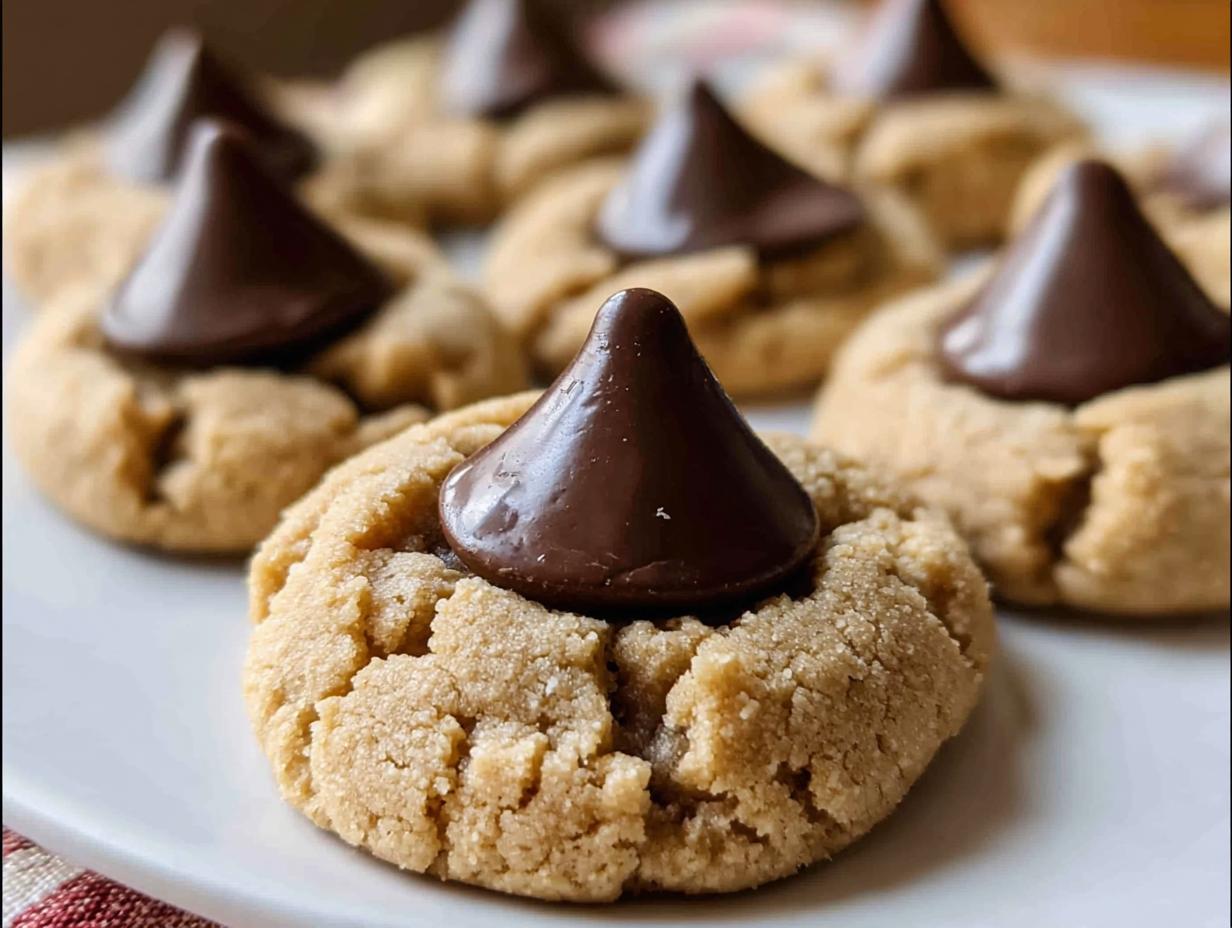
Is there anything better than the smell of cookies baking in the oven? Seriously, it’s pure happiness! And when you combine peanut butter and chocolate? Forget about it! That’s why I’m SO excited to share my recipe for Hershey Kiss Peanut Butter Cookies. These aren’t just ANY cookies, trust me. They’re soft, chewy, and that little chocolate kiss on top? Perfection!
I’ve been making these Hershey Kiss Peanut Butter Cookies for years, and they’re always a hit. My kids BEG for them, and they’re always the first to disappear at potlucks. And the best part? They’re SO easy to make! Seriously, even if you’re not a super experienced baker, you can totally nail this recipe. We’re talking simple ingredients, easy steps, and pure peanut butter chocolate bliss. So, let’s get baking, shall we?
Why You’ll Love These Hershey Kiss Peanut Butter Cookies
Okay, seriously, why *wouldn’t* you love these cookies? But just in case you need convincing, here are a few reasons why this recipe is a total MUST-TRY:
- Super easy to make (even for beginner bakers!)
- They’re always a crowd-pleaser – seriously, everyone loves them!
- That perfect peanut butter and chocolate combo? YES PLEASE!
- They’re just so darn cute with that little Hershey Kiss on top!
Simple Ingredients for Hershey Kiss Peanut Butter Cookies
You probably already have most of these ingredients in your pantry! Flour, sugar, peanut butter…you know, the usual suspects. Nothing fancy or hard-to-find here. That’s what I love about this recipe – so simple!
Quick and Easy Hershey Kiss Peanut Butter Cookies Recipe
Got a craving but short on time? No problem! These Hershey Kiss Peanut Butter Cookies come together in a snap. From start to finish, you’re looking at under an hour. Perfect for a weeknight treat or a last-minute party!
Perfectly Balanced Flavors in Hershey Kiss Peanut Butter Cookies
That salty peanut butter with the sweet chocolate? Ugh, it’s just *chef’s kiss*! They complement each other so perfectly. And the soft, chewy cookie? It’s the perfect vehicle for that amazing flavor combo, trust me!
Hershey Kiss Peanut Butter Cookies Ingredients
Alright, let’s talk ingredients! The good news is, you probably have most of this stuff already. Here’s what you’ll need to whip up a batch of these amazing Hershey Kiss Peanut Butter Cookies:
- 3 cups all-purpose flour (360 grams)
- ½ teaspoon baking soda (3 grams)
- ½ teaspoon baking powder (2 grams)
- 1 teaspoon kosher salt (3 grams)
- 1 cup unsalted butter (226 grams), room temperature (this is important!)
- 1 cup creamy peanut butter (270 grams)
- ⅔ cup dark brown sugar (142 grams)
- ⅔ cup granulated sugar (133 grams)
- 2 large eggs (100 grams), room temperature (again, important!)
- 2 teaspoons pure vanilla extract (8 grams)
- 1 tablespoon milk (14 grams), optional (you might not even need it!)
- 2 pounds Hershey’s Kisses (907 grams), wrappers removed (this takes a minute, but it’s worth it!)
How to Make Hershey Kiss Peanut Butter Cookies: Step-by-Step
Okay, here’s the part you’ve been waiting for! Let’s get down to the business of actually making these Hershey Kiss Peanut Butter Cookies. Don’t worry, it’s way easier than it looks! I promise, if I can do it, you can do it. Just follow these steps, and you’ll be munching on warm, peanut buttery, chocolatey goodness in no time!
Preparing the Dough for Hershey Kiss Peanut Butter Cookies
First things first, let’s get that dough ready! You’ll want to line two baking sheets with parchment paper – this makes cleanup a breeze, seriously! Then, in a bowl, whisk together 3 cups of flour, ½ teaspoon of baking soda, ½ teaspoon of baking powder, and 1 teaspoon of salt. Set that aside for now.
Next, in a bigger bowl (or your stand mixer, if you’re fancy!), cream together 1 cup of softened butter and 1 cup of peanut butter until it’s nice and smooth. Then, add ⅔ cup of brown sugar and ⅔ cup of granulated sugar and beat until it’s all light and fluffy. Now, crack in those 2 eggs (make sure they’re room temperature!) and add 2 teaspoons of vanilla extract. Mix it all up until it’s just combined. Don’t overmix!
Gradually add the flour mixture to the wet ingredients, mixing until it’s *just* incorporated. If the dough seems too stiff, add 1 tablespoon of milk. Now, this is important: cover the dough and refrigerate it for at least 30 minutes. Trust me, this chilling step prevents the cookies from spreading too much in the oven. Nobody wants flat cookies!
Baking Your Hershey Kiss Peanut Butter Cookies to Perfection
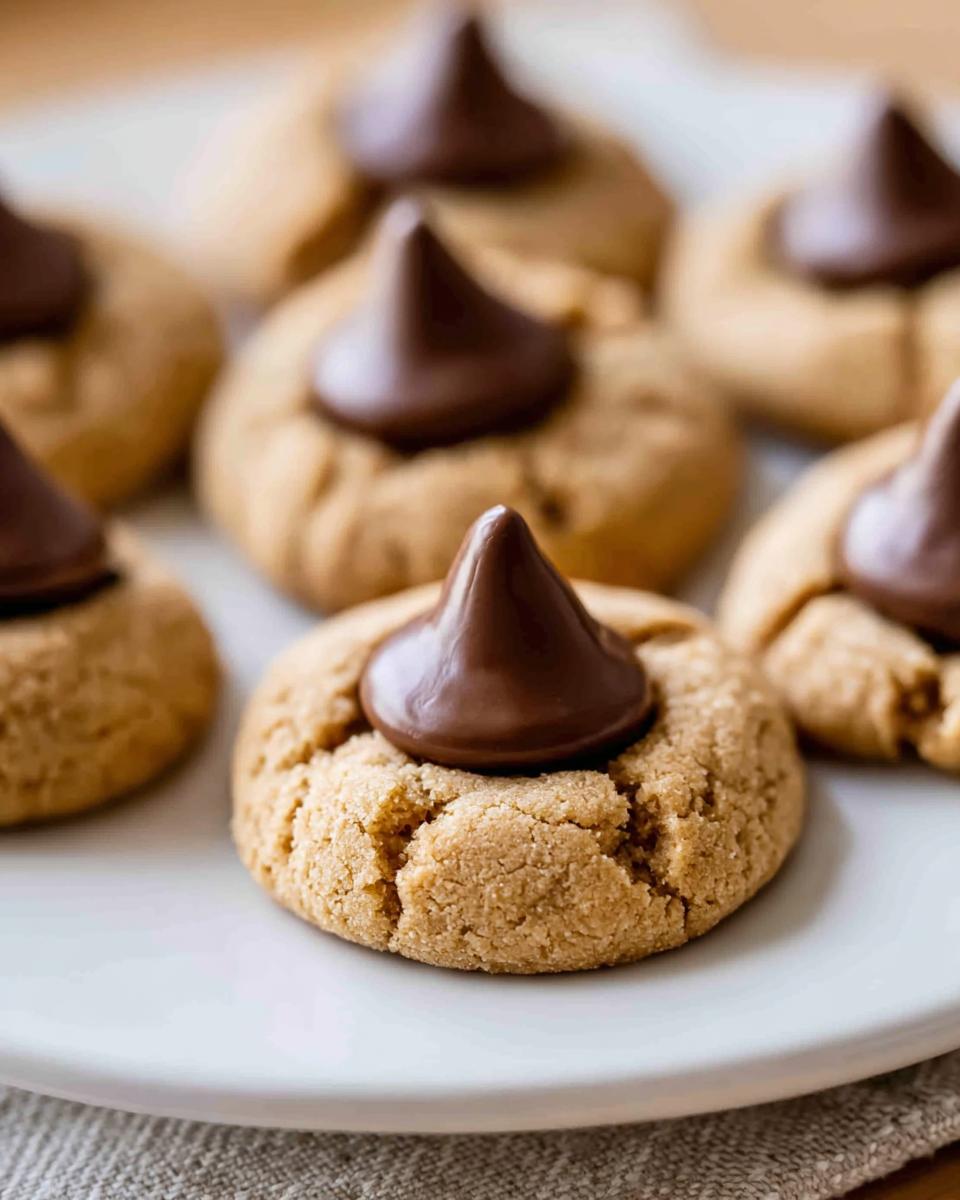
Alright, time to bake! Preheat your oven to 375°F (190°C). While it’s heating up, shape the chilled dough into ¾-inch balls and place them on your prepared baking sheets. Now, bake for 8 minutes. Then, take them out of the oven and immediately press a Hershey Kiss into the center of each cookie. This is the fun part!
Pop the cookies back into the oven for another 2 minutes. Keep a close eye on them – you don’t want them to burn! Once they’re done, they should be lightly golden around the edges. The bottoms will be a little more brown. This is how you know they’re ready!
Cooling and Storing Your Hershey Kiss Peanut Butter Cookies
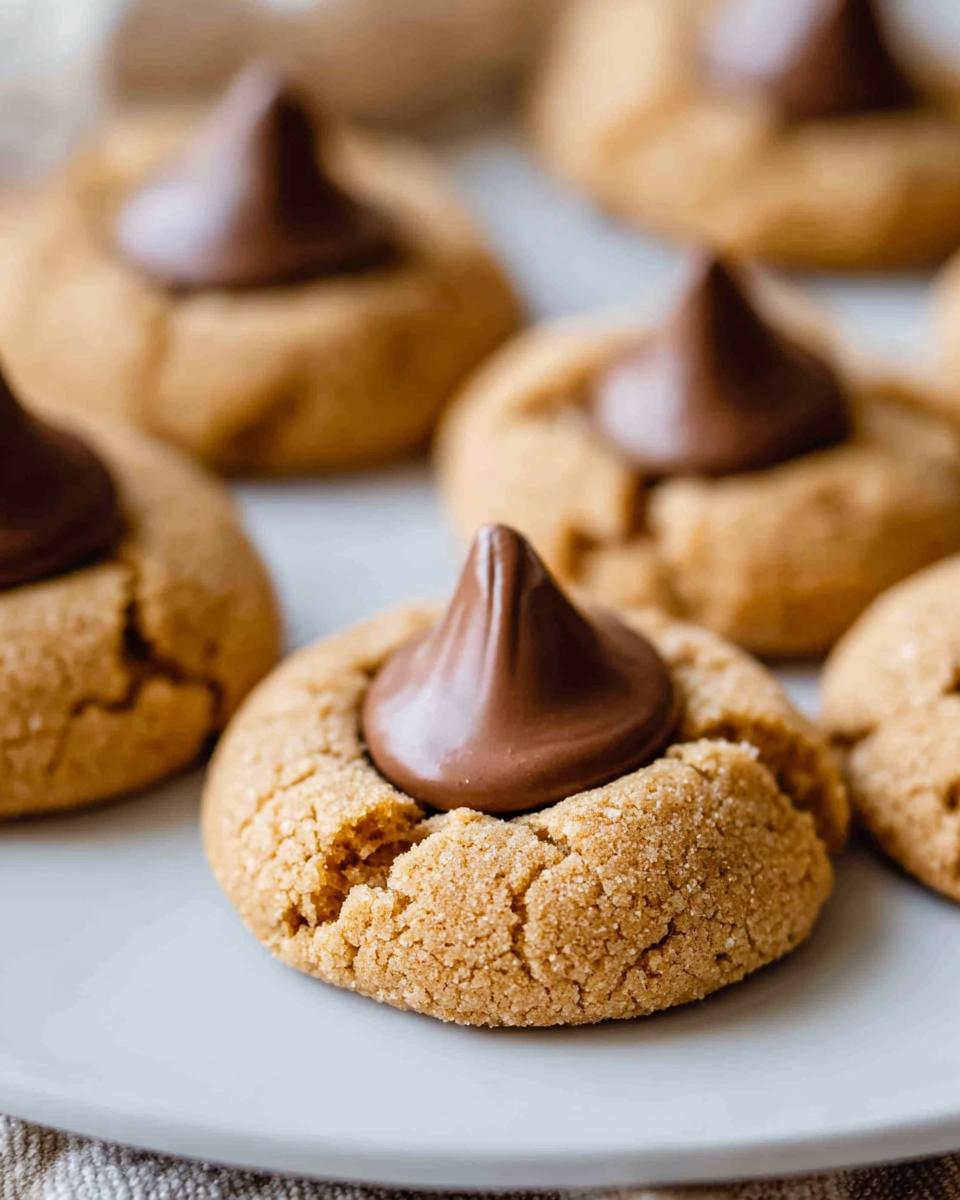
Let the cookies cool on the baking sheets for a couple of minutes before transferring them to a wire rack to cool completely. This helps them firm up a bit. And that’s it! You’ve made Hershey Kiss Peanut Butter Cookies! If you have any leftovers (doubtful!), store them in an airtight container at room temperature.
Tips for the Best Hershey Kiss Peanut Butter Cookies
Okay, so you’ve got the basics down. But want to take your Hershey Kiss Peanut Butter Cookies to the *next level*? Here are a few of my favorite tips and tricks:
First off, seriously, use room temperature butter and eggs! It makes a HUGE difference in the texture of the cookies. The butter creams better, and the eggs incorporate more evenly. Trust me on this one!
Also, don’t overbake them! Slightly underbaked cookies are way better than dry, crumbly ones. I always err on the side of caution and take them out when they’re still a little soft in the center. They’ll firm up as they cool!
And finally, don’t be afraid to experiment! Try using different kinds of Hershey Kisses (like the caramel-filled ones!) or adding a sprinkle of sea salt on top for a sweet and salty kick. Have fun with it!
Ingredient Notes and Substitutions for Hershey Kiss Peanut Butter Cookies
Okay, let’s talk swaps! You can totally use different nut butters in these Hershey Kiss Peanut Butter Cookies. Almond butter? Cashew butter? Go for it! Just keep in mind that it’ll change the flavor a bit. Also, make sure your peanut butter is creamy – the chunky kind will make the cookies a little weird. I haven’t tried it, but I am guessing!
Frequently Asked Questions About Hershey Kiss Peanut Butter Cookies
Got questions? I’ve got answers! Here are a few of the most common questions I get asked about my Hershey Kiss Peanut Butter Cookies. If you’re still scratching your head after reading these, just drop a comment below!
Can I use a different kind of nut butter for these Hershey Kiss Peanut Butter Cookies?
Absolutely! While peanut butter is classic, almond butter or cashew butter work great too! Just remember, it’ll slightly change the flavor profile of your Hershey Kiss cookies. But hey, that could be a good thing! Experiment and see what you like best!
How do I prevent my Hershey Kiss Peanut Butter Cookies from spreading too thin?
Ah, the dreaded cookie spread! The key is chilling the dough! Seriously, don’t skip that step. Also, make sure your oven temperature is accurate. An oven that’s too hot can cause cookies to spread. And resist the urge to add extra liquid to the dough!
Can I freeze Hershey Kiss Peanut Butter Cookies dough?
Yes, you totally can! This is a great way to have cookies on hand whenever a craving strikes. Just shape the dough into balls, place them on a baking sheet, and freeze them until solid. Then, transfer them to a freezer bag. When you’re ready to bake, just pop them straight into the oven (you might need to add a minute or two to the baking time). Boom! Freshly baked Hershey Kiss Peanut Butter Cookies anytime!
Storing Your Homemade Hershey Kiss Peanut Butter Cookies
So, you’ve baked a batch of these beauties! Now, how do you keep them fresh? Simple! Just pop them in an airtight container at room temperature. They’ll stay soft and delicious for about 3-4 days…if they even last that long! Good luck with *that*!
Nutritional Information Disclaimer for Hershey Kiss Peanut Butter Cookies
Okay, quick note about nutrition! I’m not a nutritionist, so I can’t give you exact numbers. Plus, the calories and stuff will vary depending on the brands you use. Just enjoy your Hershey Kiss Peanut Butter Cookies, okay? Everything in moderation!
Share Your Hershey Kiss Peanut Butter Cookies Creations!
Okay, you made ’em, now show ’em off! Seriously, I want to see your Hershey Kiss Peanut Butter Cookies! Leave a comment below and tell me how they turned out. Did you add anything fun? Rate the recipe, too! And don’t forget to share your pics on social media – tag me, so I can see your amazing creations! Happy baking!
Print
Hershey Kiss Cookies: The Easiest Irresistible Recipe
- Prep Time: 10 minutes
- Cook Time: 10 minutes
- Total Time: 48 minutes
- Yield: 96 cookies 1x
- Category: Dessert
- Method: Baking
- Cuisine: American
- Diet: Vegetarian
Description
Peanut butter cookies topped with Hershey’s Kisses.
Ingredients
- 3 cups all-purpose flour (360 grams)
- ½ teaspoon baking soda (3 grams)
- ½ teaspoon baking powder (2 grams)
- 1 teaspoon kosher salt (3 grams)
- 1 cup unsalted butter (226 grams), room temperature
- 1 cup creamy peanut butter (270 grams)
- ⅔ cup dark brown sugar (142 grams)
- ⅔ cup granulated sugar (133 grams)
- 2 large eggs (100 grams), room temperature
- 2 teaspoons pure vanilla extract (8 grams)
- 1 tablespoon milk (14 grams), optional
- 2 pounds Hershey’s Kisses (907 grams), wrappers removed
Instructions
- Line 2 baking sheets with parchment paper.
- Whisk flour, baking soda, baking powder, and salt together.
- Cream butter and peanut butter until smooth.
- Add brown sugar and granulated sugar and beat until smooth.
- Add eggs and vanilla and beat until incorporated.
- Add flour mixture and mix until just incorporated.
- If the mixture is too stiff, add milk.
- Cover and refrigerate dough for 30 minutes. Preheat oven to 375°F.
- Shape dough into ¾-inch balls and place on baking sheets.
- Bake for 8 minutes, remove from oven, and press a candy kiss in the middle of each cookie.
- Place the cookies back in the oven and bake an additional 2 minutes.
- Transfer the cookies to a cooling rack after 2 minutes.
Notes
- Use room temperature ingredients for best results.
- Chill the dough to prevent cookies from spreading too much.
- Adjust baking time based on your oven.
Nutrition
- Serving Size: 1 cookie
- Calories: Unknown
- Sugar: Unknown
- Sodium: Unknown
- Fat: Unknown
- Saturated Fat: Unknown
- Unsaturated Fat: Unknown
- Trans Fat: Unknown
- Carbohydrates: Unknown
- Fiber: Unknown
- Protein: Unknown
- Cholesterol: Unknown






