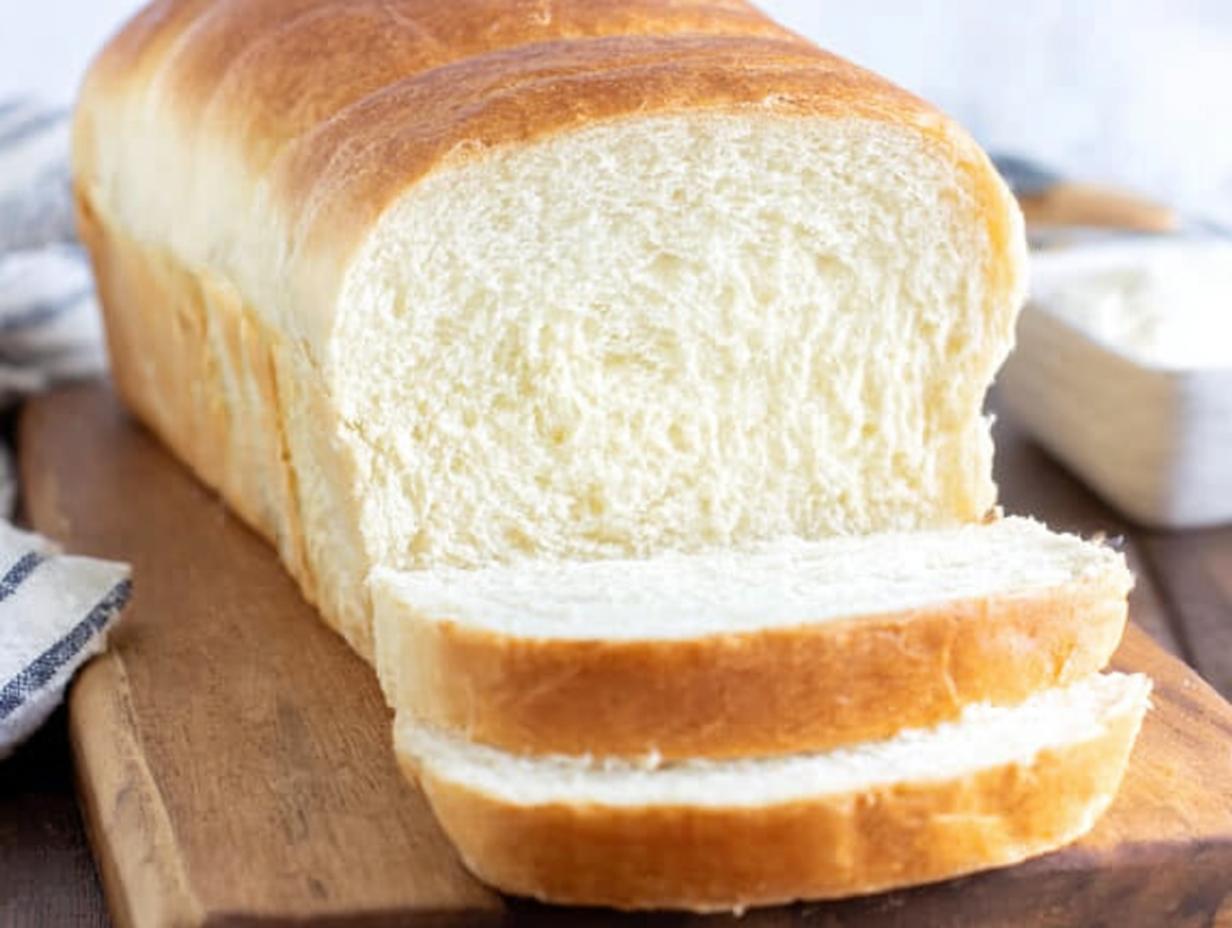
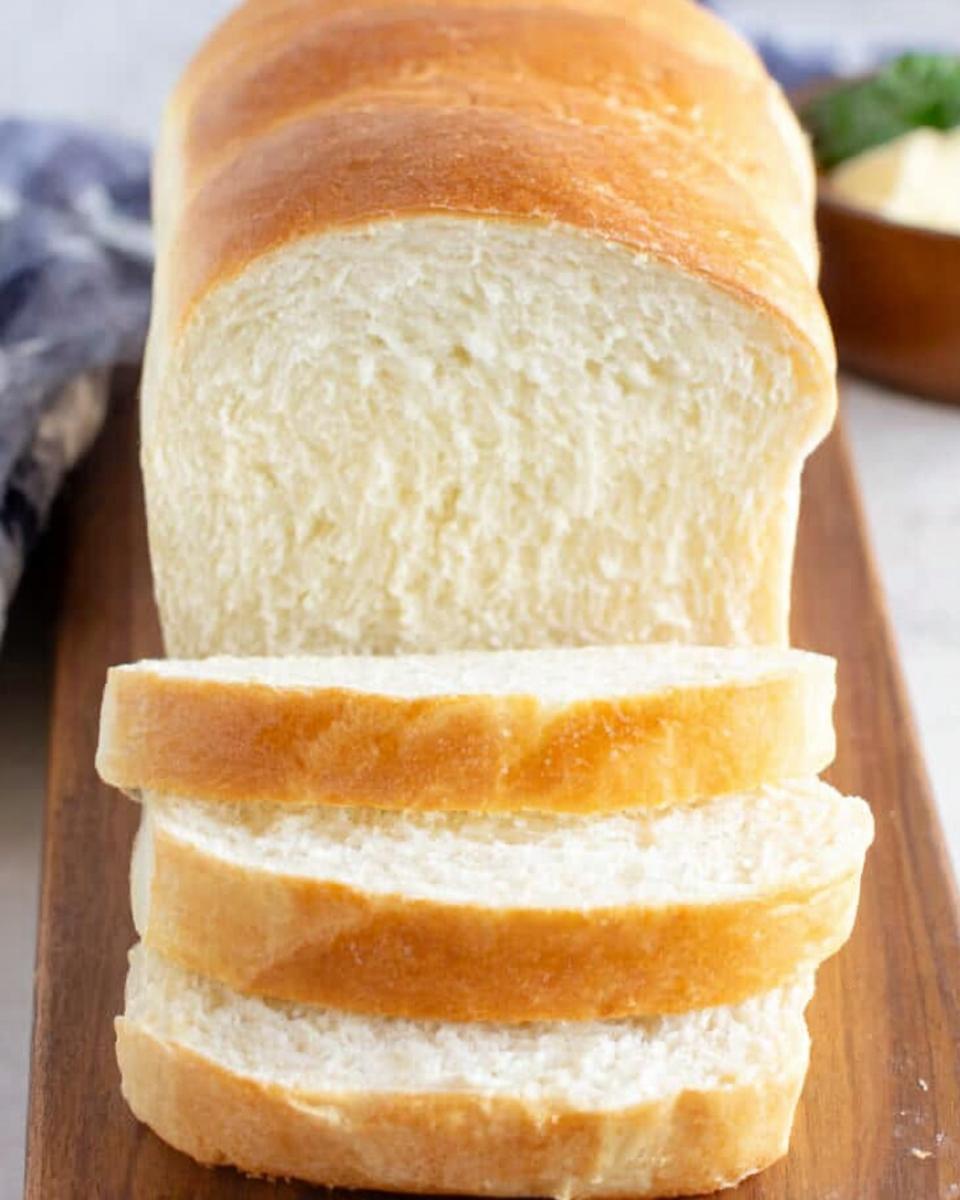
There’s just nothing like the smell of homemade bread baking in the oven, is there? Seriously, it fills the whole house with this warm, cozy feeling that just makes you want to curl up with a slice (slathered in butter, of course!). It’s one of life’s simple pleasures, and trust me, you CAN bake it yourself!
I remember the first time I tried to make bread. Oh boy, it was a disaster! It came out flatter than a pancake and hard as a rock. But I was determined, and after a whole lot of trial and error (and maybe a few tears), I finally figured it out. And guess what? It’s actually way easier than you think. This recipe is super simple, and the results are seriously delicious. So, if I can do it, you totally can too!
Baking is one of my favorite things to do, and I’ve been baking for over 30 years. I have baked all kinds of breads, and this recipe is one of the best for beginners!
Why You’ll Love This Homemade Bread Recipe
Simple Ingredients
Seriously, you probably have most of this stuff in your pantry already! We’re talking flour, water, yeast… the basics. Nothing fancy needed here!
Easy to Follow
I’ve broken everything down into super clear steps, so even if you’ve never baked bread before, you’ll be just fine. Don’t worry, I’ve got you!
Delicious Taste
Oh my goodness, the taste! There’s nothing like that first bite of warm, homemade bread. It’s soft, slightly chewy, and just plain amazing. Trust me on this one!
Perfect for Beginners
If you’re a little nervous about baking bread, don’t be! This recipe is designed with beginners in mind. I promise, you can do it!
Impress Your Family and Friends
Imagine serving up a loaf of freshly baked bread to your family and friends. They’ll be so impressed! Get ready for the compliments to roll in!
Ingredients for Homemade Bread
Okay, let’s talk ingredients! Don’t worry, you don’t need a ton of stuff for amazing homemade bread. Just a few simple things, and you’re good to go. I’m listing everything out for you, nice and clear, so there’s no confusion. Promise!
Wet Ingredients
First up, the wet stuff! You’ll need 2 cups of warm water – and I mean *warm*, not hot! Aim for around 105-115 degrees Fahrenheit. Then, 1 tablespoon of active dry yeast, 1/4 cup of honey (or sugar, if you prefer!), and 2 tablespoons of oil. I usually use canola or vegetable oil, but whatever you’ve got on hand is probably fine. Don’t stress it!
Dry Ingredients
Now for the dry! You’ll need 2 teaspoons of salt (don’t skip it, it’s important!) and about 4 to 5 1/2 cups of all-purpose or bread flour. I usually start with 4 cups and add more as needed. You’ll see why in the instructions. Flour is one of those things that can vary, so don’t be afraid to adjust it a little!
Equipment Needed for Homemade Bread
Alright, before we get started, let’s make sure you’ve got all the right tools. You don’t need a ton of fancy stuff to make amazing homemade bread, but a few basics will definitely make your life easier. So, let’s take a peek at what you’ll need!
Mixing Bowls
You’ll want a couple of good-sized mixing bowls. I usually use a large one for mixing the dough and a smaller one for, well, whatever! Glass or stainless steel works great. I love my glass bowls because I can see what’s going on!
Measuring Cups and Spoons
Gotta measure accurately! A standard set of measuring cups and spoons is a must. You know, the usual 1 cup, 1/2 cup, 1 tablespoon, etc. Nothing too exciting here, but super important!
9×5 Inch Loaf Pans
You’ll need *two* 9×5 inch loaf pans for this recipe. Make sure they’re well-greased, or you can use parchment paper. Trust me, it makes getting the bread out *so* much easier!
Wire Cooling Rack
This is a must for cooling your bread properly. You don’t want a soggy bottom, do you? A wire rack lets the air circulate all around the loaf, so it cools evenly. Simple but essential!
Optional Stand Mixer
Okay, this one’s totally optional, but if you have a stand mixer, it’ll definitely make kneading the dough a breeze. But don’t worry if you don’t have one – you can totally knead by hand! It’s a bit of a workout, but hey, you get fresh bread *and* exercise. Win-win!
Step-by-Step Instructions for Perfect Homemade Bread
Okay, here comes the fun part! Let’s get down to business and make some seriously amazing homemade bread. Don’t worry, I’ll walk you through every single step, so you can’t mess it up (well, hopefully!). Just follow along, and you’ll be enjoying fresh bread in no time!
Preparing the Dough
First things first, we need to wake up our yeast! In a large bowl (or the bowl of your stand mixer, if you’re fancy!), add the warm water, yeast, and a tiny pinch of that sugar or honey. Let it sit for about 5-10 minutes. It should get all foamy and bubbly – that means the yeast is alive and kicking! If it *doesn’t* bubble, your yeast might be dead, and you’ll need to start over. Bummer, I know!
Once your yeast is ready to go, add the rest of the sugar or honey, the salt, the oil, and 3 cups of flour. Mix it all together until it’s combined. Then, add another cup of flour and mix again. Now, here’s where it gets a little tricky. With the mixer running (or if you’re kneading by hand, just keep going!), add more flour, about a half cup at a time, until the dough starts to pull away from the sides of the bowl. You might need a little more flour, you might not. Just go by feel! You want a dough that’s slightly sticky, but not so sticky that it’s clinging to everything.
Kneading the Homemade Bread Dough
Alright, time to knead! If you’re using a stand mixer, just let it run on medium speed for about 4-5 minutes. If you’re kneading by hand (go you!), lightly flour your surface and knead for about 5-8 minutes. The dough should become smooth and elastic. It’s a bit of a workout, but it’s worth it! You’ll know it’s ready when it springs back slightly when you poke it. Don’t over-knead, though, or your bread will be tough. Nobody wants that!
First Rise
Now, we need to let our dough rise and get all puffy! Grease a large bowl with oil or cooking spray (so the dough doesn’t stick!), and place the dough inside, turning it around to coat it. Cover the bowl with a dish towel or plastic wrap, and let it rise in a warm place until it’s doubled in size. This usually takes about 1 1/2 hours, but it can take longer depending on how warm your kitchen is. Just be patient! This is where the magic happens!
Shaping and Second Rise
Okay, the dough has doubled! Now, gently punch it down to get rid of those air bubbles. Divide the dough into two equal portions. Shape each portion into a long log and place it into your greased loaf pans. Then, cover the pans with a lightweight, dry dish towel. Let the dough rise again for about 45 minutes to an hour, or until it’s risen about an inch above the top of the pans. This is the second rise, and it’s just as important as the first! Be gentle when removing the towel so you don’t deflate your beautiful loaves!
Baking Your Homemade Bread
Preheat your oven to 350 degrees Fahrenheit. Once the oven is hot, bake the bread for about 30-33 minutes, or until it’s golden brown on top. To check if it’s done, give the top of a loaf a gentle tap. It should sound hollow. If it doesn’t, bake it for a few more minutes. Ovens can vary, so keep an eye on it!
Cooling and Storing
Take the loaves out of the oven and immediately invert them onto a wire cooling rack. Brush the tops with melted butter (because why not?). Let the bread cool for at least 10 minutes before slicing. I know it’s hard to resist, but trust me, it’s better to wait! Once it’s cool, store it in an airtight container or bag for 2-3 days at room temperature, or up to 5 days in the refrigerator. If you want to keep it longer, you can totally freeze it! Just wrap it tightly in plastic wrap and then in foil.
Tips for the Best Homemade Bread
Okay, so you’ve got the recipe, you’ve got the instructions… but what about those little extra things that can really take your homemade bread to the next level? Don’t worry, I’ve got you covered! Here are a few of my top tips for baking the *absolute best* bread. Ready?
Proofing Your Yeast
Seriously, don’t skip this step! Making sure your yeast is alive and active is *crucial* for getting a good rise. If your yeast doesn’t foam up when you mix it with warm water and sugar, it’s probably dead, and you’ll need to start with fresh yeast. Trust me, it’s worth the extra few minutes to check!
Adjusting Flour
Flour can be tricky! Depending on the humidity and other factors, you might need to use a little more or a little less than the recipe calls for. The key is to add the flour gradually, until the dough pulls away from the sides of the bowl but is still slightly sticky. Don’t be afraid to experiment a little! You’ll get the hang of it, I promise!
Cooling Completely
I know, I know, it’s *so* tempting to slice into that warm bread right away. But trust me on this one: let it cool completely before slicing! If you slice it while it’s still warm, it’ll be gummy and kind of fall apart. Patience, my friend! It’s worth the wait!
Warm environment for rising
Yeast loves warmth! If your house is cold, your dough will take longer to rise. Try putting it in a slightly warmed oven (turned off, of course!), or near a sunny window. You could also put the dough in the microwave with a cup of boiling water! The steam will create a warm and cozy environment for the yeast to do its thing.
Homemade Bread Variations
Okay, so you’ve mastered the basic homemade bread recipe… now what? Time to get creative! The best part about baking is that you can totally customize things to your own taste. So, let’s talk about some fun ways to change up your bread and make it your own!
Add Herbs
Want to add a little something extra? Try mixing in some fresh herbs! Rosemary and thyme are both amazing in bread. Just chop them up finely and add them to the dough when you add the flour. Mmm, so good!
Use Different Flour
Feeling adventurous? Try using a different kind of flour! Whole wheat flour will give your bread a nuttier flavor and a slightly denser texture. Rye or spelt flour are also great options. Just keep in mind that different flours absorb water differently, so you might need to adjust the amount of liquid in the recipe. Oops, did I say the “A” word? Adjust, adjust, adjust!
Sweeten it Up
Want a sweeter bread? Add a little cinnamon or some dried fruit! Raisins, cranberries, or chopped apricots are all delicious. Just toss them in with the flour and mix ’em up. Yum!
Seeds
For a little extra crunch and flavor, try adding some seeds! Sesame seeds and poppy seeds are both great choices. You can sprinkle them on top of the loaf before baking, or mix them into the dough. It’s up to you!
Frequently Asked Questions About Homemade Bread
Baking homemade bread can seem intimidating, I get it! But trust me, once you get the hang of it, it’s a breeze. I’ve compiled some of the most common questions I get asked, so hopefully, this will help you troubleshoot any issues you might run into. Let’s get to it!
Why didn’t my bread rise?
Oh no, a flat loaf! There are a few reasons why this might happen. First, make sure your yeast is alive (see my tip about proofing it!). Also, the temperature of your water is super important – too hot and you’ll kill the yeast, too cold and it won’t activate. Finally, make sure you’re letting the dough rise in a warm enough place. If your kitchen is cold, it’ll take much longer to rise, or it might not rise at all! Be patient, and give it a little extra time.
Can I use instant yeast?
Yep, you totally can! If you’re using instant yeast (also called rapid rise), you can skip the proofing step and just add it directly to the flour. You’ll typically use a little less instant yeast than active dry yeast – check the package for instructions. The rising time might also be a bit shorter, so keep an eye on it!
How do I store Homemade Bread?
To keep your homemade bread fresh for as long as possible, store it in an airtight container or a resealable plastic bag at room temperature. You can also store it in the fridge, but it might dry out a bit faster. I often slice the loaf and then wrap the slices, because, let’s be honest, a whole loaf rarely lasts a day at my house!
Can I freeze the dough?
Absolutely! Freezing dough is a great way to have fresh bread whenever you want it. Just wrap the dough tightly in plastic wrap and then in foil, and freeze it for up to 2-3 months. When you’re ready to bake, thaw the dough in the refrigerator overnight, and then let it rise as usual. It might take a little longer to rise after being frozen, so be patient!
What temperature should the water be?
This is a biggie! The water for activating your yeast should be warm, but not too hot. Aim for around 105-115 degrees Fahrenheit. If you don’t have a thermometer, just think lukewarm – it should feel comfortably warm to the touch, but not scalding. If it’s too hot, it’ll kill the yeast, and you’ll end up with a flat, sad loaf. And nobody wants that!
Nutritional Information for Homemade Bread
Okay, so you wanna know about the nutritional stuff, huh? Well, here’s the deal: I’m giving you a *rough* estimate, but keep in mind that the exact nutrition info can vary depending on the ingredients you use. Different brands have different nutritional values, ya know? So, take this with a grain of salt (pun intended!).
Enjoy Your Freshly Baked Homemade Bread!
Alright, that’s it! You’ve got all the secrets to baking amazing homemade bread. Now get in that kitchen and get baking! Seriously, you’re gonna love it. And hey, when you do try the recipe, come back and leave a comment! I wanna hear all about it. And don’t forget to share your pics – I wanna see those beautiful loaves! Happy baking, friends!
Print
Homemade Bread: Ditch Store-Bought, Bake 2 Amazing Loaves
- Prep Time: 25 minutes
- Cook Time: 33 minutes
- Total Time: 3 hours
- Yield: 2 loaves 1x
- Category: Bread
- Method: Baking
- Cuisine: American
- Diet: Vegetarian
Description
Make delicious homemade bread with this simple recipe. You can enjoy fresh bread at home.
Ingredients
- 2 cups warm water (105–115 degrees), (474g)
- 1 Tablespoons active dry yeast
- 1/4 cup honey or sugar, (85g honey, 50g sugar)
- 2 teaspoons salt
- 2 Tablespoons oil (canola or vegetable), (30 ml)
- 4 – 5 1/2 cups all-purpose or bread flour, (500g-688g)
Instructions
- Prepare the dough: In a large bowl or stand mixer add the yeast, water and a pinch of the sugar or honey. Allow to rest for 5-10 minutes until foaming and bubbly.
- Add remaining sugar or honey, salt, oil, and 3 cups of flour. Mix to combine.
- Add another cup of flour and mix to combine. With the mixer running add more flour, ½ cup at a time, until the dough begins to pull away from the sides of the bowl. Add a little more flour, if needed.
- Knead the dough: Mix the dough for 4-5 minutes on medium speed (or knead with your hands on a lightly floured surface, for 5-8 minutes).
- First Rise: Grease a large bowl with oil or cooking spray and place the dough inside, turning to coat. Cover with a dish towel or plastic wrap and allow to rise in a warm place until doubled in size, about 1 ½ hours.
- Spray two 9×5” bread pans generously with cooking spray on all sides.
- Punch the dough down well to remove air bubbles. Divide into two equal portions. Shape each ball into long logs and place into greased loaf pans.
- Second rise: Cover pans with a lightweight, dry dish towel. Allow dough to rise again for about 45 minutes to one hour, or until risen about 1 inch above the loaf pans. Gently removing covering.
- Bake: Preheat oven to 350 F. Bake bread for about 30-33 minutes, or until golden brown on top. Give the top of a loaf a gentle tap; it should sound hollow.
- Invert the loaves onto a wire cooling rack. Brush the tops with butter and allow to cool for at least 10 minutes before slicing.
- Once cool, store in an airtight container or bag for 2-3 days at room temperature, or up to 5 days in the refrigerator.
Notes
- Proof the yeast to ensure it is active.
- Adjust flour quantity as needed.
- Let bread cool before slicing.
Nutrition
- Serving Size: 1 slice
- Calories: 150
- Sugar: 5g
- Sodium: 200mg
- Fat: 3g
- Saturated Fat: 0.5g
- Unsaturated Fat: 2g
- Trans Fat: 0g
- Carbohydrates: 25g
- Fiber: 1g
- Protein: 4g
- Cholesterol: 0mg