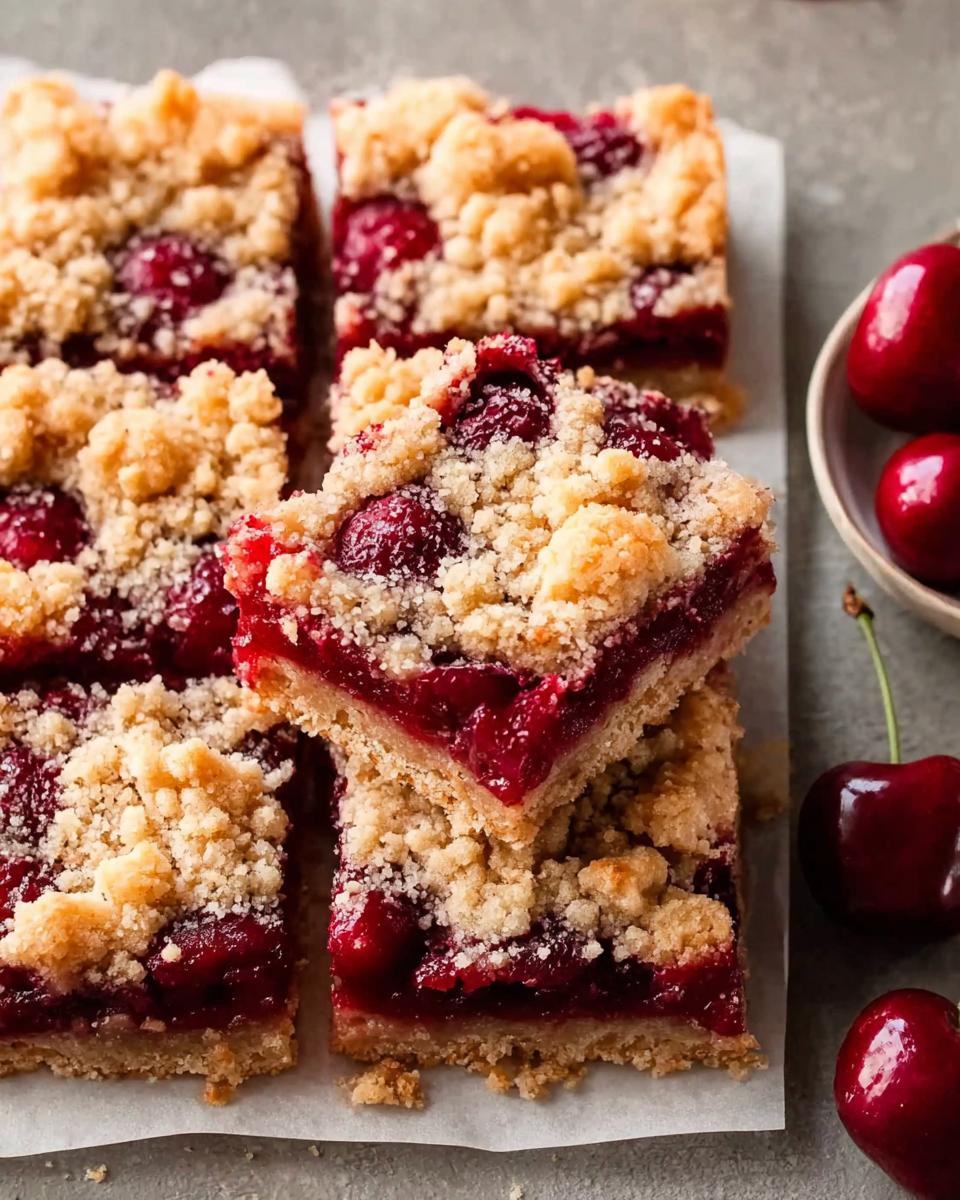
Okay, let’s talk dessert! I’m *always* on the hunt for something sweet that doesn’t take all day, and let me tell you, these Quick Cherry Crumble Bars are IT. Seriously, from craving to “OMG, this is amazing!” in under an hour? Yes, please!
These bars are ridiculously easy to throw together, and they’re always a hit. I remember when I was little, my grandma used to make cherry pie every summer. The smell of those cherries baking… pure magic! These Quick Cherry Crumble Bars give me that same warm, fuzzy feeling, but without all the fuss. They’re kinda like a cherry pie, but way easier to eat. Trust me, you’ll be making these on repeat!
And the best part? You probably already have most of the ingredients in your pantry. So, what are we waiting for? Let’s get baking!
Why You’ll Love These Quick Cherry Crumble Bars
Seriously, what’s not to love? But just in case you need convincing, here’s why these bars are about to become your new go-to dessert:
Quick and Easy Dessert
I’m not kidding when I say these are *quick*. We’re talking minimal prep time, and the oven does most of the work. Don’t let the “crumble” part fool you; it’s way easier than it sounds!
Perfect for Any Occasion
Need something for a potluck? These bars are your answer. Craving a sweet snack? Bam! Quick Cherry Crumble Bars to the rescue! They’re seriously perfect for just about anything.
Delicious Cherry Flavor
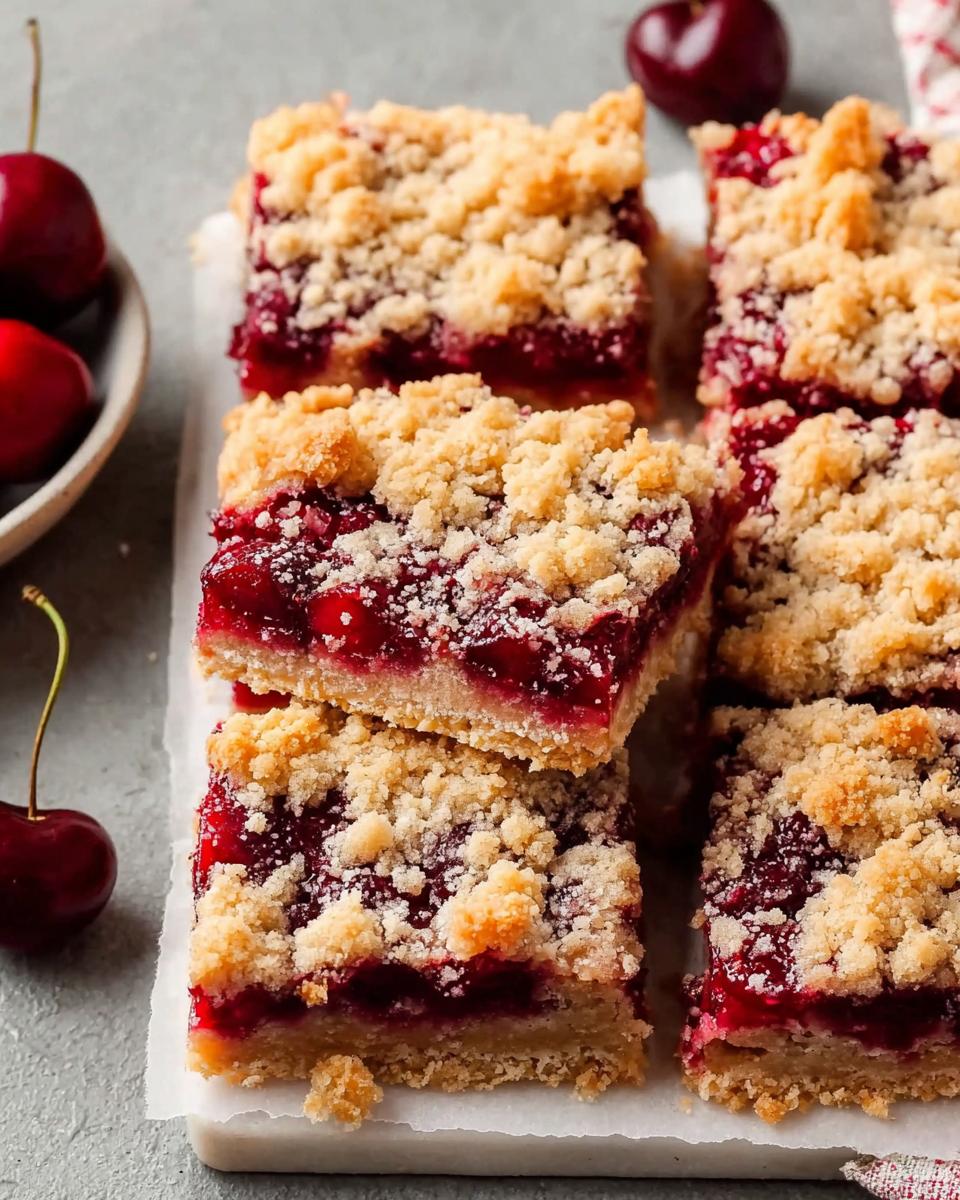
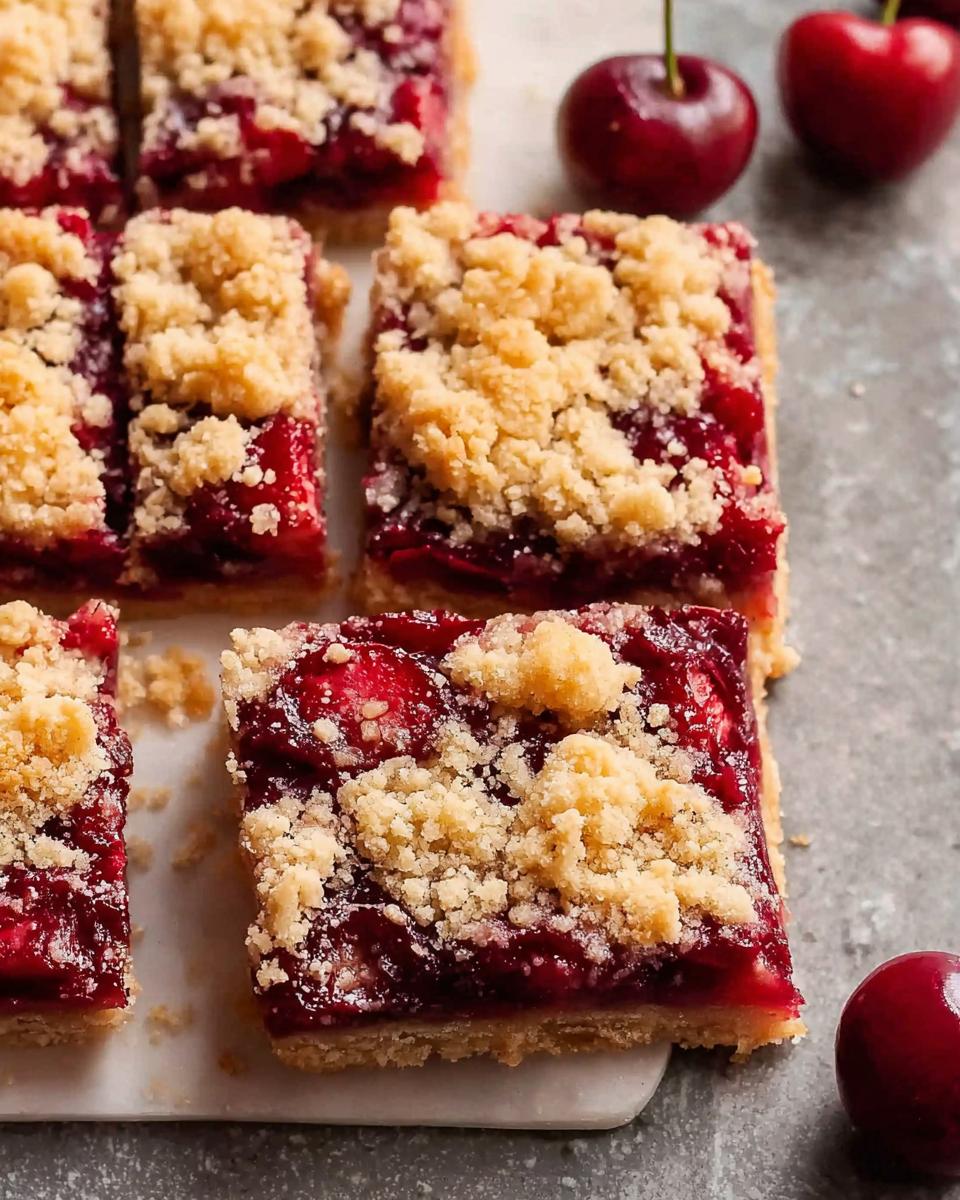
Oh, the cherries! That sweet-tart cherry flavor is just *amazing*. And when they’re baked with that buttery crumble topping? Forget about it! It’s a total flavor explosion in every bite!
Ingredients for Quick Cherry Crumble Bars
Alright, let’s talk ingredients! Nothing too crazy here, promise. But using the right stuff *does* make a difference. So, grab your measuring cups, and let’s get this show on the road!
The Crust Ingredients
This crust is seriously the best part. It’s buttery, crumbly, and oh-so-delicious. Here’s what you’ll need:
1/2 cup chilled unsalted butter (cut into 1/2-inch cubes)
Okay, this is important! That butter needs to be *cold*. Like, straight-from-the-fridge cold. Cut it into little cubes so it’s easier to work with. Trust me on this one!
2 tbsp milk
Any kind of milk works here. I usually just use whatever I have on hand. Whole milk, 2%, even almond milk in a pinch. No biggie!
1/4 tsp salt
Don’t skip the salt! It really brings out the sweetness of the other ingredients. Just a pinch is all you need.
3/4 cup granulated sugar
Plain ol’ granulated sugar is what you want here. It adds the perfect amount of sweetness to the crust.
1/2 tsp baking powder
This gives the crust a little lift, so it’s not too dense. Don’t skip it!
1 egg (large, room temperature)
Room temperature eggs blend better, so try to remember to take it out of the fridge a little while before you start. Large size is what we’re after here.
1 3/4 cups all-purpose flour
Good ol’ all-purpose flour is the base of our crust. Make sure you measure it correctly! I like to spoon it into the measuring cup and then level it off.
The Cherry Filling Ingredients
Now for the star of the show: the cherries! This filling is sweet, tart, and totally irresistible.
2 tbsp cornstarch
This helps to thicken the cherry filling so it’s not too runny. Nobody wants a soggy crumble bar!
2 1/4 cups fresh pitted cherries
Fresh cherries are *the best* for this recipe! Make sure they’re pitted, unless you want a surprise crunch (not the good kind!). If you only have frozen, don’t worry, I got you – see the substitutions section later.
3 tbsp granulated sugar
A little extra sugar to sweeten up those cherries. Adjust to taste, depending on how sweet your cherries are!
How to Make Quick Cherry Crumble Bars
Okay, time to get down to business! Here’s how to actually *make* these amazing Quick Cherry Crumble Bars. Don’t worry, it’s easier than you think. Just follow along, and you’ll be munching on these in no time!
Preparing the Crust for Quick Cherry Crumble Bars
This crust is seriously the foundation of all that’s good in this dessert. So, let’s get it right!
Combining Dry Ingredients
Grab a large bowl, and toss in your flour, sugar, baking powder, and salt. Whisk it all together until it’s nicely combined. This just makes sure everything’s evenly distributed, ya know?
Adding Butter, Egg, and Milk
Now, for the fun part! Grate that cold butter right into the bowl with the dry ingredients. Use a pastry blender or your fingers (if you’re feeling brave!) to cut the butter into the flour until it looks like coarse crumbs. Then, add your egg and milk, and stir until just combined. Don’t overmix! It’s okay if there are still some streaks of flour.
Pressing the Crust
Take about 2/3 of the dough and press it evenly into your prepared baking dish. I like to use my fingers to make sure it’s nice and snug. This will be the base of your Quick Cherry Crumble Bars, so make it count!
Making the Cherry Filling for Quick Cherry Crumble Bars
Alright, let’s get those cherries ready for their starring role!
Preparing the Cherries
In a medium bowl, mash those pitted cherries with a fork or a potato masher. You don’t want them completely smooth, just broken down a bit. Then, strain off any excess liquid. This is *super* important, or you’ll end up with soggy bars!
Combining with Sugar and Cornstarch
Add the sugar and cornstarch to the mashed cherries, and stir until everything’s nicely combined. This is what’s gonna make that filling sweet and thick. Yum!
Assembling and Baking Quick Cherry Crumble Bars
Almost there! Time to put it all together and bake these babies to golden perfection!
Spreading the Filling
Pour that delicious cherry mixture right over the crust in your baking dish. Spread it out evenly so every bite is packed with cherry goodness.
Adding the Crumb Topping
Crumble the remaining dough over the cherry filling. You can just pinch off little pieces and sprinkle them around. Don’t worry about making it perfect; a little bit of variation is what makes it look so rustic and yummy!
Baking Instructions
Pop those Quick Cherry Crumble Bars into your preheated oven and bake for 32-36 minutes, or until the topping is golden brown and the filling is bubbly. Keep an eye on them, because ovens can be tricky! Let them cool *completely* before cutting into squares. Trust me, it’s worth the wait!
Tips for Perfect Quick Cherry Crumble Bars
Want to make sure your Quick Cherry Crumble Bars are absolutely perfect? Of course, you do! Here are a few little secrets to success:
Use Cold Butter
Seriously, this is *key*! Cold butter creates those little pockets of air in the crust that make it so flaky and tender. If the butter’s too warm, it’ll melt and you’ll end up with a tough crust. Nobody wants that!
Don’t Overmix the Dough
I know it’s tempting to just keep stirring, but resist! Overmixing develops the gluten in the flour, which can make your crust tough. Just mix until everything’s *barely* combined, and you’ll be golden.
Cool Completely Before Cutting
Okay, this is the hardest part, I know! But trust me, you *have* to let those Quick Cherry Crumble Bars cool completely before you cut them. Otherwise, they’ll be a gooey mess. Let them cool in the pan on a wire rack. Patience, my friend, patience!
Ingredient Notes and Substitutions for Quick Cherry Crumble Bars
Okay, so maybe you’re missing an ingredient or two, or maybe you just want to get a little creative! No problem, I got you covered. Here are some easy swaps you can make in these Quick Cherry Crumble Bars:
Cherry Substitutions
Don’t have cherries? No worries! You can totally use other fruits. Blueberries, raspberries, even sliced peaches would be amazing in these bars. Just adjust the sugar to taste, depending on how sweet your fruit is!
Flour Substitutions
Need a gluten-free option? No problem! Just swap out the all-purpose flour for a gluten-free blend. I’ve had good luck with Bob’s Red Mill 1-to-1 Gluten Free Baking Flour. Just make sure it has xanthan gum in it!
Sugar Substitutions
Want to cut back on the sugar? You can try using coconut sugar or maple syrup instead of granulated sugar. Just keep in mind that these substitutions might slightly change the texture and flavor of the Quick Cherry Crumble Bars. But hey, experimenting is half the fun!
Storing and Reheating Your Quick Cherry Crumble Bars
So, you’ve made these amazing Quick Cherry Crumble Bars… and maybe, *just maybe*, you have leftovers! Here’s how to keep them fresh and delicious:
Storage Instructions
Just pop those bars into an airtight container. They’ll keep at room temperature for about 2-3 days. If you wanna keep ’em longer, stick ’em in the fridge for up to a week. They’re still delicious cold, btw!
Reheating Instructions
Want that warm, fresh-from-the-oven taste again? Just zap a bar in the microwave for 10-15 seconds. Be careful, it might be hot! You could also reheat them in a low oven (around 300°F) for a few minutes. Delish!
Quick Cherry Crumble Bars FAQ
Got questions? I got answers! Here are some of the most common questions I get about these Quick Cherry Crumble Bars. Don’t see your question here? Just leave a comment, and I’ll do my best to help!
Can I use frozen cherries for Quick Cherry Crumble Bars?
Yep, you totally can! Just make sure to thaw them completely and drain off any excess liquid *before* you use them. Frozen cherries tend to release a lot more moisture than fresh ones, so you really gotta strain ’em well. Otherwise… soggy bars! And nobody wants that, right?
How do I prevent the crust from getting soggy in Quick Cherry Crumble Bars?
Ah, the dreaded soggy crust! It’s usually caused by too much moisture in the filling. So, make sure you strain those cherries really well, and don’t overdo it on the liquid ingredients. A little cornstarch in the filling can also help to absorb extra moisture. And, of course, let those bars cool completely before cutting! That’s super important.
Can I make Quick Cherry Crumble Bars ahead of time?
Absolutely! These Quick Cherry Crummble Bars are great for making ahead. Just bake them as directed, let them cool completely, and then store them in an airtight container. They’ll keep for a few days at room temperature, or up to a week in the fridge. They’re even delicious straight from the fridge, if you ask me!
Estimated Nutritional Information for Quick Cherry Crumble Bars
Okay, so here’s the deal: I’m not a nutritionist, but each Quick Cherry Crumble Bar clocks in around 250 calories, with roughly 12g fat, 3g protein, and 35g carbs. Keep in mind, that’s just an estimate!
Enjoy Your Quick Cherry Crumble Bars!
Alright, go bake these Quick Cherry Crumble Bars! And hey, if you loved ’em, leave a comment or rate the recipe! Share your pics, too – I wanna see your creations!
Print
Devastatingly Delicious 35-Minute Cherry Crumble Bars
- Prep Time: 20 minutes
- Cook Time: 35 minutes
- Total Time: 1 hour
- Yield: 9-12 bars 1x
- Category: Dessert
- Method: Baking
- Cuisine: American
- Diet: Vegetarian
Description
Quick Cherry Crumble Bars are sweet and easy to make. You can enjoy these bars with your family and friends.
Ingredients
- 1/2 cup chilled unsalted butter (cut into 1/2-inch cubes)
- 2 tbsp milk
- 1/4 tsp salt
- 3/4 cup granulated sugar
- 1/2 tsp baking powder
- 1 egg (large, room temperature)
- 1 3/4 cups all-purpose flour
- 2 tbsp cornstarch
- 2 1/4 cups fresh pitted cherries
- 3 tbsp granulated sugar
Instructions
- Preheat your oven to 375°F. Line an 8×8 or 9×9 baking dish with parchment paper and spray the sides.
- In a large bowl, combine flour, sugar, baking powder, and salt.
- Grate cold butter into the bowl and mix until it resembles small pebbles.
- Add egg and milk; stir until well combined.
- Press 2/3 of the dough into the baking dish to form an even crust.
- Mash cherries in a medium bowl.
- Strain excess liquid from cherries, then return them to the bowl. Stir in sugar and cornstarch.
- Spread cherry mixture over the crust.
- Sprinkle remaining dough over the cherries to create a crumb topping.
- Bake for 32-36 minutes, until golden brown.
- Cool completely before serving.
Notes
- Use room temperature eggs for better emulsion.
- Strain excess liquid from cherries to prevent a soggy filling.
- Cool completely before cutting for cleaner slices.
Nutrition
- Serving Size: 1 bar
- Calories: 250
- Sugar: 25g
- Sodium: 100mg
- Fat: 12g
- Saturated Fat: 7g
- Unsaturated Fat: 4g
- Trans Fat: 0g
- Carbohydrates: 35g
- Fiber: 1g
- Protein: 3g
- Cholesterol: 40mg