Oh, the holidays! Is there anything better than the smell of cookies baking in the oven? For me, it just *screams* cozy, happy times! And nothing says “winter wonderland” quite like sharing a plate of beautifully decorated cookies, right? That’s why I just *had* to share my recipe for Snowflake Cookies. Seriously, these are little bites of pure holiday magic.
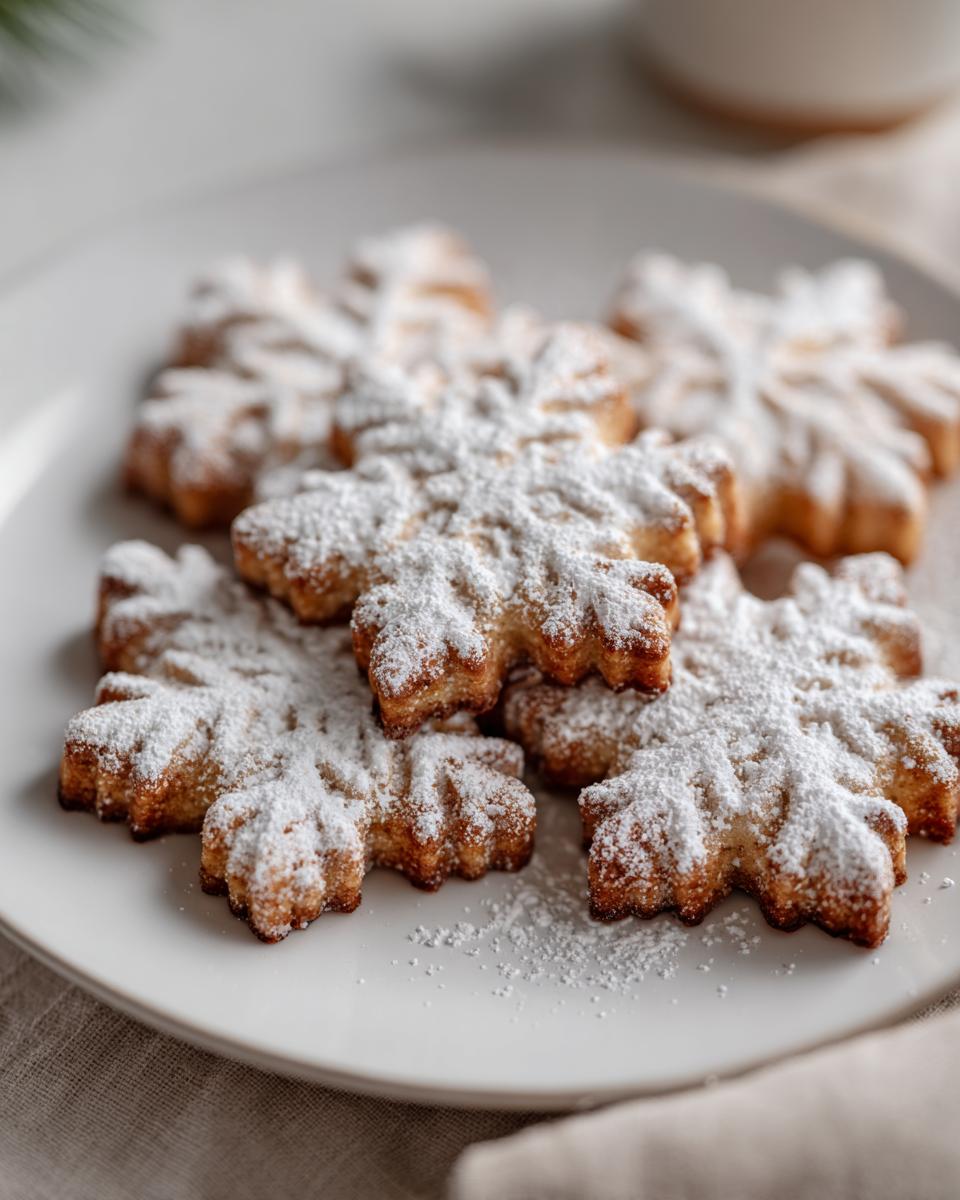
These Snowflake Cookies aren’t just any old sugar cookie. They’re delicate, they’re festive, and they are *guaranteed* to impress. The texture is just perfect – a little bit crisp around the edges, but still soft and melt-in-your-mouth good. And the presentation? Well, I think they’re almost too pretty to eat… almost! They’re perfect for Christmas, winter parties, or just a fun baking day with the family. I’ve been baking these Snowflake Cookies for, gosh, over 20 years now? And trust me, they’re always a hit!
Why You’ll Love These Snowflake Cookies
Okay, so what makes my Snowflake Cookies so special? Well, a few things, actually! I *promise* you’re going to love how easy they are to whip up, how delicious they taste, and how incredibly festive they look. Seriously, they’re the perfect addition to your holiday baking!
Easy to Make Snowflake Cookies
Don’t let the pretty snowflake shapes fool ya – this recipe is seriously straightforward! Even if you’re a beginner baker, you can totally nail these. The steps are simple, and I’ve made sure to include all my little tips and tricks to help you along the way. Promise!
Delicious and Festive Snowflake Cookies
These aren’t just cute cookies, they’re *delicious*! The buttery flavor is just incredible, and the delicate snowflake shape makes them feel extra special. My favorite part is that they look so fancy, but they’re actually super simple to make!
Perfect for Holiday Baking
Seriously, could these *be* any more perfect for the holidays? Snowflake Cookies are ideal for Christmas cookie exchanges, winter parties, or even just a sweet little gift for friends and neighbors. They just scream “winter wonderland,” don’t they?
Snowflake Cookies Ingredients
Alright, let’s talk ingredients! Nothing too crazy here, just good ol’ baking staples. But trust me, using the *right* ingredients makes all the difference! So, grab these goodies and let’s get baking!
- 1 cup (2 sticks) unsalted butter, softened. Make sure it’s *actually* soft, not melted!
- 1 cup granulated sugar. Just regular white sugar, nothing fancy.
- 1 large egg. Gotta have that binding power!
- 1 teaspoon vanilla extract. My favorite part is the smell!
- 3 cups all-purpose flour. Spoon it into your measuring cup, don’t pack it!
- 1/2 teaspoon baking powder. This gives our cookies a little lift.
- 1/4 teaspoon salt. A pinch of salt balances the sweetness perfectly.
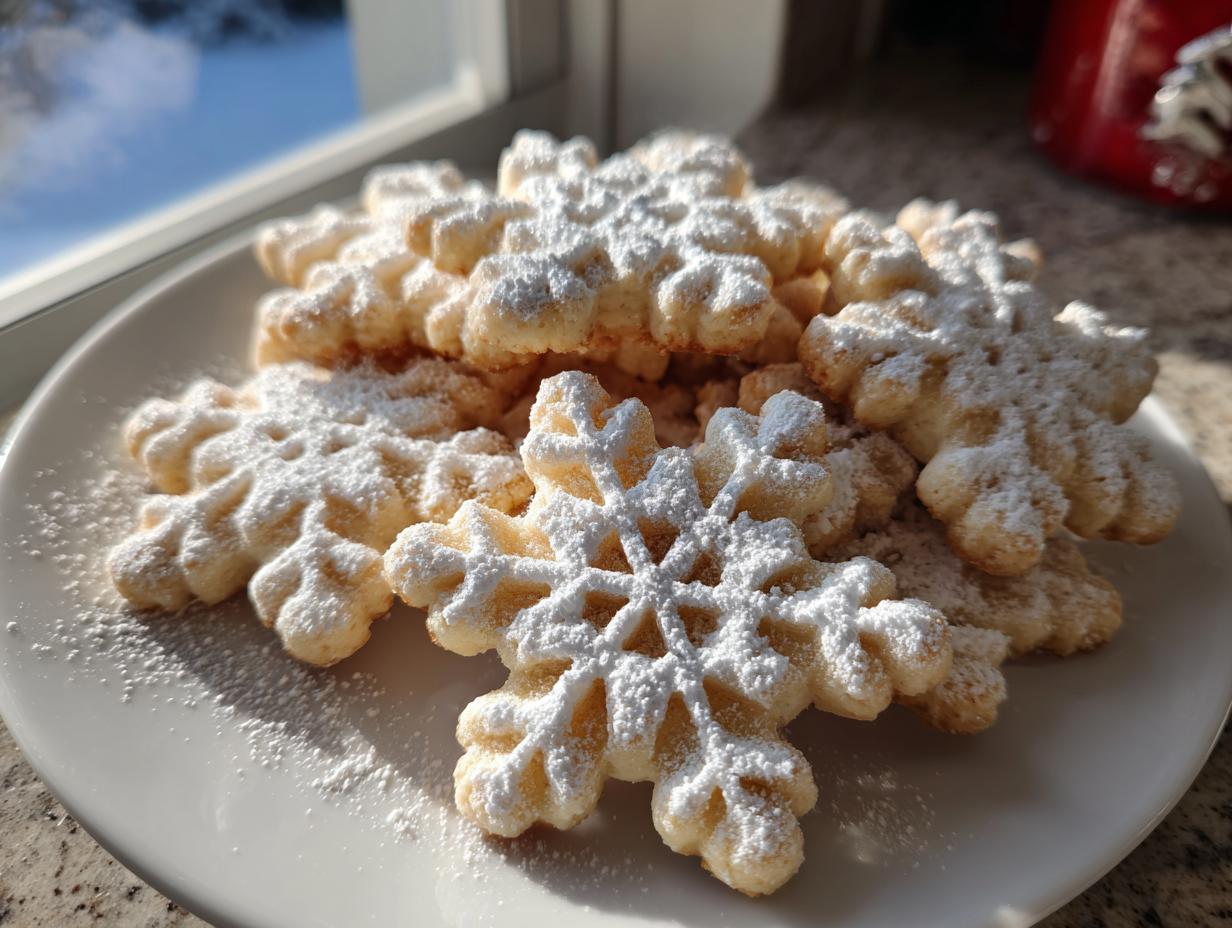
- Powdered sugar, for dusting. This is what makes them look like snowflakes, duh!
See? Nothing too scary! Just make sure you have everything ready to go before you start, it makes life so much easier!
How to Make Snowflake Cookies: Step-by-Step Instructions
Okay, friend, ready to get your bake on? I’m gonna walk you through each step, nice and easy. Don’t worry, we’ll make these Snowflake Cookies absolutely perfect! Just follow along, and you’ll be dusting them with powdered sugar before you know it!
Preparing the Dough for Snowflake Cookies
First things first, let’s get that dough ready! In a big bowl, cream together your softened butter and sugar until it’s all light and fluffy. This usually takes a few minutes, so don’t rush it! Then, beat in your egg and vanilla extract. Make sure it’s all mixed well! In a separate bowl, whisk together your flour, baking powder, and salt. Now, gradually add the dry ingredients to the wet ingredients, mixing until *just* combined. Don’t overmix, okay?
Cutting and Baking Your Snowflake Cookies
Time to shape those snowflakes! Roll out your dough on a lightly floured surface to about 1/4-inch thickness. Now, here’s a *super* important tip: chill that dough for about 30 minutes before rolling! Trust me, it makes it *so* much easier to handle. Then, grab your snowflake cookie cutters and cut out those beauties! Place them on ungreased baking sheets, and pop them in a preheated oven at 375°F (190°C) for about 8-10 minutes. You’ll want the edges to be lightly golden.
Decorating Your Homemade Snowflake Cookies
Almost there! Let your Snowflake Cookies cool on the baking sheets for a few minutes before transferring them to a wire rack to cool completely. And finally, the best part: dusting them with powdered sugar! This is what gives them that gorgeous, snowy look. Get creative! Use different sized snowflake cutters for variety. Ooh, and you can even use a sifter for a super even dusting. Gorgeous!
Tips for the Best Snowflake Cookies
Want to make sure your Snowflake Cookies are *absolutely* perfect? Of course, you do! Here are a few of my go-to tips that I’ve learned over the years. Seriously, these little tricks make a *huge* difference!
- Chilling the dough is a MUST! Don’t skip this step, or your cookies will spread like crazy.
- When you’re using cookie cutters, try dipping them in flour first. It helps prevent the dough from sticking.
- Speaking of spreading, make sure your oven is at the right temperature! An oven thermometer is your best friend.
- Don’t overbake them! You want them to be lightly golden, not brown. Trust me on this one!
Follow these tips, and you’ll be baking up a batch of Snowflake Cookies that are sure to impress!
Snowflake Cookies Variations
Okay, so you’ve mastered the basic Snowflake Cookies recipe? Awesome! Now, let’s get a little wild, shall we? One of my favorite things about baking is experimenting with different flavors and decorations. So, here are a few ideas to get your creative juices flowing!
- Try using different extracts! Almond extract is *amazing* in these. Or, for a super festive twist, try peppermint!
- Spice things up! A little cinnamon or nutmeg adds such a warm, cozy vibe.
- Sprinkles, sprinkles, sprinkles! I mean, who doesn’t love sprinkles? Use colored sugar or edible glitter for extra sparkle!
Seriously, the possibilities are endless! Don’t be afraid to get creative and make these Snowflake Cookies your own!
Storing and Reheating Snowflake Cookies
So, you’ve got a batch of Snowflake Cookies… and maybe a few leftovers (if you’re lucky!). Here’s how to keep them fresh. Just pop them in an airtight container at room temperature, and they’ll stay yummy for about 3-5 days. Trust me, they probably won’t last that long! Reheating? Nah, these are best enjoyed as is. But if you *really* want to warm them up, just a few seconds in the microwave will do the trick! Just be careful they don’t get too soft!
FAQs About Snowflake Cookies
Got questions about making the *perfect* Snowflake Cookies? I got you! I’ve answered a few of the most common questions I get asked. Hopefully, this clears things up, and you’ll be baking like a pro in no time!
Can I freeze Snowflake Cookies dough?
Absolutely! Freezing the dough is a *great* way to save time. Just wrap it tightly in plastic wrap, then pop it in a freezer bag. It’ll keep for up to 2 months! When you’re ready to bake, thaw it in the fridge overnight. Easy peasy!
What is the best way to prevent Snowflake Cookies from spreading?
Spreading is the enemy! The key is to chill that dough! Also, make sure your butter isn’t *too* soft when you cream it with the sugar. And don’t overmix the dough! Overmixing develops the gluten, which can lead to spreading.
Can I use different types of flour for Snowflake Cookies?
You *can*, but it’ll change the texture a bit. Cake flour will make them more tender, but they might be a little more fragile. Whole wheat flour will give them a slightly nutty flavor and a denser texture. I usually stick with all-purpose for the best results, but feel free to experiment!
Estimated Nutritional Information
Okay, so I know you’re probably thinking, “Cookies? Nutritional information? Does that even belong in the same sentence?” Haha! Well, I figured I’d give you a rough idea of what you’re getting into. Keep in mind, this is just an estimate, okay? It can totally vary depending on the exact ingredients you use and how big you make your Snowflake Cookies!
Per cookie, you’re probably looking at something like:
- Calories: Around 150 (give or take!)
- Fat: About 8 grams
- Protein: Maybe 1 gram
- Carbs: Roughly 18 grams
So, yeah, they’re cookies! But hey, everything in moderation, right? And these Snowflake Cookies are *so* worth it for a little holiday treat!
Share Your Snowflake Cookies Creations!
Okay, you made my Snowflake Cookies? YAY! I seriously want to see them! Baking is all about sharing the love, right? So, please, please, *please* do these things:
- Leave a comment below! Tell me how they turned out! Did you try any fun variations? I want to know *everything*!
- Rate the recipe! Did you love it? Let other bakers know! Your feedback helps everyone.
- Share your photos on social media! Tag me so I can see your beautiful Snowflake Cookies! I’m @YourSocialMediaHandle (or whatever your handle is!). Use #SnowflakeCookies so everyone can see your amazing creations!
Seriously, nothing makes me happier than seeing you guys baking my recipes! So, get sharing! And happy baking, friends!
Print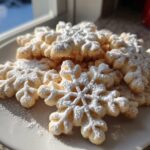
Snowflake Cookies: 20 Years of Delicious Magic
- Prep Time: 30 minutes
- Cook Time: 8 minutes
- Total Time: 38 minutes
- Yield: About 24 cookies 1x
- Category: Dessert
- Method: Baking
- Cuisine: American
- Diet: Vegetarian
Description
Delicate and festive Snowflake Cookies are perfect for the holidays.
Ingredients
- 1 cup (2 sticks) unsalted butter, softened
- 1 cup granulated sugar
- 1 large egg
- 1 teaspoon vanilla extract
- 3 cups all-purpose flour
- 1/2 teaspoon baking powder
- 1/4 teaspoon salt
- Powdered sugar, for dusting
Instructions
- Preheat oven to 375°F (190°C).
- In a large bowl, cream together butter and sugar until light and fluffy.
- Beat in egg and vanilla extract.
- In a separate bowl, whisk together flour, baking powder, and salt.
- Gradually add dry ingredients to wet ingredients, mixing until just combined.
- Roll out dough on a lightly floured surface to 1/4-inch thickness.
- Cut out snowflake shapes using cookie cutters.
- Place cookies on ungreased baking sheets.
- Bake for 8-10 minutes, or until edges are lightly golden.
- Let cool on baking sheets for a few minutes before transferring to a wire rack to cool completely.
- Dust with powdered sugar before serving.
Notes
- Chill dough for 30 minutes before rolling for easier handling.
- Use different sized snowflake cutters for variety.
- Store in an airtight container at room temperature.
Nutrition
- Serving Size: 1 cookie
- Calories: 150
- Sugar: 8g
- Sodium: 30mg
- Fat: 8g
- Saturated Fat: 5g
- Unsaturated Fat: 2g
- Trans Fat: 0g
- Carbohydrates: 18g
- Fiber: 0g
- Protein: 1g
- Cholesterol: 30mg