

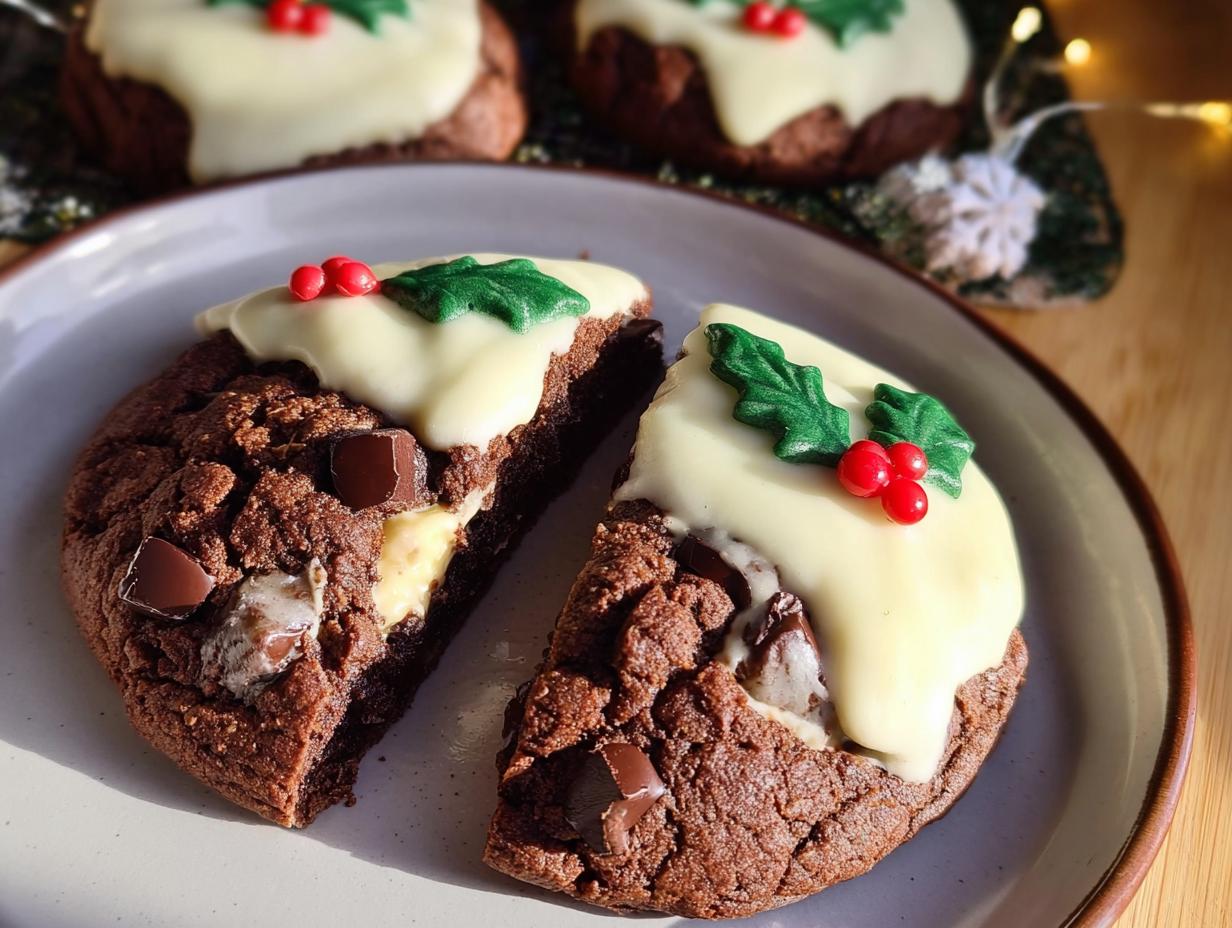
Okay, gather ’round, cookie lovers! You are SO going to want to hear about these Christmas Pudding Cookies! Imagine the most amazing triple chocolate cookie you’ve ever had… now picture it dressed up for the holidays. That’s what we’re talking about! Seriously, these aren’t just cookies; they’re like little bites of Christmas cheer.
What makes them so special? Well, it’s the combo. Rich, dark chocolate, sweet milk chocolate, and then BAM! A white chocolate coating with the cutest little holly decorations. It’s like a party in your mouth. And honestly, baking these always takes me back to being a kid, sneaking tastes of cookie dough with my grandma. Good times!
I’ve tweaked this recipe over the years to get it *just* right, and trust me, it’s a winner. So, if you’re looking for a festive treat that’s guaranteed to impress (and disappear FAST), you’ve come to the right place. Let’s get baking these amazing Christmas Pudding Cookies!
Why You’ll Love These Christmas Pudding Cookies!
Okay, seriously, why *won’t* you love them?! But, just in case you need convincing, here’s the lowdown:
- Flavor explosion! Triple chocolate? Need I say more? It’s like a chocolate lover’s dream come true. My favorite part is the dark chocolate, it just *pops*!
- Festive AF. I mean, come on, they’re practically begging to be on your Christmas cookie platter. Those little holly decorations? Adorable!
- Fun to make (and eat!). Get the kids involved! Decorating these Christmas Pudding Cookies is a blast. Don’t worry if they’re not perfect, that’s part of the charm!
- Perfect for sharing (or not!). They’re great for gifting, cookie swaps, or just hoarding for yourself. I won’t judge!
- Easy to customize. Swap out the chocolate, add nuts, whatever floats your boat! Get creative with your Christmas Pudding Cookies!
Gather Your Ingredients for Christmas Pudding Cookies
Alright, let’s get our stuff together! Here’s what you’ll need to make these amazing Christmas Pudding Cookies. Don’t skimp on the good stuff, okay?
- 125g Unsalted Butter, softened (Seriously, softened! Not melted. Trust me.)
- 100g Light Brown Sugar, packed (Get that stuff in there nice and tight!)
- 100g White Granulated Sugar (Just your regular sugar here.)
- 1 Medium Egg, at room temperature (Makes a difference, I swear!)
- 1 tsp Vanilla Extract (The real stuff, if you’ve got it!)
- 25g Cocoa Powder (Adds that lovely chocolatey depth.)
- 225g Plain Flour, spooned and leveled (We don’t want any dry cookies, now do we?)
- 1/2 tsp Bicarbonate of Soda (Gives ’em that perfect little lift.)
- 1/2 tsp Baking Powder (More lift! We want fluffy, not flat.)
- 1/2 tsp Sea salt (Balances out the sweetness. Don’t skip it!)
- 150g Milk Chocolate Chips (I use Nestle, but whatever you like.)
- 150g Dark Chocolate Chips (Adds a bit of sophistication, you know?)
- 300g White Chocolate Chips (For the coating! I like Ghirardelli.)
- Leftover buttercream coloured red & sprinkles (For the holly berries!)
- Green and red sugar paste (For the holly leaves.)
- Holly sprinkles (Because why not?)
- Green and red coloured white chocolate (If you’re feeling extra fancy!)
Ingredient Notes and Substitutions for Christmas Pudding Cookies
Okay, so a few things here. That light brown sugar? It adds a *way* better flavor than just white sugar, so try to use it! But, if you only have dark brown sugar, that’s totally fine too. It’ll just make them a bit more intense. Also, that softened butter is key! If it’s too melty, your cookies will spread like crazy. If it’s still cold, you’ll have lumps. No bueno!
And the white chocolate? You can totally use candy melts instead if you’re not feeling the white chocolate chips. Just make sure whatever you use melts smoothly. Nobody wants lumpy white chocolate on their Christmas Pudding Cookies!
How to Make Christmas Pudding Cookies: Step-by-Step Instructions
Alright, let’s get down to business! Here’s how we turn those ingredients into amazing Christmas Pudding Cookies. Don’t worry, I’ll walk you through it. Just try to follow along (and maybe resist eating all the chocolate chips!).
Preparing the Christmas Pudding Cookie Dough
First things first, crank up that oven to 180 degrees C (160 degrees C fan). And line your baking trays with parchment paper. Trust me, you do NOT want these sticking. Now, in a big bowl, cream together that softened butter and both sugars. You want it light and fluffy, like you’re making a cloud. This is important! Get it nice and creamy!
Next, beat in the egg and vanilla extract. Mix it until it’s all combined. Now, in goes the cocoa powder, flour, bicarb, baking powder, and salt. Mix it all together until you get a thick, glorious cookie dough. Don’t overmix it, okay? Just until it comes together. Finally, fold in those chocolate chips! All of ’em! Make sure they’re evenly distributed throughout the dough. YUM!
Baking Your Christmas Pudding Cookies to Perfection
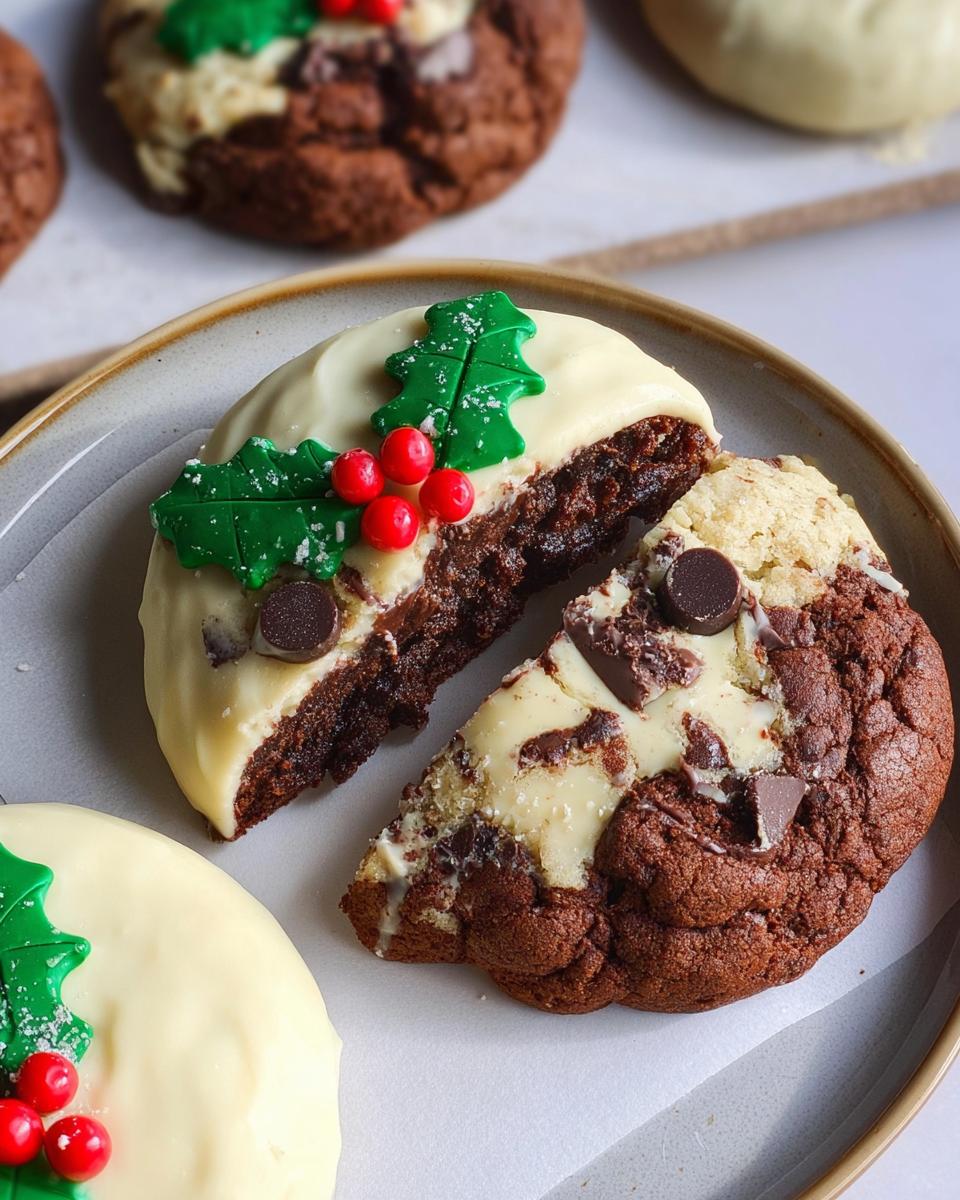
Okay, now for the fun part! Grab a spoon (or, even better, a cookie scoop if you have one) and drop spoonfuls of dough onto those prepared baking trays. Make sure you leave enough space between them, because these cookies *will* spread. Pop those trays into the oven for 10-12 minutes. Keep an eye on them! You want them to be spread out and crinkly. A minute less, they’ll be gooey. A minute more, they’ll be crunchy. It’s up to you!
Once they’re baked, take them out of the oven and let them cool *completely* on the baking trays. I know, it’s torture, but trust me, they’ll be easier to handle if you let them cool down properly. Plus, they continue to bake a little as they cool!
Decorating Your Christmas Pudding Cookies with Festive Flair
Now, for the grand finale! Melt that white chocolate in a small bowl. Dip each cookie into the melted chocolate, coating the front (or back, or both!). Place the dipped cookies onto new parchment-lined trays. Let the chocolate set at room temperature, or pop them in the fridge to speed things up. This is where the magic happens!
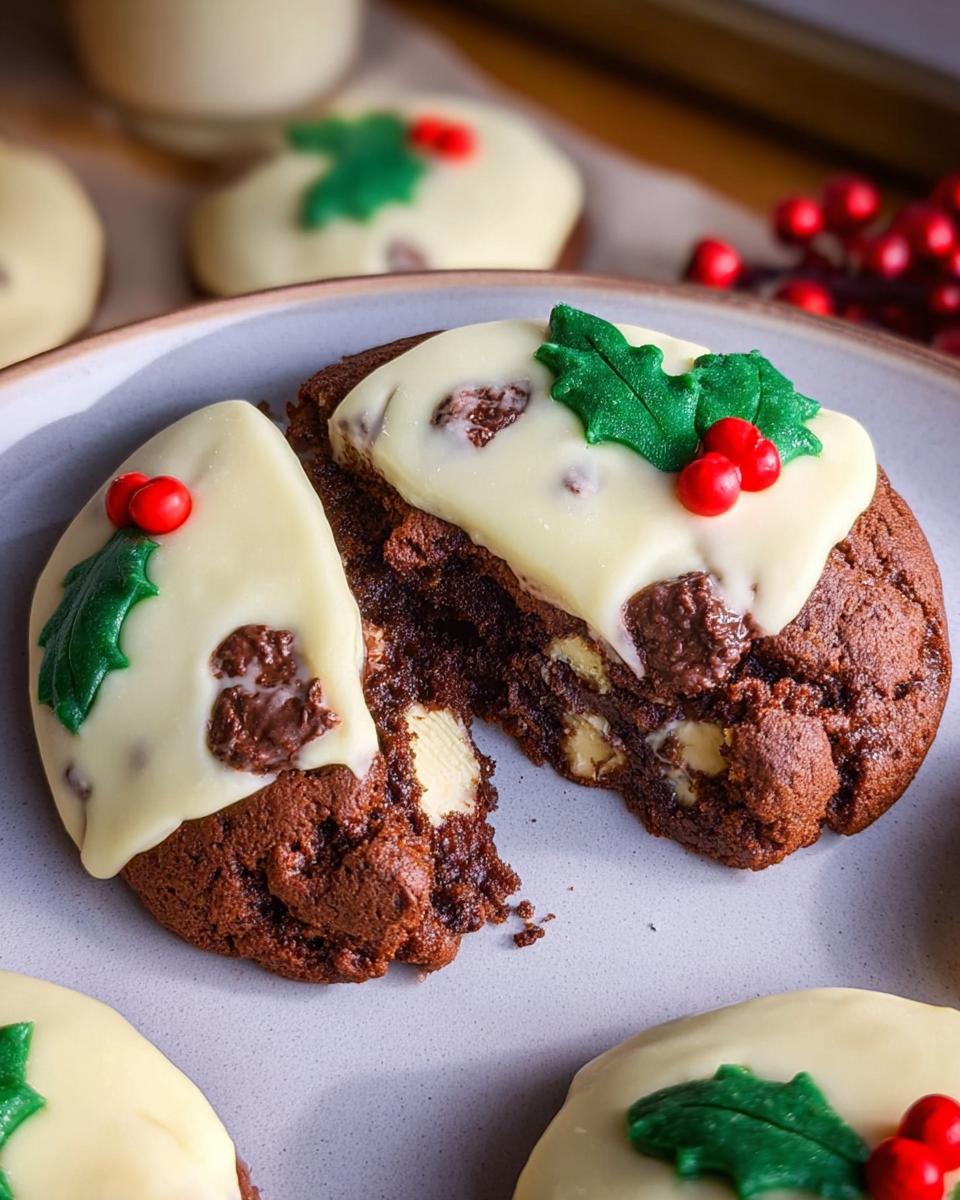
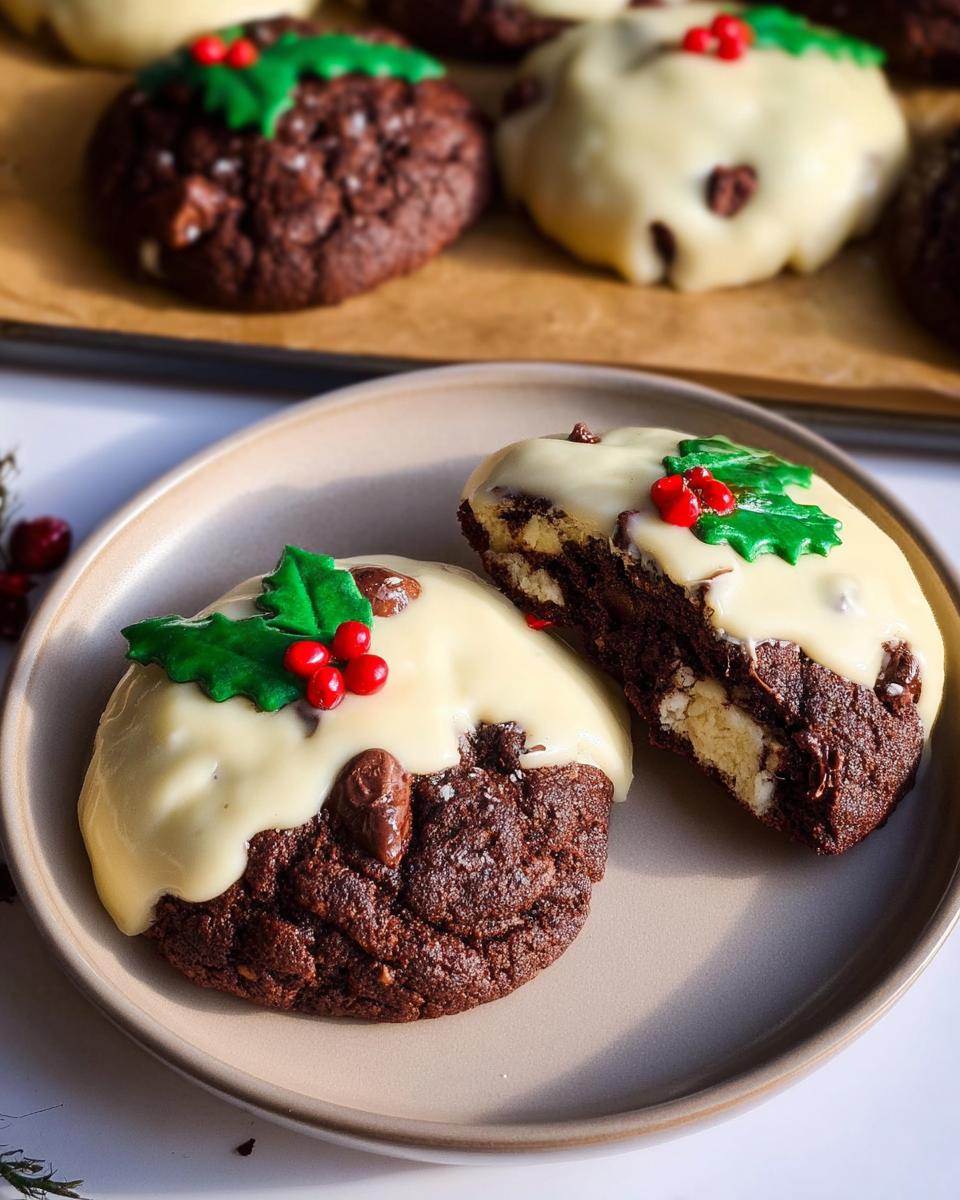
While the chocolate is setting, get creative with those decorations! Use that leftover buttercream (dyed green) to make little holly leaves. Add some red sprinkles for the berries. You can even use green and red sugar paste to make your own holly leaves. And if you’re feeling *really* fancy, drizzle some green and red colored white chocolate on top. Ta-da! Christmas Pudding Cookies!
Tips for the Best Christmas Pudding Cookies
Want to make sure your Christmas Pudding Cookies are total showstoppers? Here are a few of my secrets! First, don’t overbake them! A slightly soft center is way better than a dry, crumbly cookie. Trust me on this one.
Also, use good quality chocolate! It makes a HUGE difference. I’m talking the kind you’d actually *want* to eat straight from the bag (oops!). And, if you have the time, chill the dough for about 30 minutes before baking. It helps prevent spreading and gives them a chewier texture. Just don’t forget about it in the back of the fridge, haha!
One last thing: make sure that butter isn’t too warm when you cream it with the sugar. Otherwise, your cookies will be flat as pancakes. Nobody wants that!
Storing and Reheating Your Christmas Pudding Cookies
Okay, so you’ve somehow managed *not* to eat all the Christmas Pudding Cookies in one go? Amazing! To keep them fresh, store them in an airtight container at room temperature. They’ll last for about 4-5 days (if they last that long!).
Want to freeze them? You can! Freeze baked cookies for up to 2 months. Or, even better, freeze the unbaked dough! Just scoop it onto a tray, freeze until solid, then transfer to a freezer bag. When you’re ready for a cookie, just bake straight from frozen (you might need an extra minute or two!). To reheat, just pop them in the microwave for a few seconds (but honestly, they’re pretty great cold!).
Christmas Pudding Cookies FAQ
Got questions about these amazing Christmas Pudding Cookies? I got answers! Here are some of the most common things people ask (and some things you might be wondering!).
Can I make these ahead of time? Absolutely! The dough can be made a day or two in advance and stored in the fridge. Just let it soften up a bit before scooping. You can also bake the cookies and decorate them a day ahead of time. Easy peasy!
Can I use different types of chocolate? Of course! Get creative! Swap the milk chocolate for peanut butter chips, or use all dark chocolate for an extra-rich flavor. Just make sure the total amount of chocolate chips stays the same. I think that would be amazing!
How do I prevent the cookies from spreading too much? Chilling the dough is key! Also, make sure your butter isn’t too warm when you cream it with the sugar. And don’t overcrowd the baking trays. Give those cookies some space to breathe!
Can I freeze the cookie dough? You bet! Just scoop the dough onto a tray, freeze until solid, then transfer to a freezer bag. When you’re ready for a cookie, bake straight from frozen (you might need to add a minute or two to the baking time).
Nutritional Information for Christmas Pudding Cookies
Okay, so let’s talk numbers! Here’s the estimated nutritional info for one of these bad boys. Keep in mind, this is just an estimate, and it can vary depending on the exact ingredients you use (and how big you make ’em!). But, just so you know…
Per cookie (approximately):
- Calories: 250 (Worth it!)
- Sugar: 20g (Treat yo’self!)
- Sodium: 50mg (Not too shabby!)
- Fat: 15g (The good stuff!)
- Saturated Fat: 9g (Okay, maybe a *little* naughty!)
- Unsaturated Fat: 5g (Healthy-ish!)
- Trans Fat: 0g (Yay!)
- Carbohydrates: 30g (Fuel for Christmas cheer!)
- Fiber: 1g (Every little bit helps!)
- Protein: 3g (Keeps you going!)
- Cholesterol: 30mg (Everything in moderation!)
So, yeah, they’re cookies! But hey, it’s Christmas! Enjoy every bite! And remember, these are just estimates. Don’t come crying to me if your cookies have slightly different numbers, haha!
Rate This Recipe!
So, you’ve made it all the way to the end! Woohoo! Now, tell me, did these Christmas Pudding Cookies rock your world, or what? I’d LOVE to hear what you think! Seriously, your feedback means the world to me. Plus, it helps other bakers know if this recipe is a winner (and trust me, it is!).
So, if you loved these Christmas Pudding Cookies (and I know you did!), please take a sec to rate the recipe below. And leave a comment! Tell me what you thought, what you changed, or what you’re planning to bake next. Did you swap the chocolate? Did you add nuts? Spill the beans! Happy baking, friends!
Print
Delicious Christmas Pudding Cookies Recipe Revealed
- Prep Time: 20 minutes
- Cook Time: 12 minutes
- Total Time: 1 hour (includes cooling and decoration)
- Yield: Approximately 24 cookies 1x
- Category: Dessert
- Method: Baking
- Cuisine: American
- Diet: Vegetarian
Description
Delicious triple chocolate Christmas pudding cookies with milk and dark chocolate chunks, a white chocolate coating, and a holly buttercream decoration.
Ingredients
- 125 g Unsalted Butter
- 100 g Light Brown Sugar
- 100 g White Granulated Sugar
- 1 Medium Egg
- 1 tsp Vanilla Extract
- 25 g Cocoa Powder
- 225 g Plain Flour
- 1/2 tsp Bicarbonate of Soda
- 1/2 tsp Baking Powder
- 1/2 tsp Sea salt
- 150 g Milk Chocolate Chips
- 150 g Dark Chocolate Chips
- 300 g White Chocolate Chips
- Leftover buttercream coloured red & sprinkles
- Green and red sugar paste
- Holly sprinkles
- Green and red coloured white chocolate
Instructions
- Preheat your oven to 180 degrees C/160 degrees C fan and line two to four baking trays with parchment paper.
- Mix together the unsalted butter and both sugars until light and fluffy and thoroughly combined!
- Mix in the vanilla and the egg until thoroughly combined.
- Add in the cocoa powder, plain flour, bicarbonate of soda, baking powder and salt until a thick paste/cookie dough is formed.
- Fold in the chocolate chips, and spoon the mixture onto the trays and make sure they are suitable spread out so they stay separate! I use a 5cm cookie scoop for this.
- Bake in the oven for 10-12 minutes until spread out perfectly crinkly. A minute or so less will be gooey, a minute or two more will be beautiful Crunchy.
- Once baked, remove from the oven and leave to cool fully.
- Once the cookies have cooled fully, melt the white chocolate into a small container that the cookies will fit into.
- Dip each cookie into the melted white chocolate coating the front/back and lay onto new parchment lined trays.
- Leave the chocolate to set at room temperature or do this in the fridge to speed up the process.
- Make the holly decorations how you want I used some leftover vanilla buttercream dyed green and some small red sprinkles!
Notes
- These will last for 4-5 days after baking, but honestly they will be eaten before then.
- The mixture can be chilled before baking, and they can also be frozen raw or baked.
Nutrition
- Serving Size: 1 cookie
- Calories: 250
- Sugar: 20g
- Sodium: 50mg
- Fat: 15g
- Saturated Fat: 9g
- Unsaturated Fat: 5g
- Trans Fat: 0g
- Carbohydrates: 30g
- Fiber: 1g
- Protein: 3g
- Cholesterol: 30mg






