

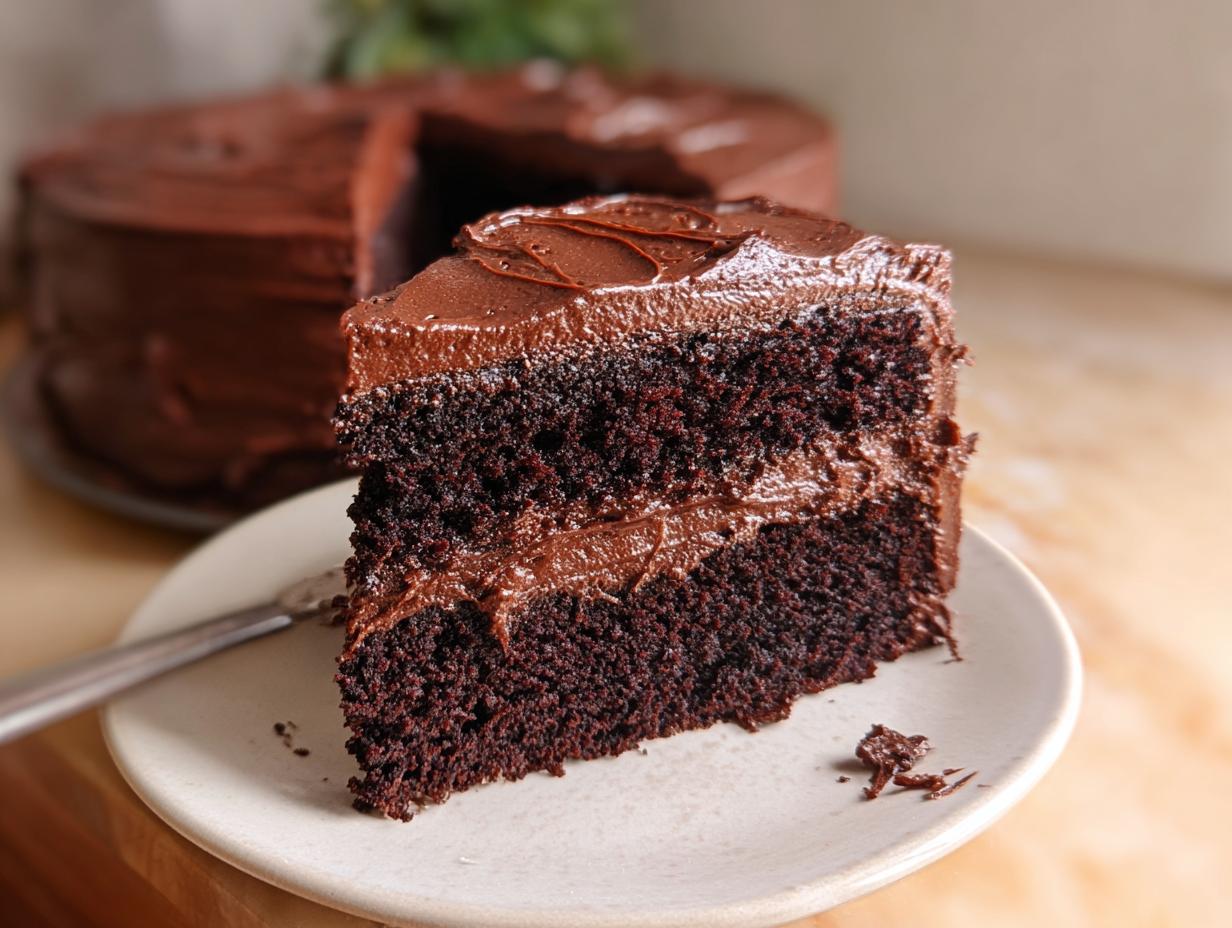
Okay, so, who *hasn’t* watched Matilda and drooled over that insanely rich chocolate cake? I know I did! Every time I saw Trunchbull force poor Bruce Bogtrotter to eat the whole thing, a part of me was like, “Ugh, that’s awful…but I kinda want a slice.” It just looked SO good, right? So, I made it my mission to recreate that iconic dessert. And trust me, after tons of tweaking (and a few kitchen disasters, oops!), I’ve finally nailed what I think is the best Matilda Chocolate Cake recipe from the movie EVER.
This isn’t your everyday chocolate cake, folks. We’re talking seriously decadent, melt-in-your-mouth goodness. It’s got layers of moist, rich chocolate cake and a fudgy frosting that’s just… wow. My version is perfect for birthdays, holidays, or, you know, just a random Tuesday when you need a little bit of Matilda magic in your life. I’ve been baking for years, and I’ve adapted this recipe from several sources, combining techniques I’ve learned from culinary school with tips from my Grandma. This recipe is great for a beginner baker!
Get ready to bake the best Matilda Chocolate Cake recipe from the movie and make all your chocolate dreams come true!
Why You’ll Love This Best Matilda Chocolate Cake Recipe from the Movie
Seriously, you NEED this cake in your life! Here’s why:
Recreating a Childhood Favorite
Remember watching Matilda? Now you can *actually* taste that cake!
Rich and Decadent Flavors
We’re talking intense chocolate. It’s seriously fudgy and amazing.
Perfect for Special Occasions
Birthdays? Holidays? This cake makes EVERYTHING better!
Ingredients for the Best Matilda Chocolate Cake Recipe from the Movie
Alright, let’s get down to the nitty-gritty! Here’s what you’ll need to whip up this masterpiece. Don’t skimp on the good stuff, okay? It makes ALL the difference. Trust me on this one!
- 2 cups all-purpose flour, sifted (260g)
- 1.5 tsp baking powder
- 1.5 tsp baking soda
- 1 cup granulated sugar (200g)
- ⅔ cup light brown sugar (135g)
- 1 tsp salt
- 3 large eggs, ideally room temp
- ⅔ cup vegetable oil (133g)
- ⅓ cup buttermilk (mix ⅓ cup whole milk (80g) + 1 teaspoon vinegar)
- 1 cup sour cream (240g), ideally room temp
- ¾ cup cocoa powder, Dutch Processed (75g)
- 2 tsp instant coffee
- ¾ cup boiling water (180g)
For the Frosting:
- 300g dark chocolate
- 3 tbsp corn syrup
- 8 oz cream cheese, room temperature (226g)
- ⅓ cup cocoa powder (33g)
- 1 cup powdered sugar (100g)
- ¼ tsp salt
- 1 ¼ cup heavy cream, chilled
Equipment Needed
Okay, before we dive in, let’s make sure you’ve got all your tools! Nothing’s worse than being halfway through and realizing you’re missing something, right? So, here’s the stuff you’ll need for this best Matilda Chocolate Cake recipe from the movie:
- 3 8-inch cake pans (greased & ready to go!)
- Parchment paper (because nobody likes stuck cake)
- Mixing bowls (big ones!)
- Stand mixer (or a hand mixer if you’re feeling strong!)
- Saucepan (for that amazing chocolate)
- Whisk (for smooth moves)
- Serrated knife (for leveling those cakes)

How to Prepare the Best Matilda Chocolate Cake Recipe from the Movie: Step-by-Step Instructions
Alright, here’s where the magic happens! Follow these steps, and you’ll be chowing down on your own Matilda-worthy cake in no time. Don’t be scared – I’ll walk you through it!
- First things first: Preheat your oven to 350F (175C). Make sure it’s “no fan,” okay? Then, grab those 8-inch cake pans and grease ’em up good with butter or cooking spray. Line the bottoms with parchment paper circles. This is KEY for easy cake removal later!
- In a big bowl, whisk together the flour, baking powder, baking soda, granulated sugar, brown sugar, and salt. Make sure there are no lumps!
- In a separate bowl, whisk the eggs, vegetable oil, buttermilk, and sour cream until everything’s smooth and combined.
- Now, add the dry ingredients to the wet ingredients in two parts. Gently whisk and fold until *just* combined. Don’t overmix! A few small lumps are okay. Overmixing makes tough cake, and nobody wants that!
- In a small bowl, mix the cocoa powder and instant coffee with the boiling water. Whisk until it forms a smooth, shiny paste. This blooms the cocoa and gives it an amazing flavor!
- Pour that cocoa mixture into the cake batter and gently fold until it’s all chocolatey and gorgeous.
- Divide the batter evenly between the three cake pans. I like to use a kitchen scale to make sure they’re all the same!
- Bake for about 22-24 minutes. Start checking at 22 minutes. A toothpick inserted into the center should come out with just a few moist crumbs attached.
- Let the cakes cool in the pans for 20 minutes before inverting them onto a wire rack to cool completely. I even pop them in the fridge for an hour to make frosting easier.
- While the cakes are cooling, melt the dark chocolate and corn syrup in a saucepan over low heat, stirring constantly until smooth. Set aside to cool slightly.
- For the frosting, beat the cream cheese, cocoa powder, powdered sugar, and salt in a stand mixer until creamy.
- Add the chilled heavy cream and whip until light and fluffy. Be careful not to overwhip!
- Slowly pour in the slightly cooled melted chocolate while mixing on low speed. The frosting will be kinda runny at this point – don’t panic!
- Let the frosting cool until it’s spreadable. I usually leave it at room temp for about 30 minutes, but you can speed it up in the fridge. If it gets too firm, microwave a little bit and whisk it back in!
- Once everything’s cool, trim the domes off the cakes with a serrated knife to make them level.
- Layer the cakes with a generous amount of frosting between each layer. Then, frost the whole cake with a thin crumb coat and chill for 20 minutes. Finally, slather on the remaining frosting. Go big or go home, right?
- To get that super shiny finish like in the movie, use a blow dryer on the lowest setting and gently wave it about a foot away from the cake. Be careful not to melt the frosting!
- Serve and enjoy! This cake is best at room temperature.

Tips for Success with Your Matilda Chocolate Cake
Want to make sure your Matilda Chocolate Cake is a total showstopper? Here are a few tricks I’ve learned along the way! These little things can make a HUGE difference, trust me!
- Refrigerating those cake layers before frosting? Total game-changer! It makes them way easier to handle and prevents crumbs from messing up your frosting.
- Cooling the frosting is ESSENTIAL! If it’s too warm, it’ll just slide right off the cake. Ain’t nobody got time for that!
- Room temperature ingredients are your friend! Especially the cream cheese. It’ll blend so much smoother. Nobody wants lumpy frosting!
- Don’t skip the coffee! It enhances the chocolate flavor like crazy. You won’t taste the coffee, I promise!
Variations on the Best Matilda Chocolate Cake Recipe from the Movie
Okay, so you’ve mastered the basic Matilda Chocolate Cake? Awesome! Now, let’s get a little crazy and mix things up! Here are some fun ways to tweak this recipe and make it your own. Don’t be afraid to experiment – that’s how the best recipes are born!
- Add a teaspoon of peppermint extract to the frosting for a chocolate-mint twist!
- Spice things up with a pinch of cinnamon or chili powder in the cake batter. Trust me, it’s delicious!
- Top the cake with chocolate shavings, sprinkles, or even some crushed Oreos for extra pizzazz!

Frequently Asked Questions About This Best Matilda Chocolate Cake Recipe from the Movie
Got questions? I’ve got answers! Here are some of the most common things people ask me about this amazing Matilda Chocolate Cake recipe. Don’t worry, I’ve got you covered!
Can I make this cake ahead of time?
Absolutely! The cake layers can be baked, cooled, and wrapped tightly in plastic wrap, then stored at room temperature overnight or frozen for up to a month. The frosting can also be made a day ahead and stored in the fridge. Just let it come to room temperature and rewhip before using. So easy!
What if my frosting is too runny?
Ah, the dreaded runny frosting! Don’t stress! Just pop it in the fridge for 15-20 minutes to firm up. If it’s *still* too runny, whisk in a tablespoon of powdered sugar at a time until it reaches the right consistency.
Can I use a different size cake pan?
Yep, you can! If you don’t have three 8-inch pans, two 9-inch pans will work just fine. You might need to adjust the baking time slightly – start checking for doneness a few minutes earlier. Just keep an eye on it!
Storage and Reheating Instructions for Your Best Matilda Chocolate Cake
Okay, so you’ve got leftover Matilda Chocolate Cake? Lucky you! To keep it fresh, store it in an airtight container in the fridge. It’ll stay good for about 3-4 days. But let’s be real, it probably won’t last that long! For the best flavor and texture, let it come to room temperature before digging in. I usually take a slice out about 30 minutes before I want to eat it. Reheating isn’t really necessary, but if you *must*, a few seconds in the microwave will do the trick!
Nutritional Information
Okay, so, just a heads up: the nutritional info here is an estimate. It’ll change based on the brands and ingredients you use. So, don’t take it as gospel, okay?
Enjoyed This Best Matilda Chocolate Cake Recipe from the Movie?
Yay! I’m so glad you gave this a try! If you loved it as much as I do, please leave a comment below and let me know what you think! And hey, don’t forget to rate the recipe – it helps other bakers find it! Share your chocolatey masterpiece on social media and tag me, I’d love to see it!
Print
Best Matilda Chocolate Cake Recipe From the Movie: Wow
- Prep Time: 1 hour
- Cook Time: 30 minutes
- Total Time: 2 hours
- Yield: 12-14 servings 1x
- Category: Dessert
- Method: Baking
- Cuisine: American
- Diet: Vegetarian
Description
This recipe brings the iconic Matilda Chocolate Cake to your kitchen. Enjoy a rich, decadent dessert that’s perfect for any celebration.
Ingredients
- 2 cups all purpose flour (260g), sifted
- 1.5 tsp baking powder
- 1.5 tsp baking soda
- 1 cup granulated sugar (200g)
- ⅔ cup light brown sugar (135g)
- 1 tsp salt
- 3 large eggs, ideally room temp
- ⅔ cup vegetable oil (133g)
- ⅓ cup buttermilk – mix ⅓ cup whole milk (80g) + 1 teaspoon vinegar
- 1 cup sour cream (240g), ideally room temp
- ¾ cup cocoa powder,Dutch Processed (75g)
- 2 tsp instant coffee
- ¾ cup boiling water (180g)
- 300g dark chocolate
- 3 tbsp corn syrup
- 8 oz cream cheese, room temperature (226g)
- ⅓ cup cocoa powder (33g)
- 1 cup powdered sugar (100g)
- ¼ tsp salt
- 1 ¼ cup heavy cream, chilled
Instructions
- Preheat oven to 350F (no fan) and prepare 3 8″ pans with parchment paper and butter
- In a bowl, combine the flour, baking powder, baking soda, granulated sugar, light brown sugar and salt. Whisk together until no lumps remain
- In a separate bowl, whisk together the eggs, vegetable oil, buttermilk and sour cream until smooth
- Add the dry ingredients to the wet in 2 additions, and gently whisk and fold until they are just combined and no big lumps remain. Do not overmix
- In a separate small bowl, add the cocoa powder and instant coffee. Pour over the boiling water and whisk until a smooth shiny mixture forms
- Pour the cocoa mixture onto the remaining batter, and gently fold until a chocolate cake batter forms
- Divide the batter evenly between the 3 prepared cake pans
- Bake for ~22-24 minutes until a toothpick inserted in the center comes out with light moist crumbs attached
- Let the cakes cool in the pans for 20 minutes, then carefully remove them and place on a wire rack. Let cool completely (I recommend refrigerating for 1 hour)
- Add the chocolate and corn syrup to a saucepan and heat over the lowest flame while stirring constantly until the chocolate has fully melted. Set aside
- In the bowl of your stand mixer, add the room temperature cream cheese and sift in the cocoa powder, powdered sugar and salt. Use the paddle attachment and whisk on medium speed until the mixture becomes creamy (1-2 minutes). Scrape the bowl
- Add the heavy cream and whisk again on low speed until a fluffy, whipped consistency is reached. Scrape the bowl in the middle. This should not take too long; avoid overmixing
- At this point, the melted chocolate should be warm and runny but not very hot. Slowly pour it in while whisking on low speed until the chocolate is fully combined into the frosting. Due to the temperature of the chocolate, the frosting will become a more runny consistency
- Let the frosting cool down until it becomes spreadable. I recommend doing this at room temperature for ~30 minutes but you can also do it in the fridge (it won’t take too long). If it becomes too firm, remove 1 cup, microwave for just a few seconds it until it is warm, and whisk back into the remaining frosting
- Once the cakes and frosting have cooled down, it’s time to assemble
- Use a large serrated knife to carefully trim off the domes from the cakes
- Layer them on top of each other with a generous layer of the frosting in between (don’t be stingy!). Cover the cake with a thin layer of frosting (crumb coat) and refrigerate for 20 minutes. Then slather on the remaining frosting all over
- Serve & enjoy! This cake is best eaten at room temperature
- Tip: To get a shiny look on the cake, use a blow dryer at the lowest setting and gently wave it 1 foot away from the cake
Notes
- Refrigerating the cake layers helps with frosting.
- Cooling the frosting is essential for spreadability.
- Use a blow dryer for a shiny finish.
Nutrition
- Serving Size: 1 slice
- Calories: 650
- Sugar: 60g
- Sodium: 300mg
- Fat: 40g
- Saturated Fat: 20g
- Unsaturated Fat: 15g
- Trans Fat: 1g
- Carbohydrates: 70g
- Fiber: 3g
- Protein: 7g
- Cholesterol: 100mg






