


Okay, so, picture this: It’s December, snow’s coming down, and the smell of something chocolatey is wafting from the kitchen. For me, that smell *always* meant candy canes were about to make an appearance! My grandma used to hang them all over the tree, and, well, let’s just say a few “mysteriously” disappeared before Christmas morning. 😉
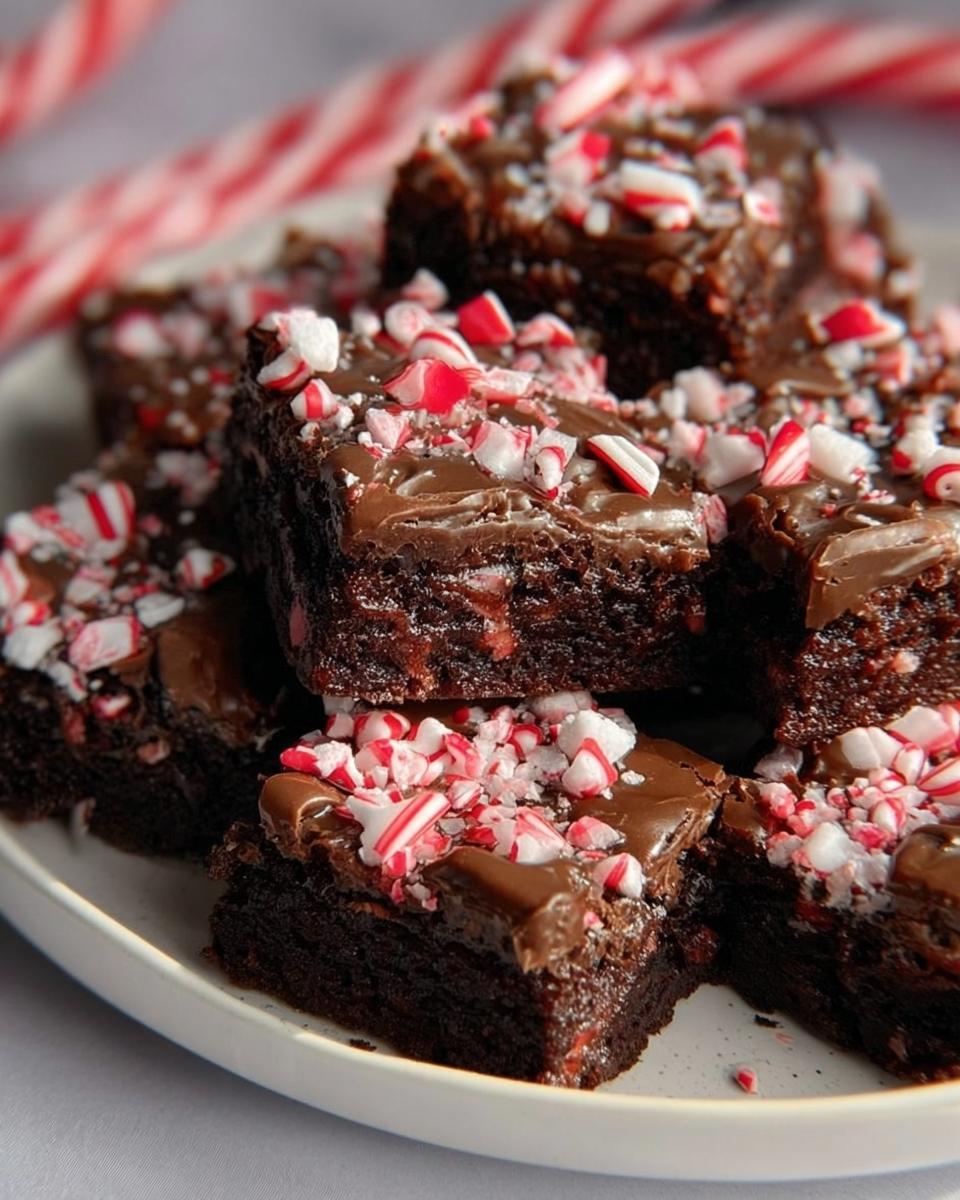
Anyway, I wanted to capture that magical holiday feeling in a super easy, festive dessert. And that’s how these **Candy Cane Brownies** were born! They’re seriously the easiest thing ever, and they’re *packed* with that amazing chocolate-peppermint combo. Trust me, you’ll be the star baker of the holiday season with these bad boys. Plus, they’re so easy to whip up; even the kids can help! Get ready for some serious brownie bliss!
Why You’ll Love These Candy Cane Brownies
-
Quick and Easy Holiday Treat
Seriously, these **Candy Cane Brownies** are SO simple! If I can make ’em, you definitely can. 😉
-
Festive Peppermint Chocolate Flavor
That peppermint kick with the rich chocolate? Wow! My favorite part is how it screams “holidays!”
-
Perfect for Sharing and Gifting
Bake a batch, wrap ’em pretty, and boom! Easiest (and yummiest) gifts *ever*. Plus, everyone always loves ’em at parties!
Candy Cane Brownies Ingredients
Alright, let’s gather our goodies! Here’s what you’ll need to make these amazing **Candy Cane Brownies**. Don’t worry, it’s mostly stuff you probably already have!
- 200g unsalted butter, softened (Seriously, make sure it’s soft! It makes a difference, trust me.)
- 200g dark chocolate, chopped (The good stuff, you know? It makes the brownies extra rich.)
- 3 large eggs, room temperature (Room temp eggs just blend better. It’s a thing.)
- 275g caster sugar (That’s the super fine sugar. If you only have regular, that’s okay, but caster’s best!)
- 90g plain flour (No fancy stuff here, just regular plain flour!)
- 35g cocoa powder (Gives it that deep, chocolatey flavor. Yum!)
- 2 tsps peppermint extract (Okay, careful with this! It’s strong. Too much, and you’ll feel like you’re brushing your teeth. LOL!)
- 250g milk chocolate chunks/chips (I like chunks, but chips work great too. Whatever you prefer!)
- 100g milk chocolate, melted (This is for drizzling on top… the best part, if you ask me!)
- 16 mini candy canes, crushed (Smash ’em up good! I usually put them in a bag and whack it with a rolling pin. Therapeutic, right?)
- Christmas sprinkles (Gotta make ’em festive! The more sprinkles, the better, I always say.)
How to Make Candy Cane Brownies: Step-by-Step Instructions
Okay, get ready, ’cause we’re about to make some magic! These **Candy Cane Brownies** are seriously easy, I promise. Just follow these steps, and you’ll be golden!
Preparing for Candy Cane Brownies
First things first: Preheat your oven to 180C/160C Fan. This is important, you don’t want a cold oven! And line a 9-inch square baking tray with parchment paper. Make sure the paper hangs over the sides a bit – it’ll make getting the brownies out *so* much easier later. Trust me on this one!
Making the Chocolate Base for Candy Cane Brownies
Now, grab a heatproof bowl and toss in your butter and chopped dark chocolate. You can melt this over a pan of boiling water (careful not to burn yourself!), or just nuke it in the microwave for a minute or two. Just keep an eye on it and stir every 30 seconds so it doesn’t burn. Once it’s all melty and smooth, set it aside to cool. It needs to be room temperature, or it’ll cook the eggs in the next step! While that’s cooling, whisk together your eggs and caster sugar until they’re pale and mousse-like. This might take a few minutes, but it’s worth it! You want the mixture to be doubled in volume and leave a trail when you lift the whisk. It’s kinda like making whipped cream, but with eggs and sugar. 😉
Combining the Ingredients for Candy Cane Brownies
Okay, now for the fun part! Gently pour that cooled chocolate mixture into the egg mixture, along with your peppermint extract (remember, careful with that stuff!). Fold it all together super carefully. You want to keep all that air you whisked into the eggs, so be patient. It’ll take a minute, but just keep folding until it’s all combined. Next, sift the flour and cocoa powder over the top and fold *again*. Don’t overmix! A few streaks of flour are okay at this point.
Baking and Cooling Your Candy Cane Brownies
Fold in your milk chocolate chunks (or chips!). Then, pour the batter into your prepared tin and spread it out evenly. Now, into the oven it goes for 25-30 minutes. Keep an eye on them! You want them to be fudgy, not cakey. Once they’re baked, resist the urge to dig in right away! Let them cool *completely* in the tin. I know, it’s torture, but it’s important!
Finishing Touches for Candy Cane Brownies
Once the brownies are cooled, drizzle that melted milk chocolate all over the top. Now, arrange your crushed candy canes on top of the chocolate, pressing them in gently. Then, shower the whole thing with Christmas sprinkles! So festive, right? Let the chocolate set completely before cutting into squares. I usually do 16 squares. And then… ENJOY! You did it!

Tips for Perfect Candy Cane Brownies
Want to make sure your **Candy Cane Brownies** are *amazing*? Here are a few of my top tips to guarantee brownie perfection! These are things I’ve learned over, like, a million batches. 😉
Don’t Overbake Your Candy Cane Brownies
Seriously, this is key! Overbaked brownies are dry and sad. You want them fudgy, right? So, start checking for doneness around 25 minutes. A toothpick inserted into the center should come out with moist crumbs attached – not wet batter, but definitely not clean. Err on the side of underbaked; they’ll firm up as they cool. Trust me!
Cooling the Candy Cane Brownies Completely
I know, I know, it’s tempting to dig in while they’re warm, but trust me on this one! Cooling them completely in the tin is *crucial*. It lets them set properly, so they’re easier to cut and have that perfect fudgy texture. Plus, the chocolate on top sets better too! So, be patient. You won’t regret it!
Using Quality Chocolate for Candy Cane Brownies
Okay, this is a big one! The better the chocolate, the better the brownies. I always splurge on good quality dark chocolate for the base and some nice milk chocolate for the chips and drizzle. It makes a *huge* difference in the flavor. So, skip the cheap stuff and treat yourself! You (and your brownies) deserve it!
Candy Cane Brownies Variations
Wanna get a little crazy and switch things up? These **Candy Cane Brownies** are super versatile! Here are a few ideas to make ’em your own. Get creative!
Different Chocolate Chips in Your Candy Cane Brownies
Instead of milk chocolate chips, why not try white chocolate or even *more* dark chocolate chips? Ooh, or a mix! White chocolate with the peppermint is SO good, you guys. Trust me!
Adding Nuts to Your Candy Cane Brownies
Fold in some chopped walnuts or pecans for a little crunch! Just don’t add too many, or they’ll overpower the peppermint. A handful is usually plenty.
Different Extracts in Your Candy Cane Brownies
Okay, so, if you’re *really* not a peppermint fan (gasp!), you could try vanilla extract instead. It’ll still be delicious, just not quite as festive, you know?
Storing Your Candy Cane Brownies
Okay, so you’ve made these amazing **Candy Cane Brownies**… and maybe you even have some leftovers (if you didn’t eat them all already! 😉). Here’s how to keep ’em fresh!
How to Store Candy Cane Brownies
These guys will keep at room temperature in an airtight container for a few days. Or, pop them in the fridge, and they’ll last even longer – up to a week! Just make sure they’re sealed up tight, so they don’t dry out.
Reheating Candy Cane Brownies
Want to warm ’em up? Just nuke ’em in the microwave for a few seconds! Warm brownies are the best! Just be careful not to overheat them, or they’ll get melty. 🤤
Frequently Asked Questions About Candy Cane Brownies
Got questions about these **Candy Cane Brownies**? I got answers! Here are some of the most common things people ask me. Don’t be shy; if you have more, just ask in the comments!
Can I use regular chocolate instead of dark chocolate in these Candy Cane Brownies?
Yep, you totally can! If you’re not a fan of dark chocolate, just swap it out for the same amount of milk chocolate. It’ll make the brownies sweeter, of course, but still super yummy! I actually sometimes do a mix of both for a more balanced flavor. Experiment and see what *you* like best!
How do I prevent my Candy Cane Brownies from being dry?
Ah, the dreaded dry brownie! The key is to *not* overbake them. Seriously, start checking them early, around 25 minutes. And remember, those moist crumbs on the toothpick are your friend! Also, make sure you’re using enough butter and eggs, and don’t overmix the batter. Overmixing develops the gluten in the flour, which can make ’em tough. And, obviously, store them properly in an airtight container!
Can I freeze Candy Cane Brownies?
You betcha! These **Candy Cane Brownies** freeze beautifully. Just wrap them individually in plastic wrap, then pop them into a freezer bag. They’ll keep for a couple of months. When you’re ready to eat them, just thaw them at room temperature. They might lose a *tiny* bit of their fudgy texture, but they’ll still be delicious!

How can I make these Candy Cane Brownies gluten-free?
Okay, so, I haven’t personally tried this, but you *should* be able to substitute the plain flour with a gluten-free all-purpose baking flour blend. Just make sure it’s a blend that’s designed for baking, not just a single-ingredient flour. You might need to experiment a bit with the baking time, as gluten-free flours can sometimes bake a little differently. Let me know if you try it and how it goes!
Nutritional Information for Candy Cane Brownies
Okay, so, quick disclaimer: I’m just a home cook, not a nutritionist! The nutritional information below is just an estimate. It’ll change depending on the exact ingredients you use (like, what brand of chocolate, etc.). So, if you *really* need precise numbers, you’ll wanna run the recipe through a proper nutrition calculator. But, hey, it’s brownies… it’s gonna be delicious. 😉
Rate this Candy Cane Brownies Recipe!
Made these **Candy Cane Brownies**? Let me know what you think! Leave a rating and a comment below. I love hearing from you guys! Happy baking!
Print
Foolproof Candy Cane Brownies: 16 Holiday Slices
- Prep Time: 15 minutes
- Cook Time: 30 minutes
- Total Time: 45 minutes
- Yield: 16 servings 1x
- Category: Dessert
- Method: Baking
- Cuisine: American
- Diet: Vegetarian
Description
Decadent candy cane brownies perfect for the holidays. Enjoy the rich chocolate flavor with a refreshing peppermint twist.
Ingredients
- 200 g unsalted butter
- 200 g dark chocolate
- 3 large eggs
- 275 g caster sugar
- 90 g plain flour
- 35 g cocoa powder
- 2 tsps peppermint extract
- 250 g milk chocolate (chunks/chips)
- 100 g milk chocolate (melted)
- 16 mini candy canes
- Sprinkles
Instructions
- Preheat your oven to 180C/160C Fan and line a 9 inch square baking tray with parchment paper.
- Melt together the butter and dark chocolate in a heatproof bowl over a pan of boiling water, or in the microwave for 1 to 2 minutes until melted. Leave to the side to cool to room temperature.
- Using an electric whisk/stand mixer, whisk together the eggs and caster sugar for a few minutes until the color has turned pale, is very mousse like, and is double the original volume of the amount of eggs + sugar. You will know its done because when you lift the whisk up out of the mix it should leave a trail for a couple of seconds before disappearing.
- When whisked, pour the cooled chocolate mix over the egg mixture, with the peppermint extract, and fold together carefully. It might take some time, but be patient, you don’t want to knock out the air you made up on the previous step.
- Once completely combined, sift the cocoa powder and plain flour on top of the chocolate mix and then fold together again, still be careful to not knock out the air.
- Once combined well, fold through the chocolate chips and pour into the prepared tin. Bake in the oven for 25 to 30 minutes. Once baked, leave to cool in the tin completely.
- Once cooled, drizzle over the melted chocolate. Add a candy cane to what will be each piece, sprinkle over some Christmas sprinkles and let the chocolate set.
- Cut the brownies into squares (I did 16) and then ENJOY.
Notes
- Warm these up in the microwave and serve with some ice cream for a delicious dessert.
- Baking time may vary depending on your oven. If the brownies are not done after 40 minutes, cover with foil and continue to bake longer. Check with a skewer until it comes out mostly clean.
- These will last in an airtight container for 1 to 2 weeks.
Nutrition
- Serving Size: 1 brownie
- Calories: 350
- Sugar: 30g
- Sodium: 50mg
- Fat: 20g
- Saturated Fat: 12g
- Unsaturated Fat: 6g
- Trans Fat: 0.5g
- Carbohydrates: 40g
- Fiber: 2g
- Protein: 4g
- Cholesterol: 60mg






