

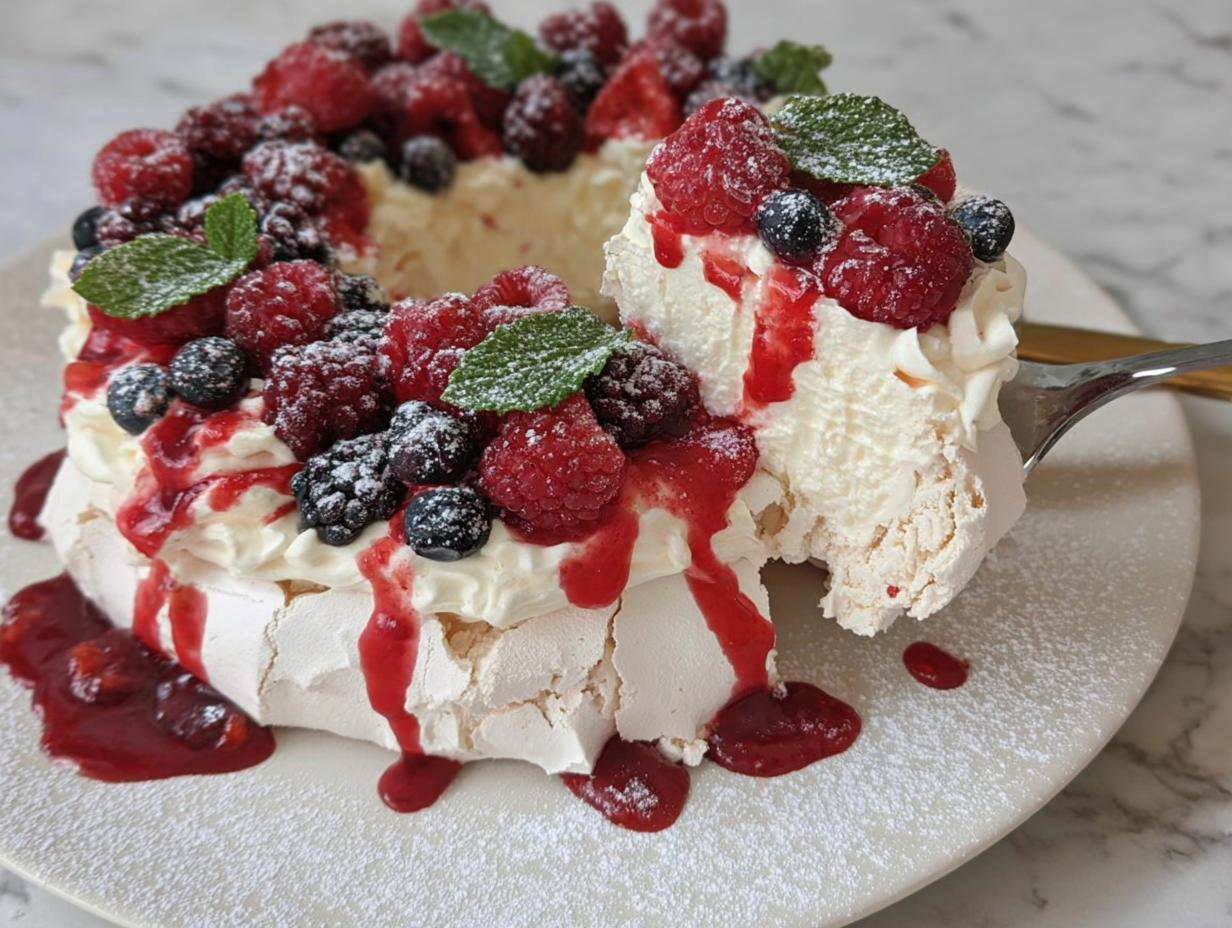
Okay, so Christmas… desserts. Who doesn’t love ’em, right? But let’s be honest, sometimes you want something *amazing* without spending, like, three days in the kitchen. That’s where my Christmas Pavlova Wreath comes in. I’m telling you, it’s a real showstopper! Seriously, people will think you’re a baking genius (even if it’s our little secret how easy it is!).
I first made a pavlova – not quite this wreath masterpiece, mind you – for Christmas a few years back when my oven decided to have a meltdown on Christmas Eve (oops!). Talk about pressure! Anyway, I needed something kinda fancy but FAST. And that’s how my love affair with pavlova began. This Christmas Pavlova Wreath is the evolved, super-festive version, and it’s become a total holiday tradition in our house. Trust me, this Christmas Pavlova Wreath will be the star of your dessert table, and the best part? It’s way easier to make than it looks!
Why You’ll Love This Christmas Pavlova Wreath
A Showstopping Christmas Dessert
Seriously, this isn’t just dessert; it’s a *statement*! The Christmas Pavlova Wreath piled high with berries and cream? It’s gorgeous! It’ll have everyone saying, “Wow!”
Easy to Make Christmas Pavlova Wreath
Don’t let the fancy looks fool you. This Christmas Pavlova Wreath recipe is surprisingly simple. I promise, you don’t need to be a pro baker to pull this off. It’s mostly whisking and arranging!
Gluten-Free Christmas Treat
Got gluten-free friends or family? No problem! This Christmas Pavlova Wreath is naturally gluten-free, so everyone can enjoy a slice of holiday deliciousness.
Perfect for Holiday Celebrations
From Christmas dinner to New Year’s Eve, this Christmas Pavlova Wreath is *the* dessert to bring. It’s festive, fun, and guaranteed to be a crowd-pleaser for any holiday get-together.
Ingredients for Your Christmas Pavlova Wreath
Alright, let’s gather our goodies! Here’s what you’ll need to create this magical Christmas Pavlova Wreath. Don’t skimp on the quality – it really makes a difference! I always try to get the freshest stuff I can find. Here’s the breakdown:
Meringue Base
- 6 medium egg whites (or 5 large ones – gotta be precise!)
- 300g white caster sugar (that’s super fine sugar, bakers!)
- 1 tsp white wine vinegar (don’t skip this, it’s important!)
- 1 tsp cornflour (keeps things stable)
- ½ tsp vanilla extract (for that lovely flavor)
Cream Topping
- 450ml double cream (full fat is the way to go, trust me!)
- 2 tbsp icing sugar (also known as powdered sugar)
Festive Decorations
- Fresh fruit (blackberries, pomegranate seeds, raspberries, blueberries – get creative!)
- Freeze-dried raspberries (for a little extra zing and color)
- Raspberry coulis (store-bought is fine, or make your own if you’re feeling fancy!)
- Mint leaves (for that fresh, Christmasy touch)
How to Make a Christmas Pavlova Wreath: Step-by-Step Instructions
Okay, ready to get baking? Don’t worry, I’ll walk you through it. Just follow these steps, and you’ll have a stunning Christmas Pavlova Wreath in no time!
Preparing the Meringue
First things first, preheat your oven to 150C (that’s about 300F), or 130C if you’ve got a fan oven. Grab a HUGE baking tray and line it with baking parchment – this is super important, or the pavlova will stick! Now, make sure your mixing bowl is squeaky clean. Seriously, any grease will stop the egg whites from whipping up properly. Then, get those egg whites into the bowl and whisk ’em with a stand mixer (or a hand mixer if you’re feeling strong!) until they form stiff peaks. You’ll know they’re ready when you can turn the bowl upside down and they don’t budge! Next, start adding the caster sugar, but *slowly* – just a teaspoon at a time. Keep whisking! Once all the sugar’s in, the mixture should be super glossy and smooth. Finally, whisk in the white wine vinegar, then the cornflour, then the vanilla. Give it a good whisk until everything’s smooth and combined.
Shaping the Christmas Pavlova Wreath
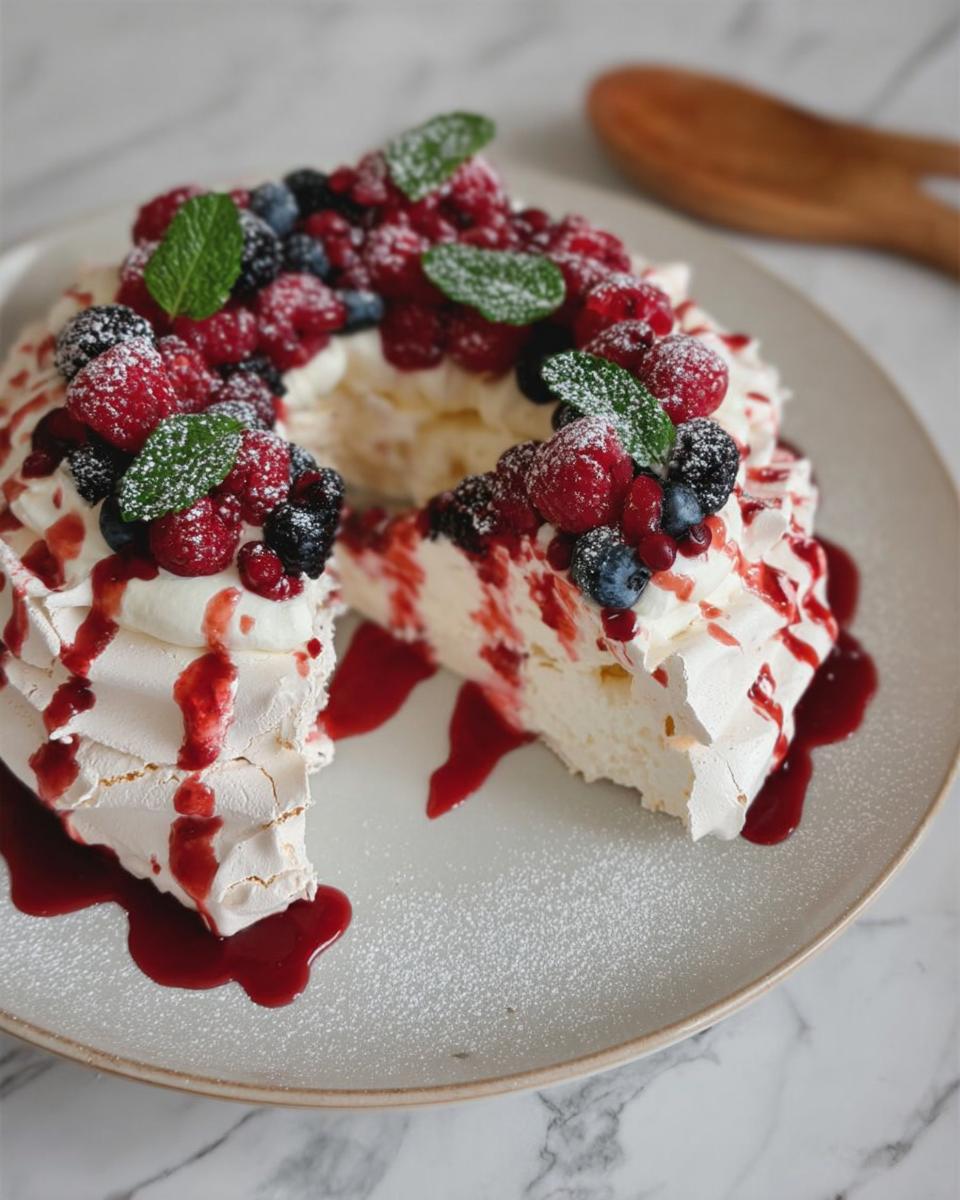
Now comes the fun part! Grab a small bowl (about 6 inches in diameter) and place it in the middle of your parchment paper. This is just to help you create the wreath shape. Now, dollop the meringue mixture around the bowl in a ring shape. I like to use a tablespoon for each dollop – it keeps things nice and even. Once you’ve got your ring, carefully lift out the bowl. Then, grab a fork and use it to create some texture on the surface of the meringue. This not only looks pretty, but it also helps the pavlova bake evenly.
Baking the Christmas Pavlova Wreath
Carefully lift the baking tray into the preheated oven and bake for 1 hour. Then, and this is important, turn off the heat and leave the pavlova to cool *completely* in the oven. Don’t open the door! This might take a few hours, or even overnight, but it’s crucial for getting that perfect crisp meringue. If you rush it, the pavlova might crack (though, honestly, a few cracks just add character!).
Decorating the Christmas Pavlova Wreath
Once the pavlova is completely cool, it’s time to decorate! Prepare all your fruit – chop any larger fruits and give all the berries a good wash. In a separate bowl, whip the double cream with the icing sugar until it forms soft peaks. Then, gently spread the whipped cream onto the meringue. Now, go wild with the fruit! Arrange it all over the cream in a festive way. I like to add some mint leaves for a pop of green, and a sprinkle of icing sugar for that snowy Christmas look. If you’re feeling extra fancy, you can even add some edible glitter! Serve immediately and enjoy your stunning Christmas Pavlova Wreath!
Tips for the Perfect Christmas Pavlova Wreath
Ensuring a Crisp Meringue
Seriously, a clean bowl is KEY! And fresh eggs? They whip up so much better. Trust me, these little things make a HUGE difference in getting that perfectly crisp meringue for your Christmas Pavlova Wreath.
Preventing Cracks
Okay, so your Christmas Pavlova Wreath cracked a little? Don’t panic! It happens to the best of us. Honestly, it just adds character, and you can totally cover it up with cream and berries. No one will ever know!
Storing Your Christmas Pavlova Wreath
Wanna make the meringue ahead? Go for it! It’ll keep for a few days in an airtight container. But once you’ve decorated your Christmas Pavlova Wreath, it’s best to eat it that day, or the meringue might get a little soggy. Still delicious though!
Ingredient Notes and Substitutions for Christmas Pavlova Wreath
Okay, so maybe you don’t have *exactly* what’s on the list, or you’re feeling a little adventurous? No worries! Here are a few tweaks you can make to this Christmas Pavlova Wreath without totally messing things up!
Berry Variations
Don’t feel stuck with my berry choices! Use whatever looks good at your store. Cranberries would be super festive, or even some sliced kiwi for a pop of green. Just make sure they’re relatively dry, or the pavlova might get a bit soggy.
Sugar Substitutions
Okay, so caster sugar is best for pavlova, but if you’re in a pinch, regular granulated sugar will work. I wouldn’t recommend liquid sweeteners, though, as they’ll change the meringue texture. And honestly, I haven’t tried any sugar-free options, so experiment at your own risk!
Cream Alternatives
If you’re not into double cream, mascarpone is a great substitute! It’s super rich and creamy. Or, for a dairy-free option, try whipped coconut cream. Just make sure it’s *really* cold before you whip it, or it won’t work. It’ll taste a little different, but still yummy!

Christmas Pavlova Wreath: Frequently Asked Questions
Can I make the Christmas Pavlova Wreath ahead of time?
Totally! The meringue base for this Christmas Pavlova Wreath is actually perfect to make in advance. Once it’s cooled completely, just pop it in an airtight container. Honestly, it’ll keep for a few days at room temperature. Then, when you’re ready to serve, whip up the cream and decorate! Easy peasy!
What if my Christmas Pavlova Wreath cracks?
Seriously, don’t sweat it! Cracks are totally normal with pavlovas. It just means it’s got that lovely crisp shell. Plus, you can totally hide any imperfections with whipped cream and berries. Nobody will ever know! Embrace the rustic charm, I say!
Can I use frozen berries for the Christmas Pavlova Wreath?
Okay, so fresh berries are *best*, but if you’re in a pinch, you *can* use frozen. Just make sure you thaw them completely and drain off any excess juice. Frozen berries tend to release a lot of moisture, which can make your Christmas Pavlova Wreath a bit soggy. So, drain ’em well!
How long will the decorated Christmas Pavlova Wreath last?
Here’s the deal: a decorated Christmas Pavlova Wreath is best eaten on the same day. The meringue will start to soften a bit as it sits with the cream and berries. But hey, if you have leftovers (unlikely!), pop it in the fridge. It’ll still be yummy the next day, just not quite as crisp!
Serving Suggestions for Your Christmas Pavlova Wreath
Complementary Flavors
Honestly, this Christmas Pavlova Wreath is pretty amazing on its own! But if you wanna get fancy, a light dessert wine or some sparkling cider would be *perfect*. The bubbles just add to the festive vibe, you know?
Presentation Ideas
Okay, so you’ve made this gorgeous Christmas Pavlova Wreath… now show it off! I love putting mine on a pretty cake stand. And a sprinkle of extra icing sugar? Always a good idea! Maybe even add some fairy lights around the base for that extra sparkle!
Nutritional Information for Christmas Pavlova Wreath
Alright, let’s talk numbers! Now, keep in mind, this is just an estimate, okay? The exact nutritional info for your Christmas Pavlova Wreath will depend on the specific brands and ingredients you use. So, take this with a grain of (icing) sugar!
I’m not a nutritionist, so don’t take this as gospel. It’s just a rough guide to give you an idea. Enjoy your Christmas Pavlova Wreath, and don’t worry too much about the calories – it’s Christmas, after all!
Love this Christmas Pavlova Wreath Recipe?
So, did you love this Christmas Pavlova Wreath as much as I do? Leave a comment below, rate the recipe, or share it with your friends on social media! Happy baking!


Fail-Proof Christmas Pavlova Wreath in Just 1 Hour
- Prep Time: 30 minutes
- Cook Time: 1 hour
- Total Time: Overnight (including cooling time)
- Yield: 8-10 servings 1x
- Category: Dessert
- Method: Baking
- Cuisine: British
- Diet: Gluten Free
Description
A festive Christmas Pavlova Wreath perfect for your holiday celebrations. This delightful dessert features a crisp meringue base, topped with whipped cream, fresh berries, and a touch of mint.
Ingredients
- 6 medium egg whites (or 5 large)
- 300 g white caster sugar
- 1 tsp white wine vinegar
- 1 tsp cornflour
- 1/2 tsp vanilla extract
- 450 ml double cream
- 2 tbsp icing sugar
- Fresh fruit (blackberries, pomegranate, raspberries, blueberries)
- Freeze dried raspberries
- Raspberry coulis
- Mint leaves
Instructions
- Preheat your oven to 150C/130C Fan. Line a LARGE baking tray with baking parchment.
- Whisk the egg whites with a stand mixer until they form stiff peaks. Start adding the sugar 1tsp at a time. Once all of the sugar is incorporated it should be glossy.
- Whisk in the white wine vinegar, then the cornflour, then the vanilla and whisk until smooth.
- Using a small bowl in the middle of the parchment paper, dollop the mixture around it in a ring shape.
- Use a tablespoon for each dollop to form the wreath shape. Use a fork to create texture.
- Carefully lift out the bowl and bake in the oven for 1 hour. Turn off the heat and leave to cool completely in the oven.
- Prepare your fruit, chop any larger fruits, and clean all the berries. Whip the double cream with the icing sugar.
- Spread the whipped cream onto the meringue and top with the fresh fruit. Add mint leaves and sprinkle with icing sugar. Edible glitter can also be used. Enjoy!
Notes
- Serve on the day of decorating.
- The meringue can last 3 months in a container at room temperature.
- It will last 2-3 days in the fridge.
- Ensure a spotlessly clean bowl and whisk.
- Fresh eggs are better than carton egg whites.
- Seasonal berries are preferred.
- Frozen berries will produce moisture.
- Icing sugar in cream and vanilla in pavlova are optional.
- Vinegar and cornflour stabilize the meringue.
- Cracks in the pavlova are normal.
- Make mini pavlovas or Eton mess with leftover meringue.
- The meringue can be made in advance and stored in the oven (turned off).
- Once decorated, it lasts 2 days.
Nutrition
- Serving Size: 1 slice
- Calories: 350
- Sugar: 40g
- Sodium: 50mg
- Fat: 20g
- Saturated Fat: 12g
- Unsaturated Fat: 6g
- Trans Fat: 0g
- Carbohydrates: 45g
- Fiber: 2g
- Protein: 4g
- Cholesterol: 80mg






