

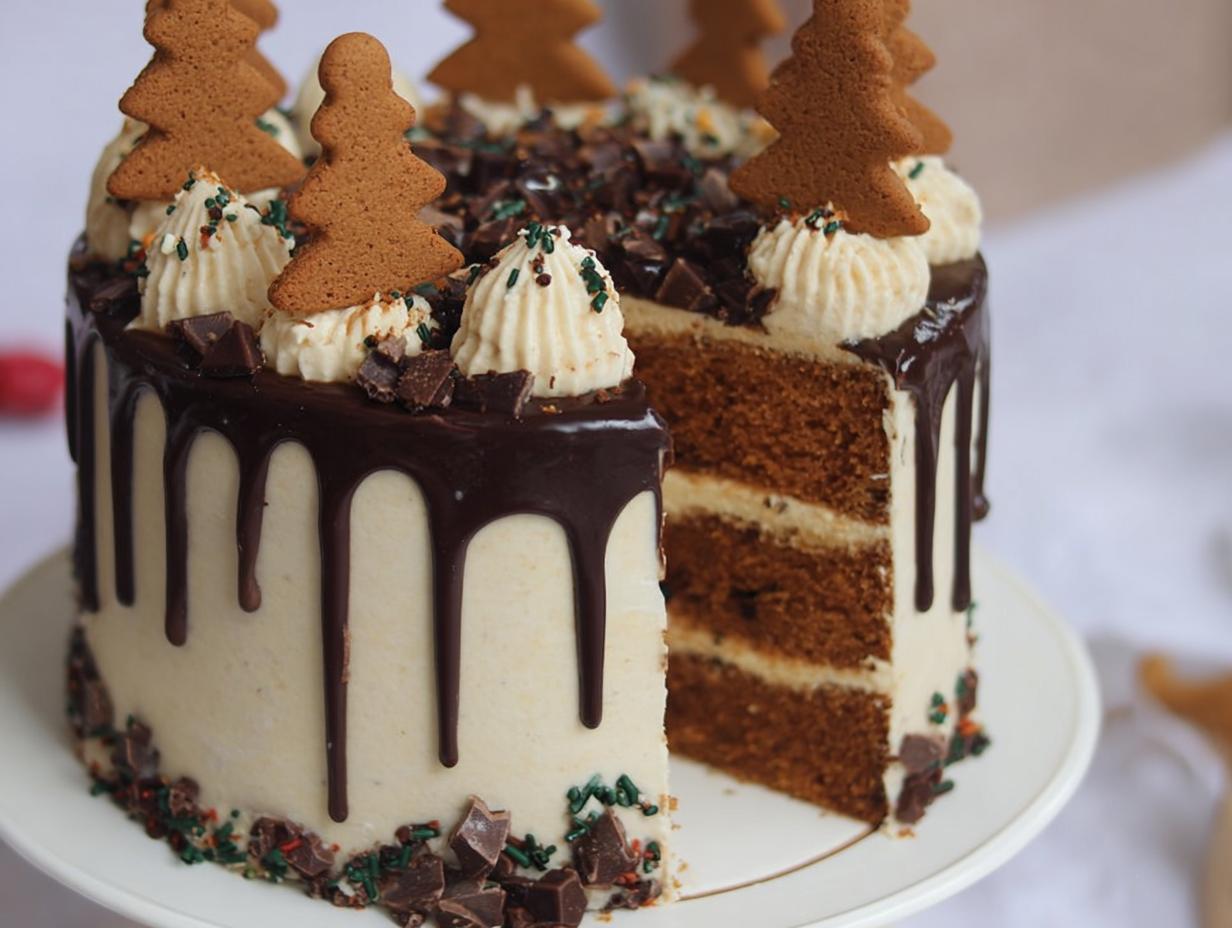
The holidays are *the* time for baking, right? And if you’re gonna bake, you gotta go big! That’s where this show-stopping Gingerbread Drip Cake comes in. Forget boring old Christmas cookies – this Gingerbread Drip Cake is gonna be the star of your dessert table. We’re talking layers of moist, spiced gingerbread cake, smothered in a creamy gingerbread buttercream, and then BAM! A rich, dark chocolate drip cascading down the sides. Oh, and sprinkles. Lots and lots of sprinkles! I’ve been baking for Christmas since I was knee-high to a snowman, and trust me, this one’s a winner. It’s got that classic gingerbread warmth with a touch of chocolatey decadence. You HAVE to try it!
Why You’ll Love This Gingerbread Drip Cake
Okay, so why *should* you spend an afternoon whipping up this Gingerbread Drip Cake? Let me tell you, it’s totally worth it! Here’s why:
Festive Flavors
Seriously, the combo of warm gingerbread spices and rich dark chocolate is just *chef’s kiss*. It’s like a hug in cake form! My favorite part is how the ginger kinda tingles on your tongue, then the chocolate swoops in. It’s a party in your mouth!
Show-Stopping Design
This isn’t just any cake; it’s a *statement*! That dark chocolate drip cascading down the sides? The sprinkles? The edible glitter? It’s pure Christmas magic! You’ll feel like a proper baking superstar when you pull this beauty out.
Perfect for Holiday Gatherings
Forget bringing a boring fruitcake (sorry, fruitcake!). This Gingerbread Drip Cake is *the* dessert to bring to Christmas parties, family get-togethers, or even just a cozy night in by the fire. Trust me, everyone will be begging you for the recipe!
Relatively Simple to Make
Don’t let the fancy look fool you! This Gingerbread Drip Cake is totally achievable, even if you’re not exactly a baking pro. I’ve broken it down into easy-to-follow steps, and I promise, if I can do it, you can do it! Don’t worry if your drip isn’t perfect the first time – that’s what sprinkles are for!
Ingredients for Your Gingerbread Drip Cake
Alright, let’s talk ingredients! Here’s what you’ll need to whip up this masterpiece. Don’t skimp on quality – it *really* makes a difference! And make sure you have everything prepped before you start. Trust me, it’ll save you a headache later.
For the Gingerbread Cake Layers
- 400g unsalted butter, softened. Seriously, softened is key! You don’t want it melted, just nice and squishy.
- 400g dark brown sugar, packed. Get that stuff in there TIGHT! It adds so much richness to the cake.
- 400g self-raising flour, sifted. Sifting is important, don’t skip it! It makes the cake layers nice and light.
- 8 medium eggs, at room temperature. Room temp eggs blend better, promise!
- 2 tsp ground ginger. Can’t have gingerbread without ginger, right?
- 1 tsp ground cinnamon. Adds that warm, cozy feeling!
- 1 tsp ground nutmeg. A little goes a long way, but it’s so worth it!
For the Gingerbread Buttercream
- 350g unsalted butter, softened. Again, softened is essential!
- 700g icing sugar, sifted. Sifted icing sugar = smooth buttercream. Trust me on this one.
- 1 tsp vanilla extract. Adds a touch of sweetness and enhances the other flavors!
- 2 tsp ground ginger. Gotta keep that gingerbread flavor going!
- 1 tsp ground cinnamon. More warmth, more deliciousness!
- 1 tsp ground nutmeg. Just a pinch for that extra something-something.
For the Dark Chocolate Drip
- 100g dark chocolate, good quality. Don’t use the cheap stuff! It’ll make a difference in the taste and the way it melts.
- 2 tsp sunflower oil. This helps the chocolate drip nice and smoothly!
Decorations
- Gingerbread sprinkles. Because sprinkles make everything better!
- Edible glitter. For that extra touch of Christmas sparkle!
- Christmas sprinkles. More sprinkles = more fun!
- 100g dark chocolate, for chocolate trees. Or whatever shape you like!
- 1 tsp ground ginger, for chocolate trees. Adds a little zing to your chocolate!
Equipment You’ll Need to Make Gingerbread Drip Cake
Okay, before you even *think* about preheating that oven, let’s make sure you’ve got all the right tools for the job! Here’s what you’ll need to create this Gingerbread Drip Cake masterpiece. Nothing too fancy, promise! But having everything ready will make your life *so* much easier.
- Three 20cm/8in cake tins. I like using the ones with removable bottoms – makes getting the cakes out a breeze!
- Parchment paper. Don’t even *think* about skipping this! It’s your best friend for preventing sticking.
- Mixing bowls. You’ll need at least two – one for the wet ingredients and one for the dry.
- Electric mixer. A stand mixer is amazing if you have one, but a hand mixer works just fine too!
- Measuring cups and spoons. Accuracy is key in baking, so don’t just eyeball it!
- Rubber spatula. For scraping down the sides of the bowl and folding ingredients together.
- Wire rack. For cooling the cakes completely.
- Cake board or serving plate. To display your gorgeous creation!
- Cake scraper or large spatula. For smoothing the buttercream.
- Small disposable piping bag. For the chocolate drip.
- Your favorite piping tip (optional). For decorating with buttercream swirls!
- Christmas tree shaped mould (optional). For the chocolate ginger Christmas trees. You can totally skip these if you’re short on time though!
How to Make a Gingerbread Drip Cake: Step-by-Step Instructions
Okay, here’s where the magic happens! Follow these steps, and you’ll be enjoying your own Gingerbread Drip Cake in no time. Don’t rush it – baking is a labor of love, right? And remember, even if things don’t go *exactly* as planned, it’ll still taste amazing!
Baking the Gingerbread Cake Layers
- First things first: preheat your oven to 180C/160C Fan. This is super important! And line those three 20cm/8in tins with parchment paper. Trust me, you’ll thank me later when the cakes pop right out.
- Now, grab your mixing bowl and beat together your softened butter and dark brown sugar until it’s light and fluffy. This usually takes me about 3-5 minutes with my stand mixer. It should look kinda like whipped cream!
- Next, add in your sifted self-raising flour, room temperature eggs, ground ginger, cinnamon, and nutmeg. Beat it all together until it’s smooth and yummy. Don’t overmix, though! Just until everything is combined.
- Divide the batter evenly between the three tins. I use a kitchen scale to make sure they’re all the same. This helps them bake evenly!
- Pop them in the oven for 25-30 minutes. You’ll know they’re done when a toothpick inserted into the center comes out clean.
- Leave the cakes to cool in the tins for 10 minutes, then turn them out onto a wire rack to cool *completely*. This is crucial! Warm cakes are too fragile to frost.
Preparing the Gingerbread Buttercream
- Make sure your butter is at room temperature! Seriously, this is key for smooth buttercream. If it’s too cold, it’ll be lumpy. If it’s too warm, it’ll be greasy.
- Beat your softened butter until it’s smooth and supple. This usually takes a few minutes.
- Add in the vanilla extract, ground ginger, cinnamon, and nutmeg. Beat it all together!
- Gradually add in the sifted icing sugar, a cup or two at a time, and beat again until smooth. Don’t dump it all in at once, or you’ll end up with a cloud of icing sugar!
- If the buttercream is too stiff, add in 1 tbsp of boiling water at a time until you get your desired consistency. But! Make sure to beat the ingredients for at least five minutes *first* as it doesn’t always need it!
Assembling the Gingerbread Drip Cake
- Get your first sponge on a cake board and secure it with a smidge of the buttercream underneath. This prevents it from sliding around!
- Add on 1-2tbsp of buttercream and smooth it over with a spatula or knife.
- Add on the second sponge and repeat, and then add on the third sponge.
- Smother the sides and top in a thin layer of buttercream to seal it and make the edges smooth. This is your crumb coat!
- Leave it to sit at room temperature for 30 minutes or 10 minutes in the fridge. This helps the crumb coat set.
- Once dried/set, you have done your crumb coat. Yay!
- Add on more buttercream all over the cake, and smooth it around with a large cake scraper or spatula. Keep any buttercream you scrape off – you’ll need it later!
Creating the Dark Chocolate Drip
- Melt your 100g of dark chocolate in the microwave in 30-second intervals, stirring in between, until it’s smooth. Or, you can use a double boiler! Just don’t burn it!
- Mix in the sunflower oil if using. This helps the chocolate drip nicely.
- Carefully drip the chocolate down the sides of the cake using a small disposable piping bag with the end snipped off. Start with small drips, and you can always add more!
- Leave the drip to set for 10 minutes or so. You want it to be firm but not rock solid.
Decorating Your Gingerbread Drip Cake
- While the drip is setting, make any extra decorations if using. I used 100g of dark chocolate mixed with 1tsp of ground ginger melted together and set in a Christmas tree shape mould in the fridge until solid. But you can use anything you like!
- Once the drip is set, pipe on your leftover buttercream in swirls using your favorite piping tip. Or just dollop it on – it’s your cake!
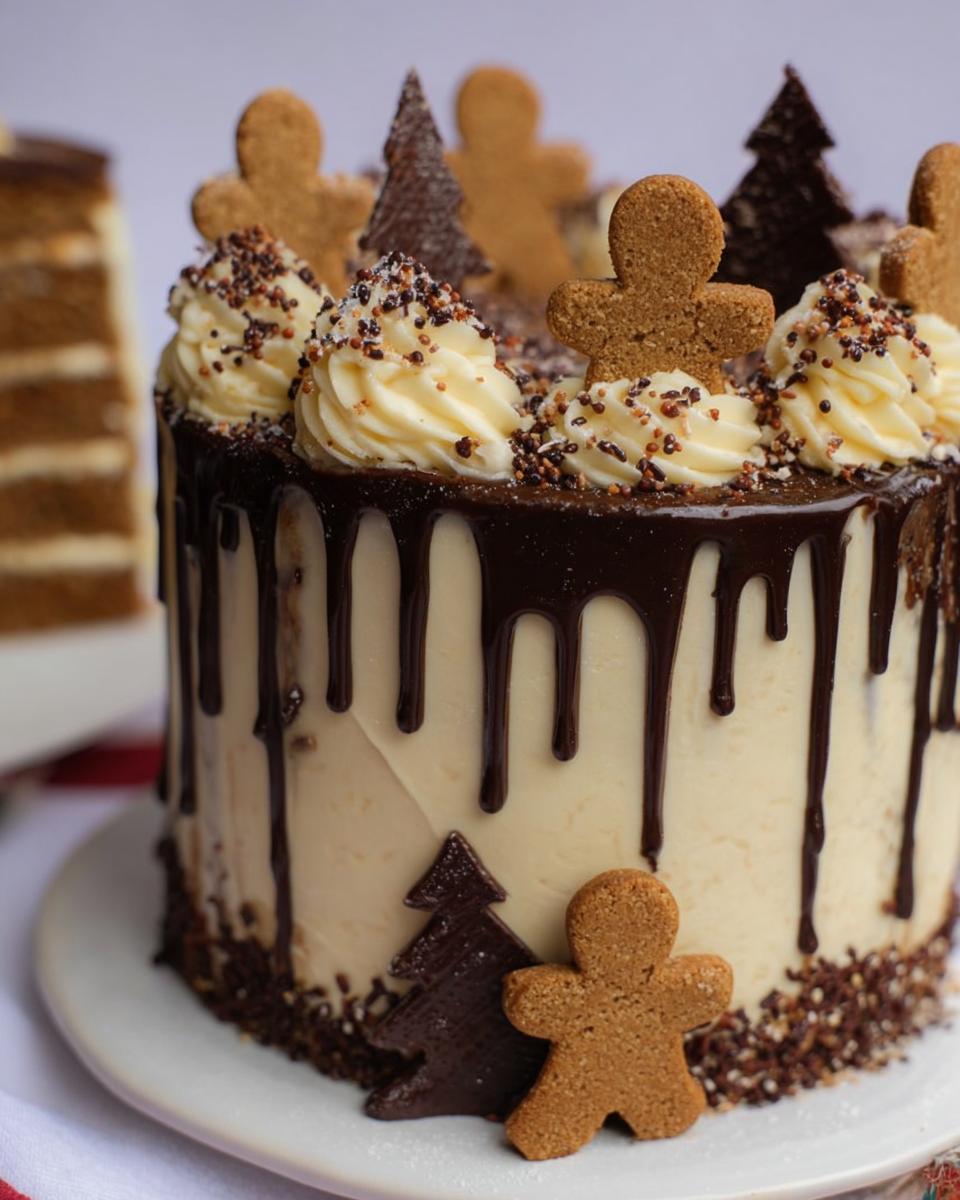
- Add a gingerbread man per swirl. Or Christmas sprinkles, or anything festive that you have!
- Also, sprinkle on your favorite Christmas sprinkles! More is more, right?
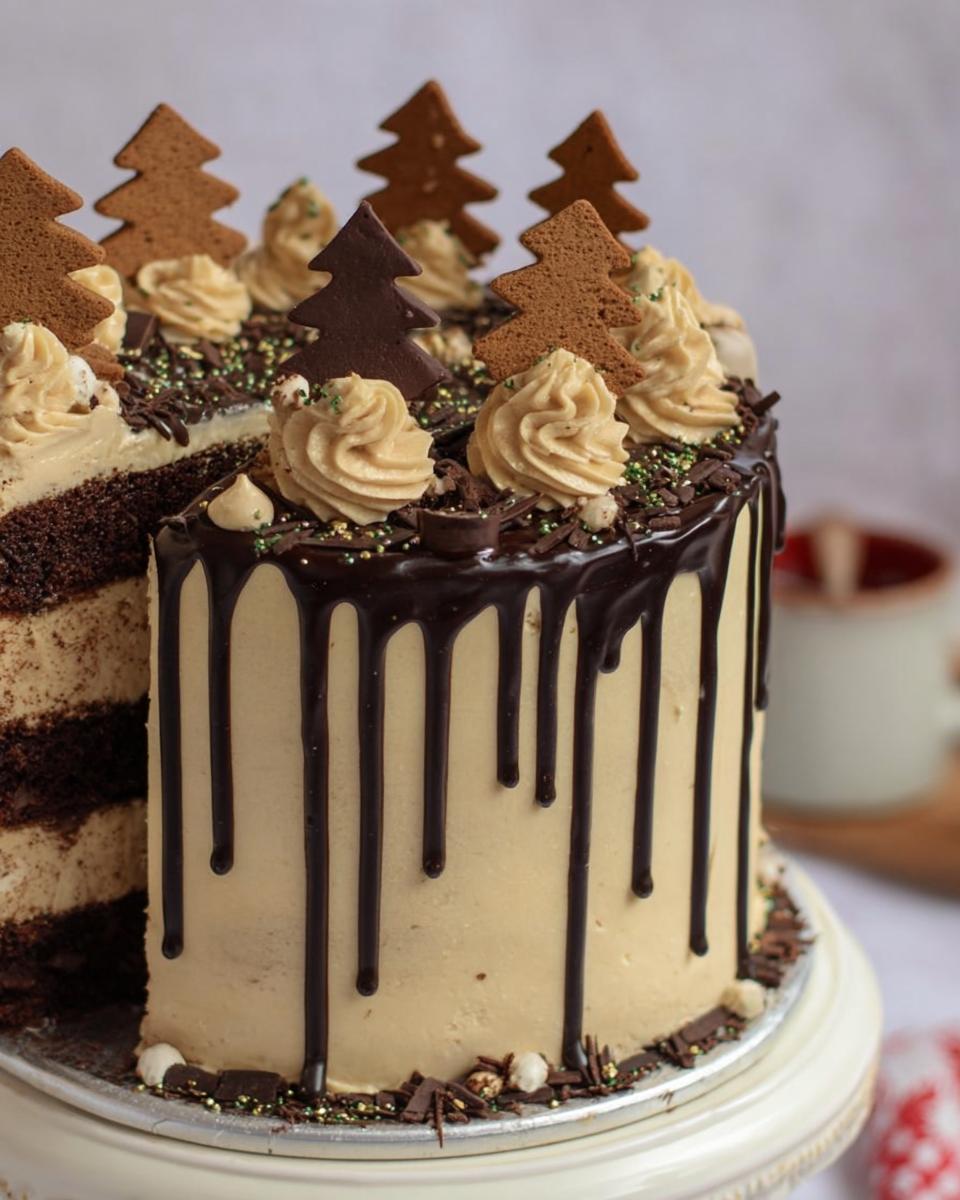
- Add your chocolate ginger Christmas trees to the centre.
- Spritz with edible glitter. Because why not?!
- Enjoy! You did it!
Tips for the Perfect Gingerbread Drip Cake
Want to take your Gingerbread Drip Cake from “good” to “OMG!”? Here are a few little tricks I’ve learned along the way. These are game-changers, trust me! Follow these, and you’ll be the Gingerbread Drip Cake QUEEN (or KING!) of Christmas!
Don’t Overbake the Cake
This is *so* important! Overbaked gingerbread is dry gingerbread, and nobody wants that. Start checking for doneness around 25 minutes. You’re looking for a toothpick inserted into the center to come out clean, or with just a few moist crumbs clinging to it. If it’s still wet batter, give it a few more minutes. But keep an eye on it! You can also gently press the top of the cake; it should spring back slightly.
Use Room Temperature Ingredients
Seriously, this makes a *huge* difference, especially with the butter. Room temperature butter creams much better, which means a lighter, fluffier cake and buttercream. Room temperature eggs emulsify better, creating a smoother batter. Just take everything out of the fridge about an hour before you start baking, and you’ll be golden!
Chill the Cake Before Adding the Drip
This is a MUST! A slightly chilled cake will help the chocolate drip set faster and prevent it from melting all over the place. I usually pop mine in the fridge for about 30 minutes before I add the drip. You don’t want it rock solid, just nice and cool. This way, you get that perfect cascading drip effect without a melty mess. Oops! I’ve learned that the hard way!!

Gingerbread Drip Cake Variations
Okay, so you’ve mastered the classic Gingerbread Drip Cake? Awesome! Now, let’s get a little crazy and try some fun variations! Don’t be afraid to experiment and put your own spin on things. Baking should be fun, after all! These are just a couple of ideas to get you started, but the possibilities are endless!
Different Spices
Feeling adventurous? Swap out some of the classic gingerbread spices for something a little different! A pinch of cardamom adds a warm, citrusy note that’s *amazing* with the chocolate. Or, try a little bit of ground cloves for a deeper, more intense flavor. Just be careful not to overdo it – cloves can be pretty potent! You could even add a bit of black pepper for a surprising kick! It sounds weird, but trust me, it works!
White Chocolate Drip
Not a fan of dark chocolate? No problem! A white chocolate drip is just as delicious and looks absolutely stunning against the gingerbread cake. Just melt some good-quality white chocolate (again, don’t skimp!), add a teaspoon of sunflower oil, and drip away! You could even add a few drops of food coloring to the white chocolate for a festive pop of color! Red and green drips? So Christmassy!
Storing Your Gingerbread Drip Cake
Okay, so you’ve baked this gorgeous Gingerbread Drip Cake, and now you’re wondering how to keep it fresh. Don’t worry, I’ve got you covered! Here’s the lowdown on storing your masterpiece. Because let’s be real, there are almost *always* leftovers (unless you have a *really* big party!).
The best way to store your Gingerbread Drip Cake is at room temperature, in an airtight container. It’ll stay moist and delicious for about 3-4 days. You don’t need to refrigerate it! The fridge can actually dry it out. Just pop it in a cake carrier or a big Tupperware container, and you’re good to go!
And if you’re wondering about reheating… well, you don’t really need to! This Gingerbread Drip Cake is delicious cold or at room temperature. But if you *really* want to warm it up, you can zap a slice in the microwave for about 10-15 seconds. Just be careful not to overheat it, or the buttercream will melt! Trust me, it’s best enjoyed as is!
Frequently Asked Questions About Gingerbread Drip Cake
Got questions about this Gingerbread Drip Cake? I got answers! Here are some of the most common things people ask me. Don’t be shy – if you’ve got a burning question, I’m here to help!
Can I make the Gingerbread Drip Cake ahead of time?
Absolutely! In fact, I often do! The cake layers themselves can be baked a day or two in advance. Just wrap them tightly in cling film and store them at room temperature. You can also make the buttercream ahead of time and store it in an airtight container in the fridge for up to 3 days. Just let it come to room temperature and re-whip it before using. Assembling the whole cake the day before is totally fine too! Just store it in the fridge, and let it come to room temperature for about an hour before serving. Easy peasy!
Can I freeze the Gingerbread Drip Cake?
Yep, you can! But… the buttercream might change texture a little bit. It can sometimes get a bit grainy after thawing. If you’re gonna freeze it, I recommend freezing individual slices rather than the whole cake. Wrap each slice tightly in cling film and then in foil. They’ll keep in the freezer for up to 2 months. To thaw, just pop them in the fridge overnight. Be warned, the drip might go a little funny!
What if my chocolate drip is too thick or too thin?
Ah, the dreaded drip dilemma! If your chocolate drip is too thick, it won’t run down the sides of the cake nicely. Just add a *tiny* bit more sunflower oil (like, a teaspoon at a time) and stir until it’s the right consistency. If it’s too thin, it’ll run right off the cake! Whoops! In that case, let it cool for a few minutes to thicken up slightly before dripping. You can also add a *tiny* bit of melted chocolate to thicken it! Also, remember that chilling the cake is always a good idea. It’s a bit of trial and error, but you’ll get there!
Nutritional Information for Gingerbread Drip Cake
Okay, let’s talk numbers! Now, I’m no nutritionist, and it’s *super* hard to give exact nutritional info for this Gingerbread Drip Cake, because it totally depends on the brands you use and how big you slice it! But, just so you have a general idea…
Keep in mind, this is just an *estimate*, folks! Your mileage may vary. But hey, it’s Christmas! A little indulgence never hurt anyone, right? Enjoy every bite of that Gingerbread Drip Cake, and don’t sweat the small stuff! Happy baking!
Enjoyed This Gingerbread Drip Cake Recipe?
So, did you bake this Gingerbread Drip Cake? I *really* wanna know what you think! Did it wow your family and friends? Did you tweak it and make it your own? Tell me *everything*!
Leave a comment below and let me know what you think! Seriously, I read every single one! And if you loved it, give it a star rating! It helps other bakers find this recipe and spread the gingerbread love!
And! If you took any photos of your gorgeous Gingerbread Drip Cake, share them on social media and tag me! I’m always so inspired by seeing your creations. Let’s spread some Christmas cheer, one Gingerbread Drip Cake at a time!
Print
Gingerbread Drip Cake: Shockingly Simple Recipe
- Prep Time: 45 minutes
- Cook Time: 30 minutes
- Total Time: 2 hours 15 minutes (includes cooling and setting time)
- Yield: 12 servings 1x
- Category: Dessert
- Method: Baking
- Cuisine: British
- Diet: Vegetarian
Description
A delicious Gingerbread Drip Cake perfect for the holiday season. It features layers of moist gingerbread cake, smooth gingerbread buttercream, and a rich dark chocolate drip. Decorated with gingerbread sprinkles, edible glitter and chocolate ginger Christmas trees.
Ingredients
- 400 g unsalted butter
- 400 g dark brown sugar
- 400 g self raising flour
- 8 medium eggs
- 2 tsp ground ginger
- 1 tsp ground cinnamon
- 1 tsp nutmeg
- 350 g unsalted butter (not stork)
- 700 g icing sugar
- 1 tsp vanilla extract
- 2 tsp ground ginger
- 1 tsp ground cinnamon
- 1 tsp nutmeg
- 100 g dark chocolate
- 2 tsp sunflower oil
- 100 g dark chocolate
- 1 tsp ground ginger
- Edible glitter
- Gingerbread sprinkles
- Christmas sprinkles
Instructions
- Preheat your oven to 180C/160C Fan, and line three 20cm/8in tins with parchment paper.
- Beat together your butter and sugar until light and fluffy.
- Add in your flour, eggs, and spices! Beat until smooth and yummy.
- Split evenly between the three tins, and bake in the oven for 25-30 minutes (or until baked through)
- Leave to cool in the tin for 10 minutes, and then on a wire rack to cool fully.
- Make sure your butter is at room temperature.
- Beat your butter until smooth and supple.
- Add in the vanilla extract, and the spices, and beat in.
- Gradually add in the icing sugar and beat again until smooth!
- If it is really too stiff, add in 1tbsp boiling water at a time till you get your desired consistency. However, make sure to beat the ingredients for at least five minutes first as it doesn’t always need it!
- Get your first sponge on a board and secure with a smidge of the buttercream underneath. Add on 1-2tbsp of buttercream and smooth over.
- Add on the second sponge and repeat, and then add on the third sponge.
- Smother the sides and top in a thin layer of buttercream to seal it and make the edges smooth, and leave to sit at room temperature for 30 minutes or 10 minutes in the fridge.
- Once dried/set, you have done your crumb coat.
- Add on more buttercream all over the cake, and smooth round with a large cake scraper, and keep any you scrape off.
- Melt your 100g of dark chocolate for the drip, and mix in the oil if using. Carefully drip down the sides of the cake with a small disposable piping bag with the end snipped off.
- Leave the drip to set for 10 minutes or so.
- Whilst the drip is setting, make any extra decorations if using I used 100g of dark chocolate mixed with 1tsp of ground ginger melted together and set in a Christmas tree shape mould in the fridge until solid.
- Once the drip is set, pipe on your leftover buttercream in swirls using your favourite piping tip, and add a gingerbread man per swirl.
- Also, sprinkle on your favourite Christmas sprinkles, and add your chocolate ginger Christmas trees to the centre.
- Spritz with edible glitter, and enjoy!
Notes
- This cake will last for 3-4 days, at room temperature. It doesn’t need to keep in the fridge.
- The sponges can be made the day before if wrapped in clingfilm overnight.
- The cinnamon and nutmeg are optional, but enhance the ginger flavour!
- I wouldn’t recommend milk chocolate for the drip as it can often be too thin and look watery, but if you do, don’t add anything to it.
- Do not use a spread/stork for the buttercream, it will be too runny.
Nutrition
- Serving Size: 1 slice
- Calories: 650
- Sugar: 75g
- Sodium: 200mg
- Fat: 40g
- Saturated Fat: 25g
- Unsaturated Fat: 10g
- Trans Fat: 1g
- Carbohydrates: 70g
- Fiber: 2g
- Protein: 5g
- Cholesterol: 150mg






