

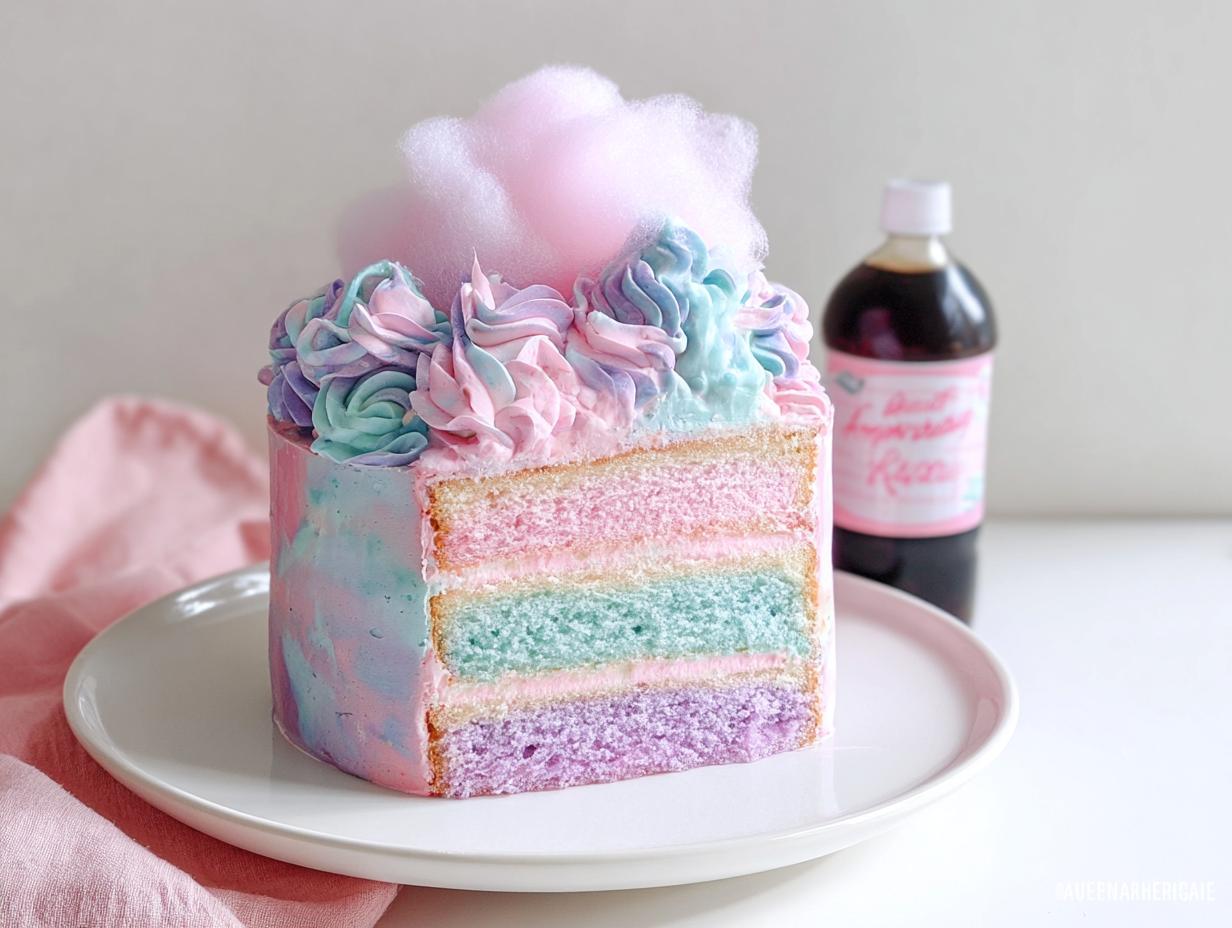
Okay, so, cotton candy, right? Doesn’t it just take you back? I remember summer days at the fair, sticky fingers, and that *amazing* spun sugar melting in my mouth. I wanted to capture that pure, sugary joy in a cake, and trust me, this Homemade Cotton Candy Cake Recipe with Cotton Candy Buttercream Frosting? It’s IT.
Forget those store-bought cakes that taste kinda artificial. This one’s got that real, from-scratch goodness *and* that unmistakable cotton candy flavor. I’ve been baking for, well, let’s just say a *long* time, and this recipe? It’s a winner. It’s light, it’s fluffy, and that Cotton Candy Buttercream Frosting? Oh. My. Goodness. Get ready to bring some serious smiles to your next party!
Why You’ll Love This Homemade Cotton Candy Cake Recipe with Cotton Candy Buttercream Frosting
Fun and Festive
Seriously, who *doesn’t* smile when they see a cotton candy cake? It’s like instant party vibes! Birthdays, baby showers, “just because” days – this cake makes ’em all better.
Delicious Cotton Candy Flavor
Okay, so, this isn’t just some cake that *looks* like cotton candy. This *tastes* like the real deal! That cotton candy flavor in the cake *and* the buttercream? It’s a total sugar rush in the best way possible. My favorite part is that the flavor is present, but it’s not overpowering.
Impress Your Friends and Family
Trust me, when you whip out this homemade cotton candy cake? Jaws. Will. Drop. People will be asking for the recipe, and you can just smile and say, “Oh, it’s just a little something I threw together!” (wink, wink!).
Perfect for All Skill Levels
Don’t worry if you’re not a pro baker! This recipe is super straightforward. I’ve broken it down so even beginners can make a show-stopping cotton candy cake. You got this!
Ingredients for Homemade Cotton Candy Cake Recipe with Cotton Candy Buttercream Frosting
Cake Ingredients
Alright, let’s gather everything we need for this magical cake! Don’t skimp on quality here; it really makes a difference.
Dry Ingredients
Okay, so for the dry stuff, you’ll need 2 1/2 cups (that’s 265g) of sifted cake flour. Sifting is *key* here – trust me, it makes the cake so much lighter! Then grab 2 teaspoons of baking powder, 1/2 teaspoon of baking soda, and 1/2 teaspoon of salt. Easy peasy!
Wet Ingredients
Now for the good stuff! You’ll need 1 1/2 cups (or 300g) of granulated sugar, 1/2 cup (that’s 113g) of unsalted butter – make sure it’s at room temperature, or it won’t cream properly! Then, 4 large egg whites, also at room temperature. Don’t forget 1/2 cup (120ml) of vegetable oil, 1 Tablespoon of Amoretti Natural Cotton Candy Artisan Flavor (this stuff is AMAZING!), and 1 1/4 cups (that’s 300ml) of full-fat buttermilk, again, room temperature is best. And finally, just a drop each of blue and pink food coloring – optional, but it makes the cake so pretty!
Cotton Candy Buttercream Frosting Ingredients
The frosting is where the *real* cotton candy magic happens! Get ready for some sugary goodness.
Base Ingredients
You’ll need 2 cups (that’s 452g) of unsalted butter, at room temperature, and a whopping 7 cups (840g) of powdered sugar. Yes, it’s a lot, but trust me, it’s worth it!
Flavor and Color
And now, for the flavor and color! Grab 1 teaspoon of Amoretti Natural Cotton Candy Artisan Flavor, 4 Tablespoons of whole milk (room temperature is best!), 1/4 teaspoon of salt, and just a *tiny* drop each of blue and purple food color gel. Seriously, a *tiny* drop – you don’t want to end up with bright blue frosting!
Topping
Last but not least, you’ll want about 1 cup of cotton candy for topping. Try to add this right before serving. It starts to shrink after an hour!
Equipment You’ll Need
Baking Equipment
Okay, so before we get started, let’s make sure we have all our tools ready! For the cake itself, you’ll need either three 6-inch or two 8-inch cake pans. I *love* my 6-inch pans – the cake looks so tall and impressive! You’ll also need some mixing bowls, measuring cups and spoons (gotta be precise!), an electric mixer (handheld or stand mixer, whatever you prefer), and a wire rack for cooling.
Frosting Equipment
For the Cotton Candy Buttercream Frosting, you’ll need that electric mixer again, a good spatula for smoothing, a piping bag (totally optional, but it makes those pretty swirls!), and a cardboard circle – it just makes transferring the cake so much easier, trust me!
How to Prepare This Homemade Cotton Candy Cake Recipe with Cotton Candy Buttercream Frosting
Baking the Cake
Okay, let’s get this show on the road! Baking the cake is probably the most important part. If the cake isn’t good, nothing else matters!
Preparing the Batter
First things first, preheat your oven to 350°F (that’s 177°C). While that’s heating up, grab your cake pans (either those three 6-inch or two 8-inch ones) and give them a good coating of baking spray. I like to add parchment paper circles to the bottom too – it just makes removing the cakes so much easier! Next, in a medium bowl, whisk together all your dry ingredients: that sifted cake flour, baking powder, baking soda, and salt. Set that aside for now.
In a large bowl, beat the butter until it’s nice and creamy. Then, add the sugar and cream them together until the mixture is light and fluffy. This usually takes a few minutes. Add the egg whites one at a time, beating well after each addition. Then, pour in the vegetable oil and that amazing cotton candy flavor. Beat for another minute until it’s all combined.
Now, for the tricky part: alternate adding the flour mixture and buttermilk. Start and end with the flour mixture. Mix until *just* combined. Don’t overmix! The batter will be slightly thin, and that’s totally okay!
Coloring the Batter
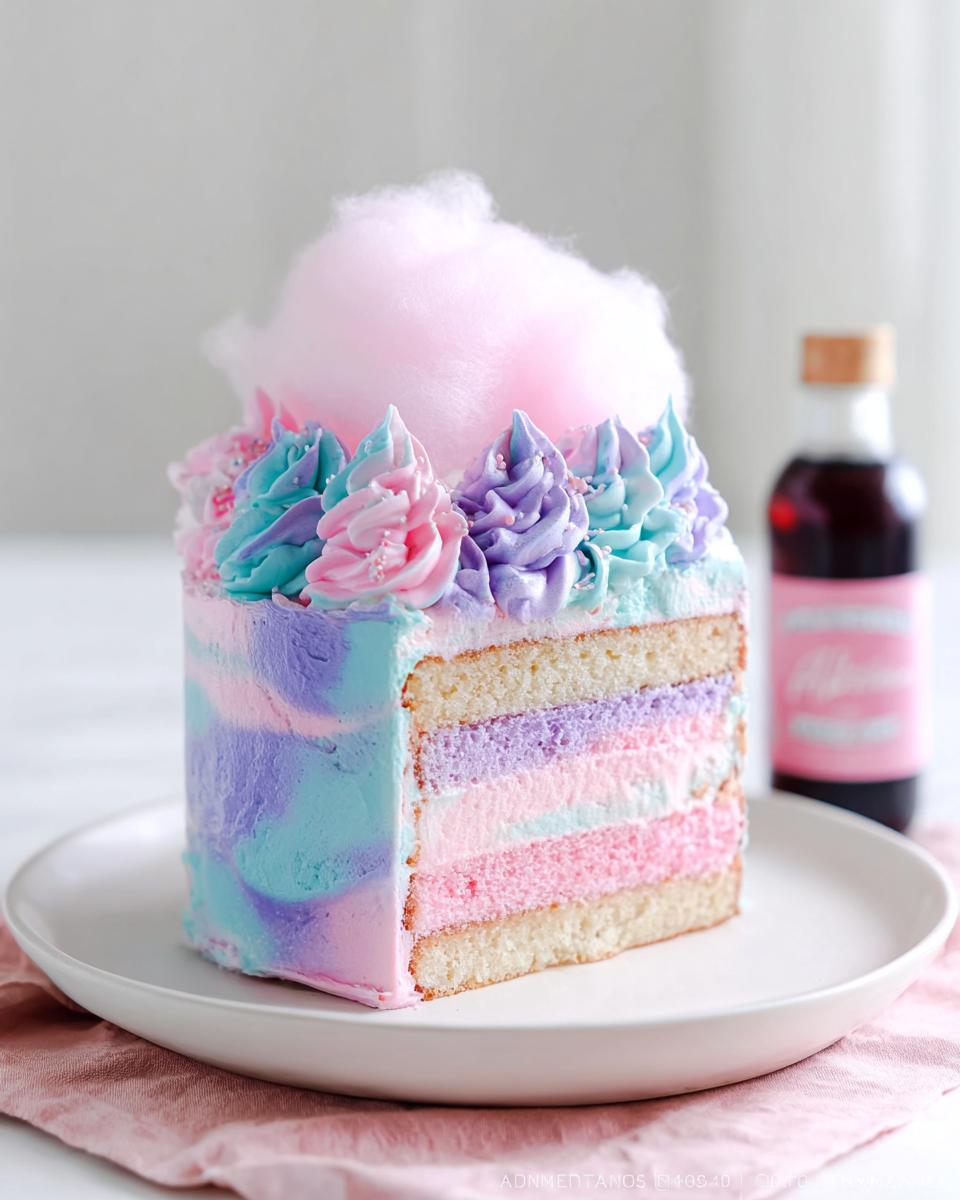
Alright, time to get colorful! Divide the batter equally into two separate bowls. Add one drop of pink food color gel to the first bowl and whisk until it’s all uniform. Do the same with the blue food color gel in the second bowl. Isn’t it pretty?
Baking Instructions
Now, grab your prepared cake pans and add alternating scoops of pink and blue batter into each one. This is what creates that fun, swirly effect! Bake for 28 to 32 minutes. The cakes are done when they spring back to the touch and a toothpick inserted into the center comes out clean. Let them cool in the pans for 5 minutes, then invert them onto a wire rack to cool completely. Patience, my friend, patience!
Making the Cotton Candy Buttercream Frosting
Okay, while those cakes are cooling, let’s whip up some Cotton Candy Buttercream Frosting!
Preparing the Buttercream Base
In a large bowl, cream the butter until it’s super creamy and light – this takes about 7 minutes. Don’t rush it! Gradually add the powdered sugar, then the milk and salt. Mix until everything is fully incorporated and you have a smooth, dreamy buttercream.
Adding Cotton Candy Flavor
Now, for the *real* magic! If you’re planning on making the pastel frosting colors (more on that in a sec!), reserve about 1 cup of the buttercream at this point and set it aside. Then, add the Amoretti Natural Cotton Candy Artisan Flavor to the *rest* of the buttercream and mix on low speed until it’s all combined. If you’re *not* doing the pastel colors, just add the cotton candy flavor to the whole batch!
Coloring the Buttercream
Time for some watercolor fun! Divide that reserved white buttercream between two bowls. Add a *tiny* drop of purple food coloring into the first bowl and a *tiny* drop of blue food coloring into the second bowl. Remember, a little goes a long way! Now you have your pastel colors to decorate!
Assembling the Cake
Almost there! Let’s put this masterpiece together.
Frosting and Crumb Coating
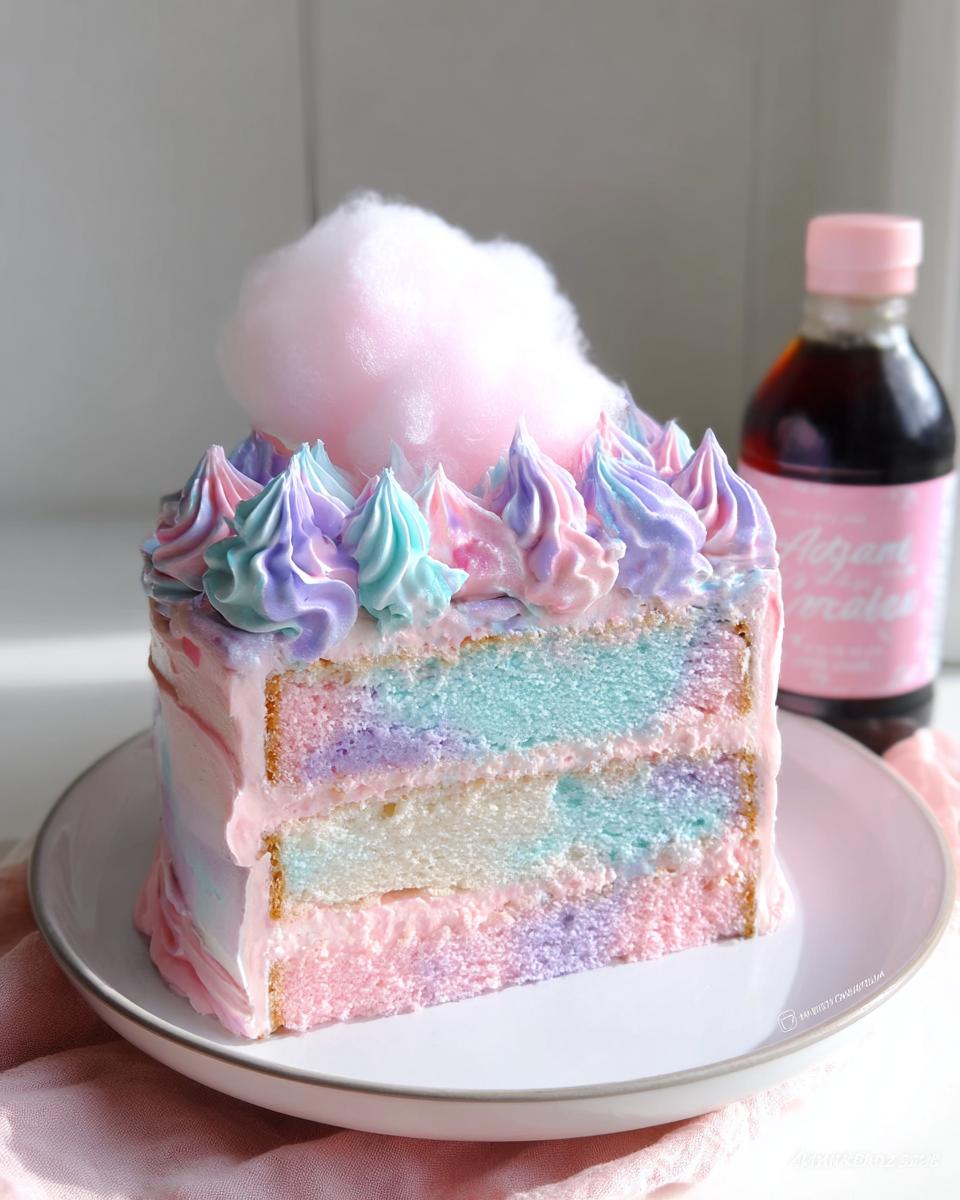
First, level those cake layers. I use a long serrated knife for this. Add a dollop of buttercream to a cardboard circle and place the first layer on top. This keeps it from sliding around. Fill and stack the cake with buttercream, making sure each layer is even. Then, apply a thin crumb coat – this seals in all those little crumbs and keeps your final frosting layer looking perfect. Pop it in the fridge for 30 minutes to firm up.
Decorating the Cake
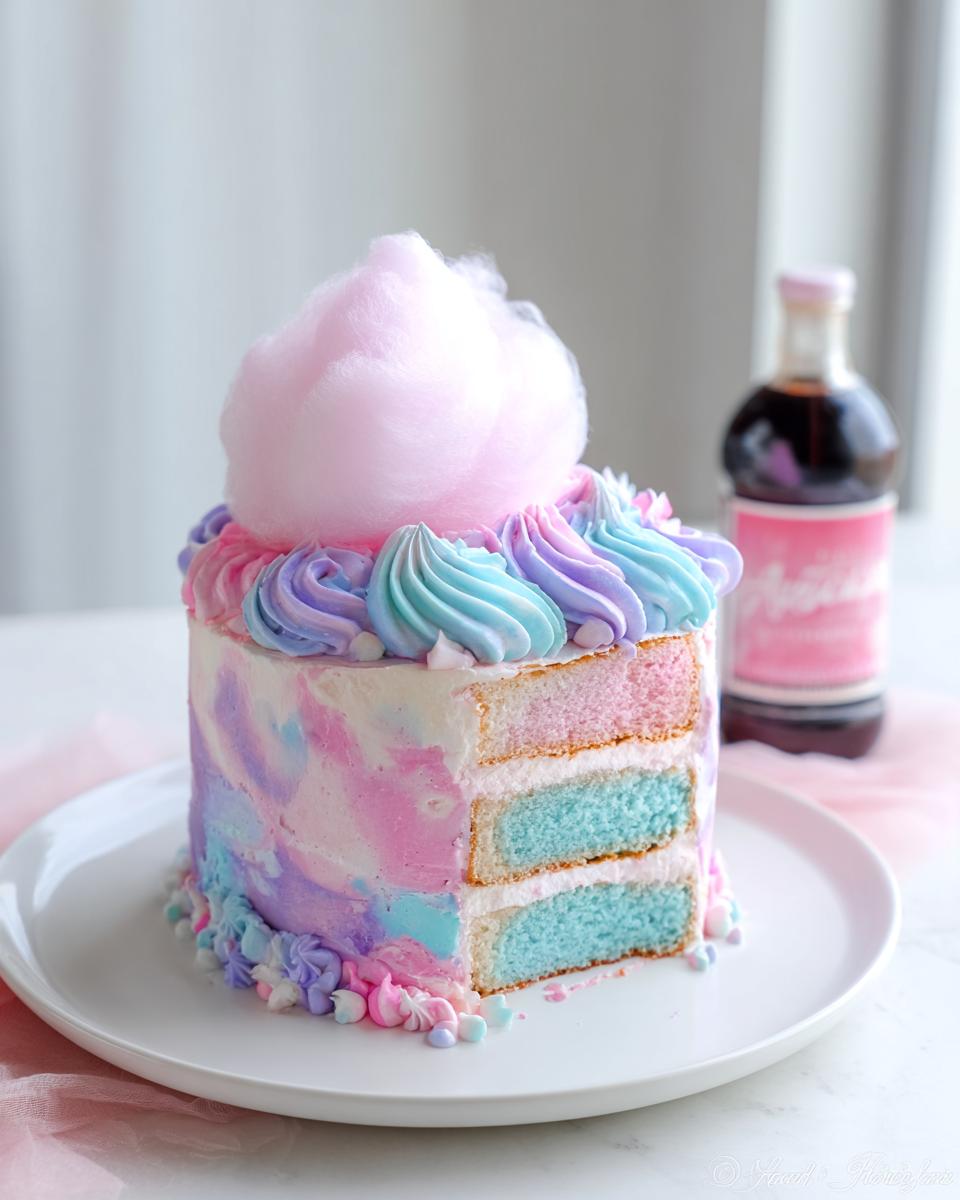
Now, for the fun part! Get those pastel frostings ready. Use these colors along with the rest of the light pink cotton candy buttercream to frost a watercolor finish on the cake. It doesn’t have to be perfect! Imperfection is beautiful! Refrigerate for another 20 minutes to set the frosting. Finally, pipe some swirls around the top edge (if you’re feeling fancy) and top with that glorious cotton candy *just* before serving. And there you have it – a Homemade Cotton Candy Cake Recipe with Cotton Candy Buttercream Frosting that’s sure to impress!
Tips for the Best Homemade Cotton Candy Cake Recipe with Cotton Candy Buttercream Frosting
Ensuring a Moist Cake
Okay, nobody wants a dry cake, right? The key is not to overbake it! Start checking for doneness around 28 minutes. Also, make sure you’re using room-temperature ingredients – it really does make a difference! And don’t skip the buttermilk – it adds SO much moisture!
Achieving the Perfect Buttercream Consistency
Buttercream too thick? Add milk, a tablespoon at a time, until it reaches the right consistency. Too thin? Add powdered sugar, a few tablespoons at a time. You want it to be smooth and spreadable, but not runny. Trust me, you’ll get the hang of it!
Working with Cotton Candy
Cotton candy melts FAST, especially in humid conditions. The trick? Add it to the cake *right* before serving. Like, literally, seconds before. Otherwise, it’ll turn into a sticky, sad mess. You can also try placing the cake in the fridge to help it stay firm for a little longer!
Ingredient Notes and Substitutions for This Homemade Cotton Candy Cake Recipe
Cotton Candy Flavoring
Okay, so the Amoretti Natural Cotton Candy Artisan Flavor is kinda the secret weapon here. *But*, if you can’t find it, don’t panic! You *could* try using cotton candy extract, but honestly, I haven’t tested it, so I can’t promise it’ll be the same. Maybe experiment with a super-finely ground cotton candy powder? Let me know if you try it!
Buttermilk
Don’t have buttermilk on hand? No problem! Just add a tablespoon of lemon juice or white vinegar to a cup of regular milk, let it sit for about 5 minutes, and boom! Buttermilk substitute. It works like a charm, trust me!
Food Coloring
If you’re not into artificial food coloring, no worries! You can use natural food coloring. Beet juice powder for pink, spirulina for blue – just be aware that they *might* slightly affect the taste, so use them sparingly!
Serving Suggestions for Your Homemade Cotton Candy Cake
Complementary Desserts
Okay, so you’ve got this amazing cotton candy cake, but what else goes with it? I think some light and fruity desserts would be perfect! Maybe some colorful macarons or a bowl of fresh berries with whipped cream? Yum!
Beverage Pairings
For drinks, I’m thinking something equally fun and festive! How about some sparkling lemonade, a fruity punch, or even just a glass of cold milk? For the grown-ups, a light, crisp Prosecco would be amazing!
Storing and Reheating Your Homemade Cotton Candy Cake Recipe with Cotton Candy Buttercream Frosting
Storing Leftover Cake
Okay, so, you *somehow* have leftover cake? Amazing! To keep it fresh, wrap it tightly in plastic wrap or store it in an airtight container. It’ll stay good in the fridge for about 3-4 days. Just let it come to room temperature before serving – that buttercream gets kinda hard when it’s cold!
Freezing Instructions
Want to save some cake for later? You can totally freeze it! Wrap individual slices (or the whole cake) tightly in plastic wrap, then in foil. It’ll keep in the freezer for up to 2-3 months. When you’re ready to eat it, let it thaw in the fridge overnight. Easy peasy!
Frequently Asked Questions About This Homemade Cotton Candy Cake Recipe with Cotton Candy Buttercream Frosting
Can I use a different size cake pan?
Sure thing! If you don’t have the 6-inch or 8-inch pans, you can definitely adapt. Just keep an eye on the baking time! If you’re using a larger pan, like a 9-inch, it’ll probably bake a bit faster. Start checking for doneness around 25 minutes. Smaller pans? They might need a few extra minutes. Just use that toothpick test!
Can I make this cake ahead of time?
Absolutely! This cake is actually great for making ahead. You can bake the cake layers a day or two in advance, wrap them tightly, and store them at room temperature or in the fridge. The Cotton Candy Buttercream Frosting can also be made a day ahead and stored in the fridge. Just let it come to room temperature and whip it up again before using. It’s a total time-saver!
How do I prevent the cotton candy from melting?
Okay, this is *the* big question, right? Cotton candy is super delicate! The best way to prevent it from melting is to add it to the cake literally *right* before serving. I’m talking seconds! If you need to assemble the cake a bit earlier, you can try placing it in the fridge to keep it cool, but honestly, fresh cotton candy is always best.
What is the best way to get a smooth buttercream frosting?
Smooth buttercream is all about technique! Make sure your butter is at the right temperature – soft, but not melted. Beat it for a good 7 minutes until it’s light and fluffy. And when you add the powdered sugar, do it gradually, mixing on low speed to avoid a sugary mess. If it’s still lumpy, try adding a tiny bit of milk, one tablespoon at a time, until it’s perfectly smooth. You got this!
Estimated Nutritional Information
Okay, so, I’m not gonna lie, I don’t have the exact nutritional info for this Homemade Cotton Candy Cake Recipe with Cotton Candy Buttercream Frosting. But, let’s be real, it’s cake! It’s definitely got calories, sugar, and all that good stuff. Just enjoy it in moderation, okay? It’s an estimate!
Rate and Share Your Homemade Cotton Candy Cake Recipe with Cotton Candy Buttercream Frosting
Loved this cake? Leave a comment below and tell me what you think! Don’t forget to rate the recipe and share it with your friends on social media – let’s spread the cotton candy love!
Print
Homemade Cotton Candy Cake: Shockingly Easy Recipe
- Prep Time: 45 minutes
- Cook Time: 35 minutes
- Total Time: 1 hour 20 minutes
- Yield: 15 slices 1x
- Category: Dessert
- Method: Baking
- Cuisine: American
- Diet: Vegetarian
Description
Make a whimsical Homemade Cotton Candy Cake. It features a light and fluffy cake with a cotton candy flavor and a smooth Cotton Candy Buttercream Frosting.
Ingredients
- 2 1/2 Cups (265g) sifted cake flour
- 2 tsp baking powder
- 1/2 tsp baking soda
- 1/2 tsp salt
- 1 1/2 Cups (300g) granulated sugar
- 1/2 Cups (113g) unsalted butter, room temperature
- 4 large egg whites, room temperature
- 1/2 Cup (120ml) vegetable oil
- 1 Tbsp Amoretti Natural Cotton Candy Artisan Flavor
- 1 1/4 Cups (300ml) full-fat buttermilk, room temperature
- 1 drop blue food coloring (optional)
- 1 drop pink food coloring (optional)
- 2 Cups (452g) unsalted butter, room temperature
- 7 Cups (840g) powdered sugar
- 1 tsp Amoretti Natural Cotton Candy Artisan Flavor
- 4 Tbsp whole milk, room temperature
- 1/4 tsp salt
- 1 small drop blue food color gel
- 1 small drop purple food color gel
- 1 Cup cotton candy
Instructions
- Preheat the oven to 350°F/177°C. Prepare three 6-inch or two 8-inch cake pans with baking spray and parchment paper circles.
- Whisk together flour, baking powder, baking soda, and salt in a medium bowl. Set aside.
- Beat butter until creamy. Add sugar and cream together until light and fluffy. Add egg whites one at a time, then vegetable oil and cotton candy flavor. Beat for 1 minute.
- Add flour mixture and buttermilk. Mix until just combined. The batter will be slightly thin.
- Divide the batter equally into 2 separate bowls. Add one drop of pink food color gel into the first bowl and whisk until the color is uniform. Add one small drop of blue food color gel into the second bowl and whisk until the color is uniform.
- Add alternating scoops of pink and blue batter into each prepared cake pan.
- Bake for 28 to 32 minutes, until the cakes spring back to the touch and a toothpick inserted into the centers comes out clean. Cool in pans for 5 minutes, then cool completely on a wire rack.
- Cream butter until creamy and light. About 7 minutes.
- Add powdered sugar gradually, then milk and salt. Mix until fully incorporated.
- If you’re planning on making the pastel frosting colors: Reserve about 1 Cup of the buttercream at this point and it set aside, then add the Amoretti Natural Cotton Candy Artisan Flavor to the rest of the buttercream and mix on low speed until fully incorporated.
- If you’re NOT planning on making the pastel frosting colors: simply add the Amoretti Natural Cotton Candy Artisan flavor to the whole batch of buttercream and mix on low speed until fully incorporated.
- Level cake layers. Add buttercream to a cardboard circle and place the first layer on top. Fill and stack the cake with buttercream. Crumb coat and refrigerate for 30 minutes.
- Divide the reserved white buttercream between two bowls. Mix one small drop of purple food coloring into the first bowl and one small drop of blue buttercream into the second bowl. Use these colors along with the rest of the light pink cotton candy buttercream to frost a watercolor finish on the cake.
- Refrigerate for 20 minutes. Pipe swirls around the top edge. Top with cotton candy just before serving.
Notes
- Cotton candy topping will last for about one hour before it starts to droop/shrink.
Nutrition
- Serving Size: 1 slice
- Calories: Unknown
- Sugar: Unknown
- Sodium: Unknown
- Fat: Unknown
- Saturated Fat: Unknown
- Unsaturated Fat: Unknown
- Trans Fat: Unknown
- Carbohydrates: Unknown
- Fiber: Unknown
- Protein: Unknown
- Cholesterol: Unknown






