


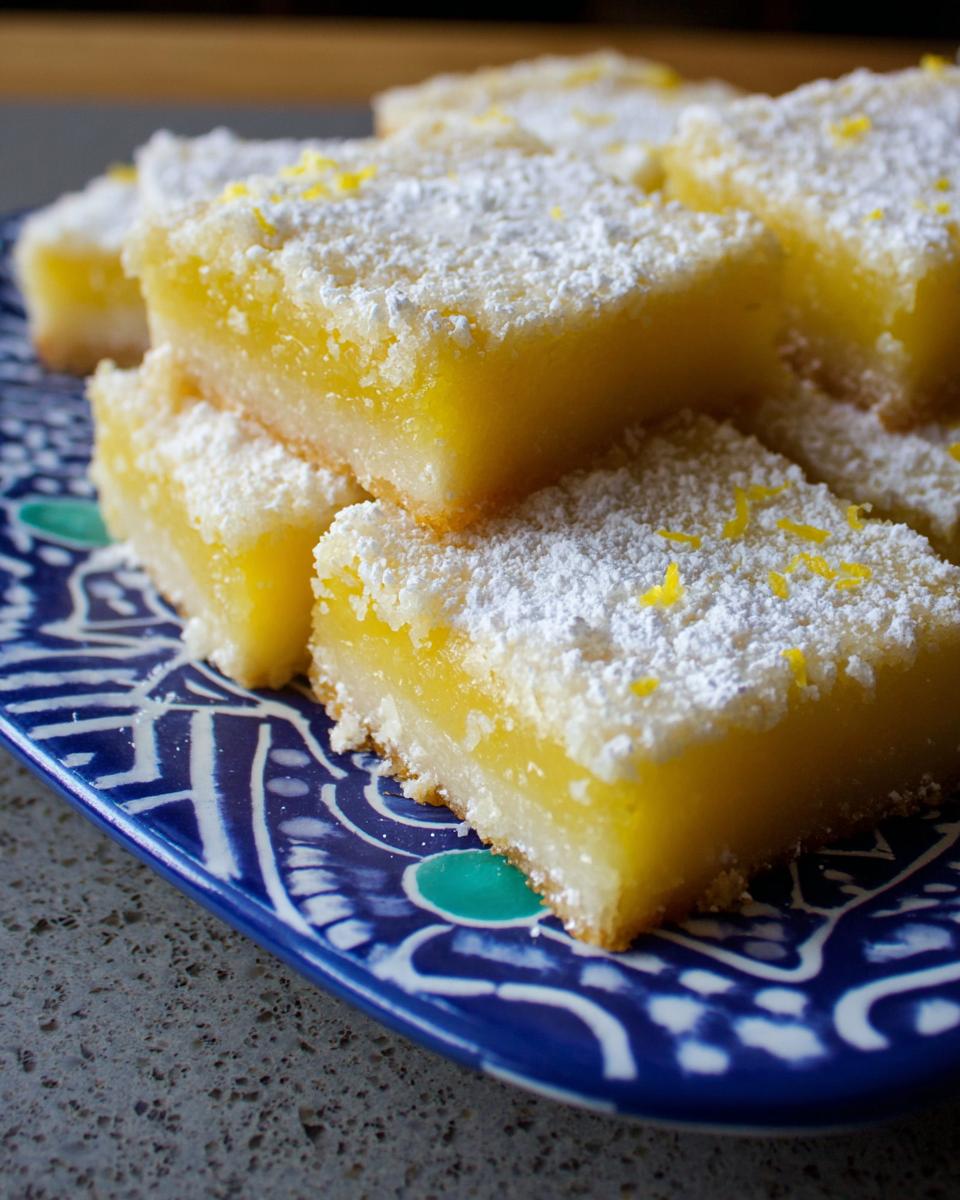
Oh, lemon bars! Is there anything more sunshine-y and perfect? And Ina Garten’s recipes? Well, they’re just pure gold, aren’t they? Combine the two, and you’ve got a dessert that’s seriously hard to beat. We’re talking Ina Garten’s Lemon Bars: a buttery, crumbly crust that practically melts in your mouth, topped with a tangy lemon filling that just zings with flavor.
I remember the first time I made these. Total disaster! I forgot the sugar in the crust (oops!), and it was like eating cardboard. But, trust me, I learned my lesson. Now? Now, I can whip up a batch of Ina Garten’s Lemon Bars in my sleep. Okay, maybe not sleep, but you get the idea. They’re simple, they’re satisfying, and they’re always a hit. So, let’s get baking, shall we?
Why You'll Love These Ina Garten's Lemon Bars
Okay, so why *these* lemon bars? Why Ina’s? Well, let me tell you! They’re kinda magical. Here’s the lowdown:
The Perfect Balance of Sweet and Tart
Seriously, it’s like a flavor explosion in your mouth! Not too sweet, not too tart – just *right*. Ina knows her stuff!
Simple Ingredients, Stunning Results with Ina Garten's Lemon Bars
You won’t need any fancy-schmancy ingredients. Just the basics, and BAM! Lemon bar perfection. I love that!
A Crowd-Pleasing Dessert with Ina Garten's Lemon Bars
Potluck? Party? Just need a little something sweet? These Ina Garten’s Lemon Bars are always a hit. Always! They disappear so fast!
Ina Garten's Lemon Bars: Buttery, Crumbly, and Irresistible
That buttery crust… oh man! And the crumbly topping? And the lemon-y goodness? It’s just… irresistible. You’ve been warned!
Ingredients for Ina Garten’s Lemon Bars
Alright, let’s talk ingredients! You know Ina – she keeps it simple, but high-quality. So, gather these goodies, and let’s get ready to bake some seriously amazing Ina Garten’s Lemon Bars!
For the Crust:
2 sticks unsalted butter, softened
Gotta be softened! Like, leave-it-on-the-counter-for-a-bit softened. Not melted! I usually use good ol’ Land O’ Lakes, but whatever you’ve got is fine. Just make sure it’s unsalted, okay?
1/2 cup granulated sugar
Plain ol’ white sugar. Nothing fancy here!
2 cups all-purpose flour
The stuff in your pantry. I usually use King Arthur, but whatever brand you like is totally fine.
1/8 tsp salt
Just a pinch! Don’t skip it – it balances the sweetness. Trust me!
For the Filling:
6 large eggs, room temperature
Room temp is key! Pop ’em in a bowl of warm water for a few minutes if you forgot to take them out ahead of time. I always buy large eggs – just easier that way!
3 cups granulated sugar
Yep, more sugar! Gotta have that sweetness to balance the lemon-y tang.
3 Tbsp lemon zest from 3 lemons
Fresh zest is a MUST! Don’t even think about using the dried stuff. Get yourself a good zester (I love my microplane!), and go to town. Make sure you’re just getting the yellow part, not the white pith – that’s bitter!
1 cup freshly squeezed lemon juice from 3 lemons
Again, fresh is best! Bottled lemon juice just doesn’t have the same zing. Squeeze those lemons! My favorite part is using my citrus press.
1 cup all-purpose flour
Just like for the crust – the usual stuff!
For Dusting:
Confectioners sugar
Also known as powdered sugar. You’ll need this for that pretty, snowy topping. Don’t skip it – it makes ’em look extra fancy!
How to Make Ina Garten's Lemon Bars: Step-by-Step Instructions
Okay, buckle up, buttercups! It’s time to get down to business and make these amazing Ina Garten’s Lemon Bars. Don’t worry – it’s easier than you think! Just follow these steps, and you’ll be munching on lemon-y goodness in no time.
Preparing the Crust for Ina Garten's Lemon Bars
That buttery crust is EVERYTHING, so let’s get it right!
Combining Ingredients
Alright, grab your softened butter and 1/2 cup of sugar. Cream ’em together! You can use a mixer (stand or hand-held), or do it the old-fashioned way with a wooden spoon. Just beat ’em until they’re light and fluffy. Then, add your flour and salt. Mix it all together until it forms a smooth dough. Don’t overmix!
Pressing into Pan & Chilling
Now, form that dough into a ball. Then, press it into a 9×13 inch baking sheet. Make sure you create a little edge – about 1/2 inch. This will keep the filling from spilling over. Once it’s all pressed in nicely, pop that pan in the fridge for 10-15 minutes. Chilling the crust helps it stay nice and crisp!
Baking the Crust
Preheat your oven to 350ºF. Once it’s heated up, bake that crust for 15-20 minutes. You want it to be lightly golden brown. Keep an eye on it – you don’t want it to burn! Once it’s ready, take it out of the oven and let it cool slightly while you make the filling.
Making the Lemon Filling for Ina Garten's Lemon Bars
That tangy lemon filling? Oh yeah, this is where the magic happens!
Whisking the Filling Ingredients
In a large bowl, whisk together your eggs, 3 cups of sugar, lemon zest, lemon juice, and flour. Whisk it all together until it’s nice and smooth. No lumps allowed! A whisk is really important here, trust me.
Pouring Filling & Baking
Pour that beautiful lemon filling right on top of your baked crust. Then, pop the whole thing back into the oven for 30-35 minutes. You’ll know it’s done when the filling is set – it shouldn’t jiggle too much when you gently shake the pan. Careful not to overbake it! It should be just set.
Cooling, Cutting, and Dusting Ina Garten's Lemon Bars
Almost there! Just a few more steps to lemon bar heaven!
Cooling Completely
This is the hardest part – waiting! Let those lemon bars cool completely before you cut into them. I know, it’s tempting to dig in right away, but trust me, they’ll be much easier to cut if they’re cool. Plus, the flavors will meld together even more. I usually let them cool on the counter, then pop them in the fridge to chill completely.
Cutting into Squares
Once they’re completely cool, cut those lemon bars into squares. I usually go for about 2-inch squares, but you can make them whatever size you like. Just make sure you use a sharp knife for clean cuts! Run the knife under hot water, then dry it off before each cut to get super clean lines. Fancy!
Dusting with Sugar
Now for the finishing touch! Dust those lemon bars generously with confectioners sugar. I like to use a sifter for even coverage. That snowy topping just makes them look so pretty and adds a little extra sweetness. And there you have it – perfect Ina Garten’s Lemon Bars!

Tips for Perfect Ina Garten's Lemon Bars
Want to take your Ina Garten’s Lemon Bars from “good” to “OMG AMAZING”? Here are a few of my go-to tips. Trust me – they make all the difference!
Chill the Crust
Don’t skip this step! Chilling the crust before baking helps it stay nice and crisp and keeps it from shrinking up while it bakes. Nobody wants a shriveled crust, right?
Don't Overbake
Overbaked lemon bars are sad lemon bars. They’ll be dry and kinda rubbery. You want the filling to be just set – it should still have a slight jiggle when you gently shake the pan. If it’s totally firm, it’s probably overbaked.
Use Fresh Lemon Juice
Seriously, bottled lemon juice just doesn’t cut it. Fresh lemon juice has so much more flavor and zing! Plus, you need the zest anyway, so you might as well squeeze those lemons!
Dust Generously
Don’t be shy with that confectioners sugar! A generous dusting makes those Ina Garten’s Lemon Bars look extra pretty and adds a touch of sweetness. Plus, it’s just fun!
Ingredient Notes and Substitutions for Ina Garten's Lemon Bars
Okay, so sometimes you’re missing an ingredient, or maybe you just wanna try something different. No worries! Here are a few swaps you can make in Ina Garten’s Lemon Bars. But honestly, stick to the original if you can – it’s perfect for a reason!
Butter Substitutions
Alright, so butter is best, BUT if you’re really in a pinch, you *could* use margarine. I wouldn’t recommend it, though. The taste just isn’t the same. If you’re dairy-free, try a vegan butter stick that’s meant for baking. Just make sure it’s softened!
Lemon Juice Alternatives
Okay, I *always* say fresh lemon juice is a must, but I get it – sometimes you just don’t have any lemons on hand. If you *have* to use bottled lemon juice, make sure it’s a good quality one. And please, for the love of lemon bars, don’t use that plastic lemon-shaped bottle stuff! It’s just… wrong.
Flour Options
Want to make these gluten-free? You can totally swap out the all-purpose flour for a gluten-free blend! I’ve had good luck with Bob’s Red Mill 1-to-1 Baking Flour. Just make sure it has xanthan gum in it – that helps with the texture. Otherwise, your Ina Garten’s Lemon Bars might be a little crumbly!
Storing and Reheating Your Ina Garten's Lemon Bars
Okay, so you’ve made a batch of Ina Garten’s Lemon Bars (yay!), and somehow, you haven’t eaten them all in one sitting. What to do? Don’t worry, I’ve got you covered!
Storage Instructions
Pop those leftover lemon bars in an airtight container – I like to use a glass one. Then, stick ’em in the fridge. They’ll keep for about 3-4 days. But, honestly, they never last that long at my house!
Reheating
Reheating? Nope! These Ina Garten’s Lemon Bars are best served cold, straight from the fridge. That tangy filling is just so refreshing when it’s chilled. Trust me on this one – no reheating needed!
Frequently Asked Questions About Ina Garten's Lemon Bars
Got questions about Ina Garten’s Lemon Bars? Don’t worry, you’re not alone! Here are some of the most common questions I get, and my tried-and-true answers. Let’s get you baking like a pro!
Why is my lemon filling runny?
Ah, the dreaded runny filling! There are a couple of reasons why this might happen. First, make sure you’re baking the lemon bars long enough. The filling should be set, with just a slight jiggle. Also, make sure your oven is at the right temperature! An oven thermometer is your best friend here. If it’s still runny after baking, it could also be that you didn’t whisk the filling ingredients together enough. Get those arms working!
Can I freeze Ina Garten's Lemon Bars?
Yep, you totally can! These Ina Garten’s Lemon Bars freeze beautifully. Just wrap them tightly in plastic wrap, then pop them in a freezer bag. They’ll keep for about 2-3 months. When you’re ready to eat them, just thaw them in the fridge overnight. They might be a *tiny* bit softer than fresh, but they’ll still be delicious!
How do I prevent the crust from shrinking?
Shrinking crust? Annoying, right? The key is to chill that crust before baking! That really helps it hold its shape. Also, don’t overwork the dough when you’re making it. Overmixing develops the gluten, which can cause the crust to shrink. Just mix it until it comes together, and then chill it out (literally!).
What is the best way to zest a lemon?
Okay, zesting is an art form! My favorite way to zest a lemon is with a microplane. It’s super easy to use, and it gets you those fine, delicate strands of zest. Just make sure you’re only zesting the yellow part of the peel – the white pith is bitter! Rotate the lemon as you zest, so you’re not going over the same spot twice. Easy peasy lemon squeezy!

Estimated Nutritional Information for Ina Garten's Lemon Bars
Okay, so let’s be real, these Ina Garten’s Lemon Bars are a *treat*. A delicious, buttery, lemon-y treat. But, if you’re curious about the nutrition stuff, here’s a rough estimate per bar. Keep in mind, it can vary a bit depending on how big you cut ’em and the exact ingredients you use!
I’m no nutritionist, but generally, you’re looking at roughly:
- Calories: Around 250
- Fat: About 12g (Saturated Fat: 7g, Unsaturated Fat: 4g, Trans Fat: 0g)
- Cholesterol: 75mg
- Sodium: 50mg
- Carbohydrates: 35g
- Fiber: 1g
- Sugar: 25g
- Protein: 3g
So, yeah, they’re not exactly a health food. But hey, everything in moderation, right? Just enjoy every single, delicious bite of these Ina Garten’s Lemon Bars! They’re SO worth it!
Share the Lemon Love
Made these Ina Garten’s Lemon Bars? Awesome! Now, spread the love!
Rate This Recipe
Did you love ’em? Let me know! Give this recipe a star rating below. It helps other bakers find this little slice of lemon-y heaven!
Leave a Comment
Got questions? Tips? Just wanna say “YUM”? Leave a comment below! I love hearing from you guys!
Share on Social Media
Snap a pic of your gorgeous Ina Garten’s Lemon Bars and share it on Instagram or Facebook! Tag me so I can see your amazing creations! Baking is better when it’s shared, right?
Print
Ina Garten’s Lemon Bars: Foolproof Tangy 7-Ingredient Recipe
- Prep Time: 20 minutes
- Cook Time: 50 minutes
- Total Time: 1 hour 30 minutes
- Yield: 24 servings 1x
- Category: Dessert
- Method: Baking
- Cuisine: American
- Diet: Vegetarian
Description
Classic lemon bars with a buttery crust and tangy lemon filling.
Ingredients
- 2 sticks unsalted butter, softened
- 1/2 cup granulated sugar
- 2 cups all-purpose flour
- 1/8 tsp salt
- 6 large eggs, room temperature
- 3 cups granulated sugar
- 3 Tbsp lemon zest from 3 lemons
- 1 cup freshly squeezed lemon juice from 3 lemons
- 1 cup flour
- Confectioners sugar, for dusting
Instructions
- Preheat oven to 350ºF.
- Cream together butter and sugar for crust.
- Add flour and salt. Mix until smooth dough forms.
- Form dough into a ball.
- Press dough into a 9×13 inch baking sheet, creating a 1/2 inch edge. Chill for 10-15 minutes.
- Bake crust for 15-20 minutes.
- Whisk together eggs, lemon juice, lemon zest, sugar, and flour for filling.
- Pour lemon filling on top of baked crust.
- Bake for 30-35 minutes, until filling is set.
- Let cool completely. Cut into squares and dust with confectioners sugar. Chill until ready to serve. Store leftovers in fridge.
Notes
- Chill the crust before baking for a crisper texture.
- Ensure the lemon filling is set before removing from the oven.
- Dust generously with confectioners’ sugar before serving.
Nutrition
- Serving Size: 1 bar
- Calories: 250
- Sugar: 25g
- Sodium: 50mg
- Fat: 12g
- Saturated Fat: 7g
- Unsaturated Fat: 4g
- Trans Fat: 0g
- Carbohydrates: 35g
- Fiber: 1g
- Protein: 3g
- Cholesterol: 75mg






