


Who doesn’t love a classic cookie? Seriously! And these Jam Thumbprint Cookies? They’re like little bites of happiness. I swear, every time I make them, it takes me right back to baking with my grandma. There’s just something so comforting about that buttery, melt-in-your-mouth texture combined with the sweet burst of jam.
These aren’t just any cookies, though. They’re *perfect* for when you want something a little fancy but don’t want to spend hours in the kitchen. Plus, the jam filling? You can totally customize it! My favorite part is seeing everyone’s faces light up when they take that first bite. Trust me, you’ll be making these Jam Thumbprint Cookies again and again!
Why You’ll Love These Jam Thumbprint Cookies
Quick and Easy Jam Thumbprint Cookies
Seriously, these are SO easy! A few simple steps and boom – you’ve got cookies. Don’t let fancy desserts intimidate you; these are totally doable, even on a busy weeknight.
Buttery and Delicious Jam Thumbprint Cookies
Oh my goodness, the flavor! That buttery dough just melts in your mouth. And with the sweet jam? It’s the perfect combo. You just can’t beat that classic cookie taste!
Perfect for Any Occasion Jam Thumbprint Cookies
Need a treat for a holiday party? Gotcha covered. Just want something sweet with your afternoon tea? These work! Honestly, any excuse is a good excuse to bake up a batch of Jam Thumbprint Cookies.
Ingredients for Jam Thumbprint Cookies
Okay, let’s talk ingredients! Here’s what you’ll need to whip up these little gems. Nothing too crazy, promise! You’ll want 1 cup of unsalted butter, and it’s gotta be at room temperature – that’s key! Then, ⅔ cup of granulated sugar, 1 teaspoon of vanilla extract (or almond extract if you’re feeling fancy!), ½ teaspoon of kosher salt, and 2 cups of all-purpose flour. For the filling, grab ¼ cup of your fave jam (apricot and seedless raspberry are my go-tos), and ⅓ cup of granulated sugar for coating those beauties!
How to Make Jam Thumbprint Cookies: Step-by-Step Instructions
Alright, let’s get down to business! Here’s how you make these adorable (and delicious!) Jam Thumbprint Cookies. Don’t worry, it’s easier than you think. Just follow these steps, and you’ll be golden!
Preparing the Dough for Jam Thumbprint Cookies
First things first, you’ll want to cream together that room temperature butter and sugar in your stand mixer. Beat ’em until they’re light and creamy – this usually takes a few minutes. Seriously, don’t skip the room temperature butter, or you’ll end up with lumpy dough! Next, add in your vanilla extract and salt. Mix that up real good! Then, gradually add in the flour, scraping down the bowl as you go. You don’t want any sneaky flour pockets hiding in there!

Chilling and Shaping the Jam Thumbprint Cookies
Okay, once the dough is all mixed, form it into a ball, wrap it in plastic wrap, and pop it in the fridge. This is important! You gotta chill the dough for at least an hour. This keeps them from spreading all over the place when baking. After chilling, preheat your oven to 350°F (175°C) and line those baking sheets with parchment paper – trust me, makes cleanup a breeze! Pour that sugar into a shallow bowl. Scoop out about a tablespoon of dough, roll it into a ball, and coat it in sugar. Place ’em on the baking sheet.
Baking Your Perfect Jam Thumbprint Cookies
Now, the fun part! Make a little indentation in each cookie with your thumb (hence the name, duh!). Then, fill each one with about half a teaspoon of jam. I love using apricot and raspberry, but hey, you do you! Pop those babies in the oven and bake for 14-15 minutes. You’re looking for lightly browned edges. Careful not to overbake them, or they’ll be dry!

Cooling and Storing Jam Thumbprint Cookies
Once they’re out of the oven, let the cookies cool on the baking sheet for a minute or so before transferring them to a wire rack to cool completely. This helps them set up a bit. And that’s it! Store your totally amazing Jam Thumbprint Cookies in an airtight container. They’re usually gone within a day at my house, haha!
Ingredient Notes and Substitutions for Jam Thumbprint Cookies
Okay, so let’s talk swaps! Real butter is best, no question, but if you *absolutely* have to, you could try a butter substitute. But honestly? Just use butter. For the jam, apricot and seedless raspberry are my top picks ’cause they’re classic and taste amazing, but you can totally experiment! Strawberry, blackberry, even fig jam would be delicious.
And that vanilla extract? Almond extract gives a *totally* different vibe, but it’s yummy too! Just use it sparingly, it’s stronger. Oh! And if you’re feeling extra fancy, a little lemon or orange zest in the dough? *chef’s kiss* Just adds a little somethin’ somethin’!
Tips for the Best Jam Thumbprint Cookies
Want *perfect* Jam Thumbprint Cookies every time? Of course, you do! First, remember that chilling time. Seriously, don’t skip it! It’s what keeps those cookies from spreading into sad little pancakes. Also, use a light-colored baking sheet. Dark ones can cause the bottoms to burn before the cookies are cooked through.
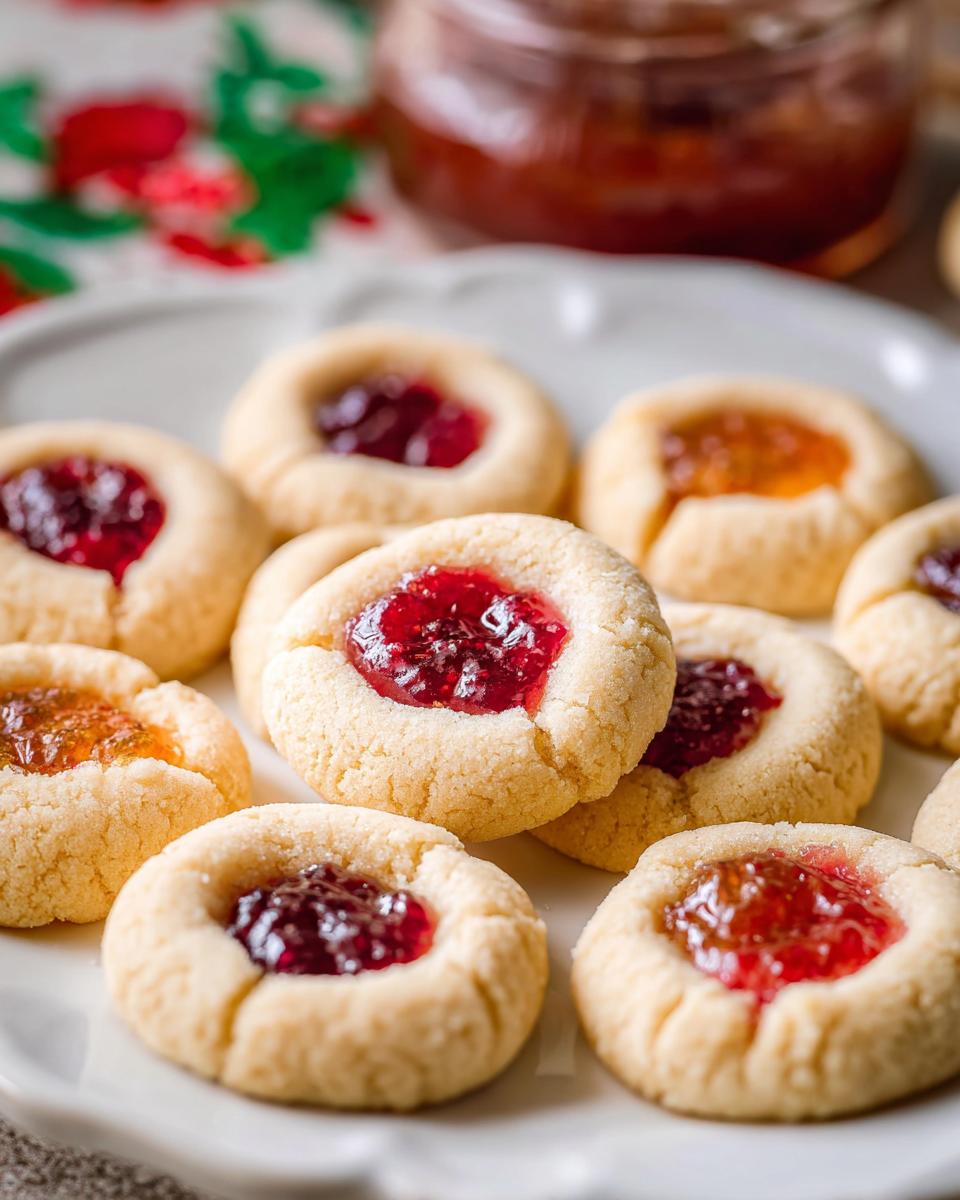
And speaking of baking, keep a close eye on ’em! Ovens vary, so start checking for doneness around 12 minutes. You want those edges lightly golden. One last thing: use good quality jam! It really makes a difference. Trust me, these little tweaks will take your Jam Thumbprint Cookies to the next level!
Frequently Asked Questions About Jam Thumbprint Cookies
Got questions? I got answers! Here are some of the most common things people ask me about these yummy Jam Thumbprint Cookies. Don’t be shy; I’m here to help you bake the best cookies ever!
Can I use different types of jam for Jam Thumbprint Cookies?
Absolutely! That’s one of the best things about these cookies – you can totally customize them! Apricot and raspberry are classics, but strawberry, blackberry, even fig jam are all fantastic choices. Just make sure it’s a jam you love the taste of! Oh, and try to avoid super chunky jams; they can be a little tricky to work with in those tiny thumbprints.
How do I prevent my Jam Thumbprint Cookies from spreading?
Ah, the dreaded cookie spread! The biggest secret? Chilling that dough! Seriously, don’t skip that step. It firms up the butter, so the cookies hold their shape in the oven. Also, make sure your oven is at the right temperature. If it’s too low, the butter will melt before the cookies set, leading to, you guessed it, spreading!
How long do Jam Thumbprint Cookies last?
If you manage to *not* eat them all right away (which, let’s be honest, is a challenge!), these Jam Thumbprint Cookies will last for about 3-4 days in an airtight container at room temperature. They might get a *tiny* bit softer over time, but they’ll still be delicious! You *can* also freeze them, but the jam might get a little sticky when they thaw. Still totally edible, though!
Nutritional Information for Jam Thumbprint Cookies
Okay, so everyone always asks about the nutrition info. Here’s the deal: it’s tricky! It totally depends on the exact ingredients you use – different brands have different values, you know? So, I can give you an estimate, but just remember this isn’t, like, a scientific analysis. It’s a rough idea!
Each cookie is *approximately* 120 calories, with 8g of sugar, 6g of fat (4g saturated, 2g unsaturated, and zero of those nasty trans fats!), 16g of carbohydrates, and around 1g of protein. There’s also a tiny bit of fiber (0.5g) and about 30mg of sodium and 20mg of cholesterol. But seriously, take it with a grain of (kosher!) salt! It’s a cookie, not health food, haha! Enjoy it!
Disclaimer: The nutritional information provided here is an estimate and may vary based on specific ingredients and brands used. This information is not intended as a substitute for professional dietary advice.
Rate This Jam Thumbprint Cookies Recipe!
So, what do you think? Did you love these Jam Thumbprint Cookies as much as I do? Leave a comment below and let me know! Don’t forget to rate the recipe, too! And hey, if you make ’em, snap a pic and share it on social media – tag me so I can see your creations! Thanks so much for trying my recipe; happy baking!
Print
Irresistible Jam Thumbprint Cookies in 15 Minutes
- Prep Time: 20 minutes
- Cook Time: 15 minutes
- Total Time: 1 hour 35 minutes
- Yield: About 24 cookies 1x
- Category: Dessert
- Method: Baking
- Cuisine: American
- Diet: Vegetarian
Description
Classic jam thumbprint cookies are delightful treats. These cookies feature a buttery, tender dough with a sweet jam filling.
Ingredients
- 1 cup unsalted butter, room temperature
- ⅔ cup granulated sugar
- 1 teaspoon vanilla extract or almond extract
- ½ teaspoon kosher salt
- 2 cups all-purpose flour
- ¼ cup jam (apricot and seedless raspberry)
- ⅓ cup granulated sugar (for coating)
Instructions
- In a stand mixer, beat the butter and sugar until light and creamy.
- Add vanilla extract and salt; mix well.
- Gradually add flour, scraping the bowl as needed.
- Form the dough into a ball, wrap in plastic, and refrigerate for one hour.
- Preheat oven to 350°F (175°C) and line baking sheets with parchment paper.
- Place sugar in a shallow bowl.
- Scoop one tablespoon of dough, roll into a ball, and coat in sugar. Place on baking sheets.
- Make an indentation in each cookie with your thumb.
- Fill with half a teaspoon of jam.
- Bake for 14-15 minutes, until edges are lightly browned.
- Let cookies cool on the baking sheet for one minute, then transfer to a wire rack to cool completely.
- Store in an airtight container.
Notes
- Use room temperature butter for a smoother dough.
- Chilling the dough prevents spreading during baking.
- Adjust baking time based on your oven.
Nutrition
- Serving Size: 1 cookie
- Calories: 120
- Sugar: 8g
- Sodium: 30mg
- Fat: 6g
- Saturated Fat: 4g
- Unsaturated Fat: 2g
- Trans Fat: 0g
- Carbohydrates: 16g
- Fiber: 0.5g
- Protein: 1g
- Cholesterol: 20mg






