


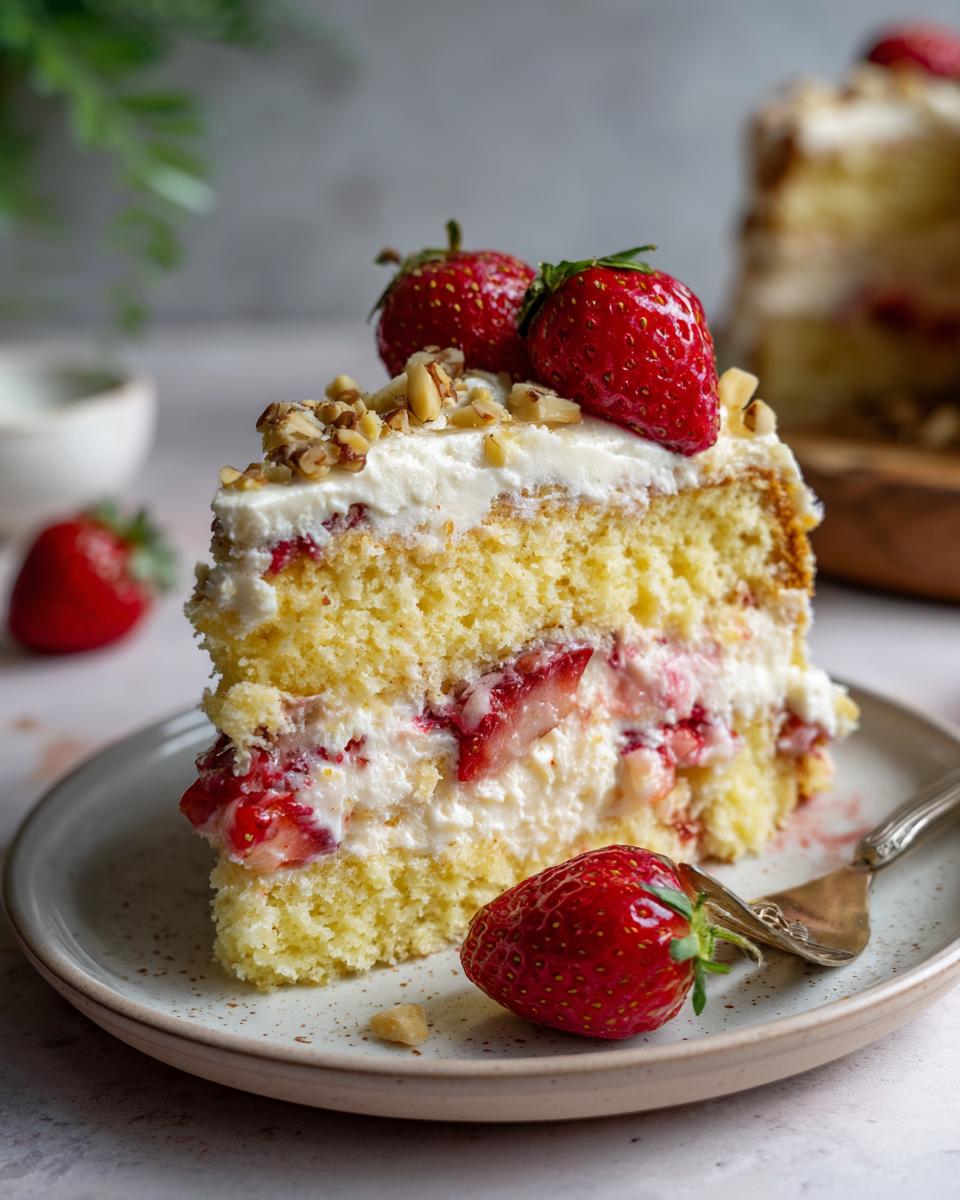
Okay, friends, let me tell you about a cake that’s seriously fun to make and even MORE fun to eat: Strawberry Earthquake Cake! This isn’t your average cake; it’s like a party in every bite. What makes it so special, you ask? Well, imagine a creamy, dreamy filling that’s all swirled together with a rich, moist cake base. And the best part? That strawberry flavor just POPS!

My first time making it? Total chaos (hence the “earthquake,” maybe?). I was convinced I’d messed it up, but then…BAM! The most delicious, gooey, strawberry-licious cake emerged from the oven. I’ve been hooked ever since, tweaking it here and there (Grandma would be proud!). Trust me, this Strawberry Earthquake Cake recipe is a keeper!
Why You’ll Adore This Strawberry Earthquake Cake
Seriously, what’s not to love? This Strawberry Earthquake Cake is a guaranteed hit, and here’s why:
Quick and Easy Dessert
Forget complicated recipes! We’re talking about dump-and-bake simplicity. If you can stir, you can make this cake. It’s *that* easy!
Bursting with Strawberry Flavor
Oh, that strawberry! The sweet tang of strawberry preserves baked right into that cakey goodness? It’s a taste explosion, I tell ya!
Creamy and Dreamy Texture
That creamy cream cheese filling…it’s like a cloud of deliciousness! The contrast with the cake is just…*chef’s kiss*.
Perfect for Any Occasion
Need a dessert for a potluck? Birthday party? Or just a “treat yourself” kind of day? This Strawberry Earthquake Cake is ALWAYS the right answer.
Strawberry Earthquake Cake Ingredients
Alright, let’s gather our supplies! Here’s what you’ll need to make this amazing Strawberry Earthquake Cake. Don’t skimp – good ingredients make a GOOD cake!
Cake Base
Grab one box (that’s usually around 18.25 ounces) of yellow cake mix. I usually go for a classic brand, but honestly, any yellow cake mix will do in a pinch. Wanna get fancy? Try a butter pecan mix for a lil’ something extra!
Cream Cheese Filling
This is where the magic happens! You’ll need:
- One package (8 ounces) of cream cheese, softened. Trust me, gotta be soft! Leave it out on the counter for a bit.
- 1/2 cup (that’s one stick!) of unsalted butter, also softened. Unsalted is key here, we don’t want a salty surprise.
- 3 cups of powdered sugar. Yes, it’s a lot! But it makes that filling dreamy.
- 1 teaspoon of vanilla extract. Pure vanilla, if you can!
- 1/2 teaspoon of almond extract. This is optional, but it REALLY amps up the flavor. Don’t skip it!
Strawberry Swirl
You’ll need one jar (around 10 ounces-ish) of strawberry preserves. Go for a good quality brand – you can really taste the difference. Seedless is my preference, but if you like the seeds, go for it!
Optional Topping
Totally optional, but I love a little crunch! Grab about 1/2 cup of chopped pecans or walnuts. You can toast them lightly for even MORE flavor. Not a nut fan? No worries, skip it or try some chopped white chocolate!
How to Make Strawberry Earthquake Cake: Step-by-Step Instructions
Okay, buckle up, buttercups! Here’s how we turn those ingredients into a masterpiece. Don’t worry, it’s easier than it looks!
Getting Started: Preheat and Prep
First things first: preheat that oven to 350°F (175°C). This is super important, so don’t skip it! While the oven’s warming up, grab a 9×13 inch baking pan. Now, grease it REALLY well. I’m talking every nook and cranny. Then, dust it with flour. This helps the cake slide right out later – no sticking allowed!
Prepare the Cake Batter
Now, follow the instructions on your yellow cake mix box. Usually, it involves mixing the mix with some eggs, oil, and water. Don’t overmix! Just stir until everything’s combined. Pour that batter into your prepared pan, spreading it out evenly. Boom! Cake base done.
Making the Cream Cheese Filling for Strawberry Earthquake Cake
In a large bowl (I use my stand mixer, but a hand mixer works just fine!), beat together that softened cream cheese and butter until it’s smooth and creamy. Scrape down the sides of the bowl a few times to make sure everything’s getting mixed properly. Then, gradually add in that powdered sugar, beating until the mixture is light and fluffy. It should look like a cloud! Finally, stir in the vanilla and almond extracts. Mmm, smells good already, right?
Assembling the Strawberry Earthquake Cake
Now comes the fun part! Drop spoonfuls of that cream cheese mixture all over the cake batter. Don’t be shy! Then, do the same thing with the strawberry preserves. Get those spoonfuls scattered around! Finally, if you’re using nuts, sprinkle them evenly over the top. You can even use a knife or skewer to swirl the cream cheese and strawberry preserves together a bit for a cool marbled effect. Go wild!
Baking the Strawberry Earthquake Cake
Pop that pan into the preheated oven and bake for 40-50 minutes. Keep an eye on it! To check if it’s done, stick a wooden skewer into the center. If it comes out clean (or with just a few moist crumbs), it’s ready! If it’s still gooey, bake it for a few more minutes and check again. Careful not to overbake, or it’ll be dry! For more baking tips, check out this guide on ingredient substitutions.
Cooling and Serving Your Strawberry Earthquake Cake
Once the cake’s done, take it out of the oven and let it cool COMPLETELY in the pan. I know, it’s torture, but trust me, it’s worth it! If you try to cut it while it’s still warm, it’ll be a gooey mess. Once it’s cooled, cut it into squares and serve. Enjoy every delicious, strawberry-filled bite!
Tips for the Best Strawberry Earthquake Cake
Want to take your Strawberry Earthquake Cake from “yum” to “WOW”? Here are a few of my tried-and-true tips!
Ingredient Temperature Matters
Seriously, don’t skip this! That softened cream cheese and butter? It’s not just a suggestion, it’s a REQUIREMENT! If they’re cold, they won’t blend properly, and you’ll end up with lumpy filling. Yuck! Give ’em a little time on the counter – you’ll thank me later.
Don’t Overbake
I know, I know, it’s tempting to just leave it in there “to be sure.” But trust me on this one: overbaked cake is SAD cake. It’ll be dry and crumbly, and nobody wants that! Start checking for doneness around 40 minutes, and don’t be afraid to pull it out even if it looks a *tiny* bit gooey. It’ll firm up as it cools!
Swirls and Patterns
Okay, this is where you can get a little fancy! After you’ve dolloped the cream cheese and strawberry preserves onto the cake, grab a knife or a skewer and gently swirl them together. You can create all sorts of cool patterns! Just don’t overdo it – you still want those distinct pockets of cream cheese and strawberry goodness. It’s all about that *earthquake* effect!
Strawberry Earthquake Cake Variations
Alright, so you’ve mastered the classic Strawberry Earthquake Cake? Awesome! Now, let’s get a little wild and try some fun variations. Don’t be afraid to experiment – that’s where the real magic happens!
Different Fruit Preserves
Strawberry’s great, but why stop there? Try using raspberry preserves for a slightly tart twist. Blueberry preserves are also AMAZING – that deep, rich berry flavor is just *divine*. Or, for a truly decadent treat, go for cherry preserves. Seriously, the possibilities are endless! Just make sure you’re using good quality preserves – it makes all the difference.
Chocolate Chips or Chunks
Okay, who doesn’t love chocolate? Toss some chocolate chips (milk chocolate, dark chocolate, white chocolate – whatever floats your boat!) into the cake batter before baking. Or, for an even more intense chocolate experience, chop up a chocolate bar and sprinkle those chunks on top. Trust me on this one: chocolate and strawberry are a match made in heaven!
Spice It Up
Want to add a little warmth and complexity to your Strawberry Earthquake Cake? A pinch of cinnamon or nutmeg in the cake batter is the way to go! It adds a subtle, cozy flavor that complements the strawberry perfectly. Start with just a 1/4 teaspoon of each, and adjust to your liking. You can even add a tiny bit of ground ginger for a little zing!
Storing Your Strawberry Earthquake Cake
Made a Strawberry Earthquake Cake and (gasp!) have leftovers? No worries! Here’s how to keep that deliciousness fresh and ready for round two.
How to Store Leftover Cake
Listen up, this is important! Because of that cream cheese filling, you’ll want to store your leftover Strawberry Earthquake Cake in the fridge. Just cover the pan tightly with plastic wrap or transfer the cake to an airtight container. It’ll keep for about 3-4 days…if it lasts that long!
Reheating Instructions
Okay, so cold cake is pretty darn good, but sometimes you just want that warm, gooey goodness, right? If you’re reheating a slice, pop it in the microwave for about 20-30 seconds. Just be careful not to overheat it, or the cream cheese filling might get a little melty. You can also reheat it in the oven! Wrap the slice in foil and bake at 350°F (175°C) for about 10-15 minutes, or until it’s warmed through. Seriously yummy!
Common Questions About Strawberry Earthquake Cake
Got questions about making the *perfect* Strawberry Earthquake Cake? I’ve got answers! Here are a few of the most common questions I get asked (and a few I asked myself when I first started baking this beauty!).
Can I use a different size pan?
Okay, so the 9×13 inch pan is kinda the sweet spot for this recipe, but if you’re in a pinch, you *can* use a different size. Just keep in mind that the baking time will change! If you use a smaller pan (like an 8×8), the cake will be thicker and will need to bake longer. Start checking for doneness around 50 minutes. If you use a larger pan, it’ll bake faster, so keep a close eye on it after 30 minutes. The most important thing? Make sure that wooden skewer comes out mostly clean!
Can I freeze Strawberry Earthquake Cake?
Good news: you CAN freeze Strawberry Earthquake Cake! It’s perfect for making ahead or saving leftovers for a rainy day. Just make sure to wrap it really well in plastic wrap and then in foil. This will help prevent freezer burn. It’ll keep in the freezer for up to 2-3 months. When you’re ready to eat it, thaw it overnight in the fridge. You might notice the texture is *slightly* different after thawing, but it’ll still be delicious!
Can I use sugar-free preserves?
Alright, let’s talk sugar-free! Yes, you *can* use sugar-free strawberry preserves in this recipe. BUT… (and it’s a big but!)…it will affect the texture and flavor of the cake. Sugar helps to create a tender crumb and adds to the overall sweetness. Without it, the cake might be a little drier and less flavorful. If you’re using sugar-free preserves, I recommend adding a little bit of extra sweetener (like a tablespoon or two of honey or maple syrup) to the cake batter to compensate. And maybe add a *touch* more vanilla, too. You do you!
Nutritional Information for Strawberry Earthquake Cake
Okay, let’s talk nutrition! Now, I’m no nutritionist, but I know everyone’s curious about the numbers. Just a heads-up: the nutritional information for this Strawberry Earthquake Cake can vary A LOT depending on the brands of ingredients you use (especially that cake mix and the preserves!). So, any numbers I give you are just estimates, okay? Don’t come yellin’ at me if your slice has, like, five extra calories. Enjoy responsibly!

Rate this Strawberry Earthquake Cake Recipe!
Loved this Strawberry Earthquake Cake recipe? Leave a comment and rating below! And don’t forget to share it with your friends on social media!
Print
Devastating Strawberry Earthquake Cake with 3 Secrets
- Prep Time: 20 minutes
- Cook Time: 45 minutes
- Total Time: 1 hour 5 minutes
- Yield: 12 servings 1x
- Category: Dessert
- Method: Baking
- Cuisine: American
- Diet: Vegetarian
Description
Strawberry Earthquake Cake is a delightful dessert. It features a creamy, strawberry-infused filling. It is baked into a rich cake.
Ingredients
- 1 box (18.25 ounces) yellow cake mix
- 1 package (8 ounces) cream cheese, softened
- 1/2 cup (1 stick) butter, softened
- 3 cups powdered sugar
- 1 teaspoon vanilla extract
- 1/2 teaspoon almond extract
- 1 jar (10 ounces) strawberry preserves
- 1/2 cup chopped pecans or walnuts (optional)
Instructions
- Preheat oven to 350°F (175°C). Grease and flour a 9×13 inch baking pan.
- Prepare cake mix according to package directions. Pour into prepared pan.
- In a large bowl, beat cream cheese and butter until smooth.
- Gradually add powdered sugar, beating until light and fluffy.
- Stir in vanilla and almond extracts.
- Drop spoonfuls of cream cheese mixture over cake batter.
- Spoon strawberry preserves over cream cheese mixture.
- Sprinkle nuts over the top, if desired.
- Bake for 40-50 minutes, or until a wooden skewer inserted into the center comes out clean.
- Let cool completely before serving.
Notes
- For a richer flavor, use cream cheese frosting instead of the cream cheese filling.
- You can substitute other fruit preserves for the strawberry preserves.
- Store leftovers in the refrigerator.
Nutrition
- Serving Size: 1 slice
- Calories: 450
- Sugar: 50g
- Sodium: 250mg
- Fat: 25g
- Saturated Fat: 15g
- Unsaturated Fat: 5g
- Trans Fat: 1g
- Carbohydrates: 60g
- Fiber: 1g
- Protein: 4g
- Cholesterol: 75mg






