

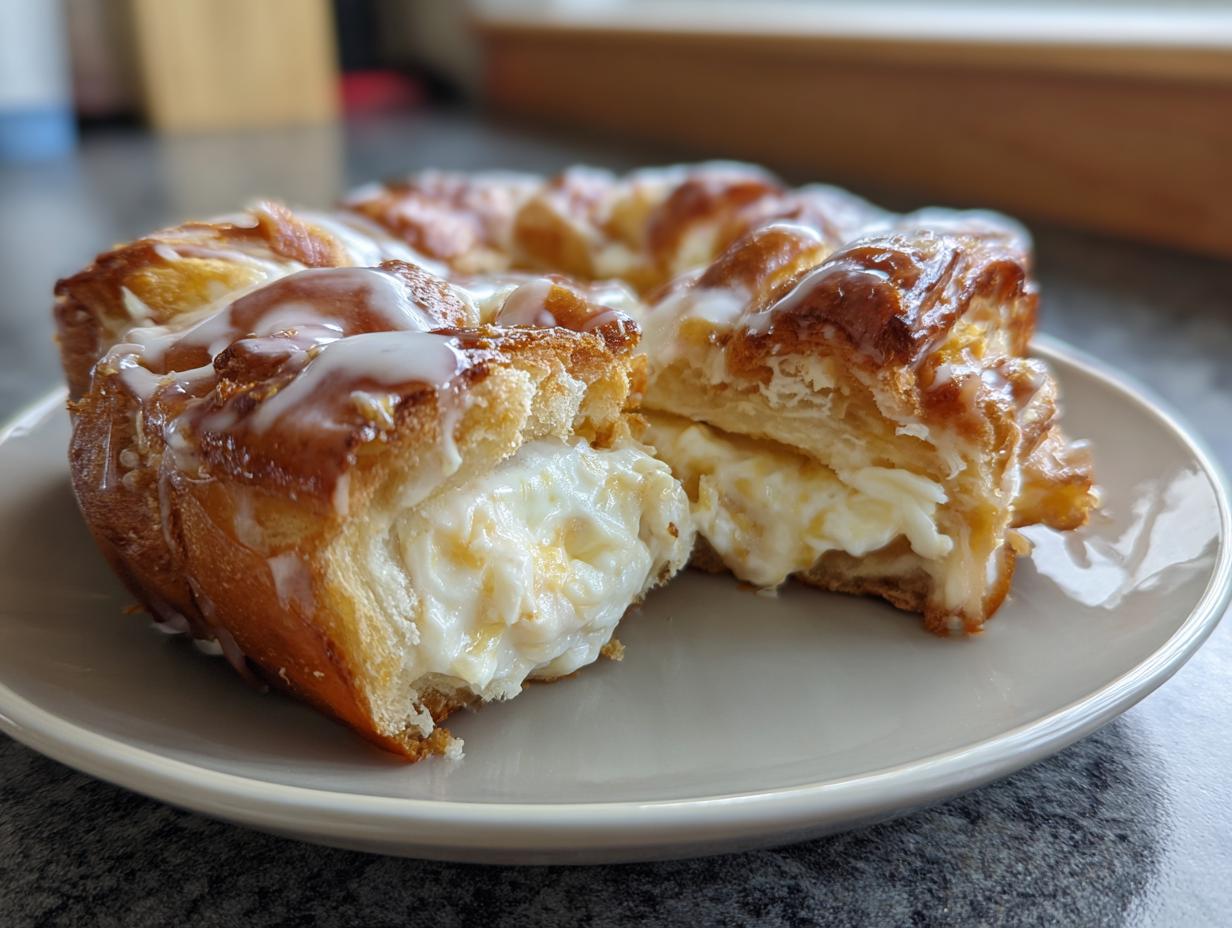
Okay, seriously, who doesn’t love King’s Hawaiian rolls? I swear, I could eat a whole pack in one sitting! And cheesecake? Don’t even get me started. Creamy, tangy, sweet… it’s basically perfection. So, imagine my excitement when I thought, “Hey, why not combine these two amazing things?” That’s how this King’s Hawaiian Cheesecake Danish recipe was born!
The first time I had King’s Hawaiian bread, my best friend’s mom made these little ham and cheese sliders with them. I was hooked! The slight sweetness with the savory ham and cheese? Genius! This recipe gives you that same kind of flavor combo, but with creamy cheesecake. Trust me; the tangy cheesecake filling with the sweet rolls is a match made in heaven. You HAVE to try it!

Why You’ll Love This King’s Hawaiian Cheesecake Danish
Seriously, you’re gonna be obsessed! Here’s why:
Quick and Easy Dessert
I’m all about easy, and this is IT. We’re talking minimal prep and bake time. You can whip these up in no time!
The Perfect Blend of Sweet and Tangy
That King’s Hawaiian sweetness with the cheesecake tang? It’s a flavor explosion! My favorite part is how they balance each other out perfectly.
Versatile for Any Occasion
Breakfast? Brunch? Dessert? This King’s Hawaiian Cheesecake Danish works for EVERYTHING. I’ve even made them for a potluck, and they were gone in minutes!
King’s Hawaiian Cheesecake Danish Ingredients
Alright, let’s gather our goodies! You’ll need just a few simple things to make this magic happen. Make sure you grab: 1 package (12 ounces) of King’s Hawaiian sweet rolls (the star!), 8 ounces of cream cheese (make sure it’s softened – super important!), 1/2 cup of granulated sugar, 1 large egg, 1 teaspoon of vanilla extract, and 1/4 cup of that yummy King’s Hawaiian glaze. Easy peasy!
Equipment You’ll Need
Okay, before we get started, let’s make sure we have everything we need! This is super simple.
Baking Sheet
You’ll need a baking sheet to bake these babies on. Size doesn’t really matter, just make sure it fits in your oven!
Mixing Bowl
Grab a mixing bowl to whip up that cheesecake filling. Any size will do, as long as it’s big enough to hold the cream cheese and other stuff.
Electric Mixer or Whisk
You’ll need either an electric mixer or a whisk to get that cream cheese filling nice and smooth. I usually use my mixer ’cause I’m lazy, but a whisk works just fine!
How to Prepare This King’s Hawaiian Cheesecake Danish: Step-by-Step Instructions
Alright, let’s get baking! Don’t worry; it’s way easier than it looks. Just follow these steps, and you’ll be enjoying your own King’s Hawaiian Cheesecake Danish in no time!
Preparing the Rolls
First things first, grab your package of King’s Hawaiian rolls. You’ll want to slice each roll in half horizontally, like you’re making a tiny little sandwich. I usually use a serrated knife for this – it seems to work best and doesn’t squish the rolls too much. Try to keep the tops and bottoms together; it makes things easier later!
Making the Cheesecake Filling
Now for the good stuff! In your mixing bowl, toss in that softened cream cheese and sugar. Beat them together until they’re smooth and creamy – no lumps allowed! Seriously, make sure that cream cheese is SOFT. It’ll make your life SO much easier. Once that’s all smooth, beat in the egg and vanilla extract. That’s it! Cheesecake filling done!
Assembling and Baking
Okay, now for the fun part! Preheat your oven to 350°F (175°C). Don’t skip this! While the oven is heating up, spread that cheesecake mixture evenly over the cut sides of the rolls. Be generous! Place them on your baking sheet, and pop them in the oven for about 15-20 minutes. Keep an eye on them – you want them to be golden brown, but not burnt!

Finishing Touches
Once they’re golden and gorgeous, take them out of the oven and let them cool for a minute or two. Then, drizzle them with that King’s Hawaiian glaze. If you don’t have the glaze, you can totally make your own with powdered sugar and a little milk! Serve them warm, and get ready for some serious deliciousness!
Tips for the Best King’s Hawaiian Cheesecake Danish
Want to take these danishes from good to AMAZING? Here’s the inside scoop!
Softening the Cream Cheese
Seriously, guys, this is KEY. If your cream cheese is cold and hard, you’ll end up with a lumpy filling, and nobody wants that! Let it sit out at room temperature for at least an hour, or even better, overnight. Trust me on this one!
Don’t Overbake
Nobody likes a dry danish! Keep a close eye on them in the oven, and pull them out as soon as they’re golden brown. They should be slightly soft to the touch, not hard as rocks.
Glaze Consistency
Sometimes, that King’s Hawaiian glaze can be a little thick. If it’s not drizzling nicely, pop it in the microwave for a few seconds to warm it up. Just be careful not to overheat it! You want it pourable, not boiling!
King’s Hawaiian Cheesecake Danish Variations
Okay, so you’ve nailed the basic recipe? Awesome! Now let’s get a little crazy and try some fun variations! These are seriously good, and they’re a great way to customize your danishes.
Add Fruit
Berries are AMAZING on these! I love adding fresh strawberries, blueberries, or raspberries. Peaches or pineapple would also be super yummy. Just chop them up and sprinkle them on top of the cheesecake filling before baking! It is really that simple.
Spice It Up
Want to add a little warmth? A pinch of cinnamon or nutmeg to the cheesecake filling is SO good. It gives them a cozy, comforting flavor. I sometimes add a tiny bit of ginger for a little kick!
Chocolate Chips
Okay, who doesn’t love chocolate? Toss some chocolate chips into the cheesecake filling for a super decadent treat. Milk chocolate, dark chocolate, white chocolate… they all work! You can even use mini chocolate chips for extra cuteness!
Serving Suggestions for Your King’s Hawaiian Cheesecake Danish
Okay, so you’ve got these amazing danishes… what do you serve with them? Here are a few of my go-to’s. Trust me, you can’t go wrong!
Coffee or Tea
Seriously, is there anything better than a warm danish with a hot cup of coffee or tea? It’s a classic combo for a reason! My personal fav? A vanilla latte!
Fresh Fruit Salad
Want something a little lighter? A fresh fruit salad is the perfect complement to the sweetness of the danishes. It’s also a great way to trick yourself into thinking you’re being healthy, haha!
Whipped Cream
Feeling extra indulgent? A dollop of whipped cream takes these danishes to the NEXT LEVEL. Seriously, it’s like a party in your mouth! I like to add a little sprinkle of cinnamon on top, too!
Storing and Reheating Your King’s Hawaiian Cheesecake Danish
Okay, so you’ve made these amazing danishes, but you somehow managed to *not* eat them all in one sitting? Wow, I’m impressed! Here’s how to keep ’em fresh for later.
Storage
Just pop any leftovers in an airtight container and stick them in the fridge. They’ll keep for about 3-4 days… if they last that long! I bet they won’t!
Reheating
Want to warm them up again? You can either pop them in the oven at a low temp (like 300°F) for a few minutes, or nuke them in the microwave for about 15-20 seconds. Careful, they can get a little soggy in the microwave, so the oven is usually my go-to.
Frequently Asked Questions About This King’s Hawaiian Cheesecake Danish
Got questions? I’ve got answers! Here are some of the most common things people ask me about this King’s Hawaiian Cheesecake Danish recipe.
Can I use a different type of bread?
Okay, so, technically, *could* you use a different bread? Sure. But honestly, the King’s Hawaiian sweet rolls are what make this recipe so special! That little bit of sweetness is just perfect. If you absolutely have to substitute, maybe try brioche rolls, but they won’t be quite the same. Just sayin’!
Can I make this ahead of time?
Yep! You can totally assemble these King’s Hawaiian cheesecake danishes ahead of time. Just spread the cheesecake filling on the rolls, then cover them tightly and store them in the fridge. Then, when you’re ready to bake, just pop them in the oven! I wouldn’t do this more than a day in advance, though, or the rolls might get a little soggy.
Can I freeze these?
Hmm, freezing isn’t my favorite idea for these guys. The cheesecake filling can get a little weird after thawing, and the rolls can get kind of mushy. If you absolutely HAVE to freeze them, wrap them really well, but just be prepared for a slight change in texture. Honestly, they’re so easy to make, it’s better to just whip up a fresh batch!
Nutritional Information
Okay, so you’re probably wondering about the nutritional info, right? Well, here’s the deal: I’m not a nutritionist, and honestly, the nutrition can vary A LOT depending on the exact ingredients you use (different brands, different sizes of eggs, etc.). So, I can’t give you precise numbers, but just keep in mind that this King’s Hawaiian Cheesecake Danish is a treat! Enjoy it in moderation, okay?
Rate This King’s Hawaiian Cheesecake Danish Recipe
Loved it? Hated it? Let me know! Leave a rating and a comment below. I wanna hear what you think! And, hey, if you tweaked it, tell me how!
Print
Irresistible King’s Hawaiian Cheesecake Danish in 20 Minutes
- Prep Time: 15 minutes
- Cook Time: 20 minutes
- Total Time: 35 minutes
- Yield: 6 servings 1x
- Category: Dessert
- Method: Baking
- Cuisine: American
- Diet: Vegetarian
Description
This is a sweet and tangy treat. It combines the flavors of King’s Hawaiian bread and cheesecake.
Ingredients
- 1 package (12 ounces) King’s Hawaiian sweet rolls
- 8 ounces cream cheese, softened
- 1/2 cup granulated sugar
- 1 large egg
- 1 teaspoon vanilla extract
- 1/4 cup King’s Hawaiian glaze
Instructions
- Preheat oven to 350°F (175°C).
- Slice each King’s Hawaiian roll in half horizontally.
- In a bowl, beat together cream cheese and sugar until smooth.
- Beat in egg and vanilla extract.
- Spread cream cheese mixture evenly over the cut sides of the rolls.
- Bake for 15-20 minutes, or until golden brown.
- Drizzle with King’s Hawaiian glaze before serving.
Notes
- You can add fruit toppings.
- Serve warm or cold.
- Store leftovers in the refrigerator.
Nutrition
- Serving Size: 1 danish
- Calories: 350
- Sugar: 25g
- Sodium: 200mg
- Fat: 20g
- Saturated Fat: 12g
- Unsaturated Fat: 6g
- Trans Fat: 1g
- Carbohydrates: 40g
- Fiber: 1g
- Protein: 5g
- Cholesterol: 75mg






